
Thank you for putting a link to this tutorial, whenever you display your realization of that tag on a website, on a group or in a mail !
**************************
You'll find some versions of that tag in my gallery Here
***********************
To make that tag, you'll need the filter :
- Filters Unlimited 2.0
- Photo Aging Kit
- Artistic / Underpainting
- Mura's Meister / Copies
- Graphic plus / Cross shadow.
and the material zip down below :

**************
*It is forbidden to suppress watermarks on the material provided , to alter, mist or rename the tubes in order to respect the work of the tubers
- The tube of the children are by JHanna.
- The tube of the clock is by Sabine.
- The tube of the fireworks is by Redgem.
- The light post comes from a tube called "WinterPost&Bench_KK".
- The other elements that I haven't created, have been found on the net.
******************
Preparation
To be on the safe side, duplicate your tubes and image in your Psp :
-
Window / Duplicate
- Close the originals and work with the copies !
- Double click on the Alien skin preset, it will automatically install itself.
- Open the font outside your Psp if you have Windows Xp or place it in the Font folder of Windows if you have Win7.
*****************
Click here to print the tutorial
**********************
You can use my arrow to follow your work
Click on it and drag it all along the tutorial !

***************
Tutorial made with PSP XVIII
******************
1 - Open a new transparent image of 850 by 700 pixels.
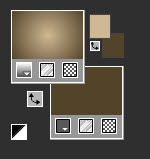
2 - Set your Material palette with two colours out of your main tube.
- My choice : Foreground : Light colour cfb893.
- Background : Dark colour 534329.
- Set your foreground with a sunburst gradient as below :
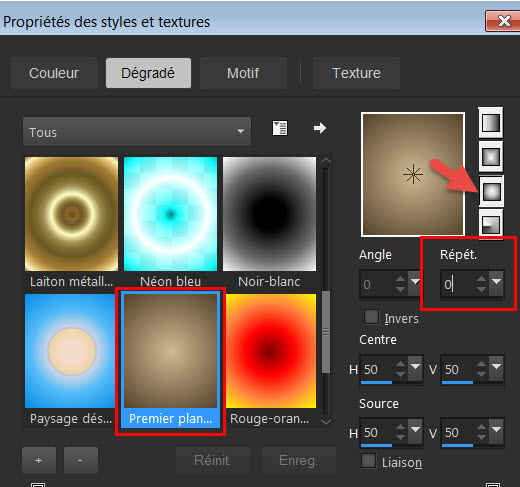
3 - Flood fill your transparent image with your foreground gradient.
4- Effects / Plugins / IC.NET Software / Filters Unlimited 2.0 / Paper texture /
Cotton Paper fine / 128, 96.
5- Effects / Plugins / IC.NET Software / Filters Unlimited 2.0 / Photo Aging Kit / Dirt / 128, 128.
6- Effects / Plugins / Graphic plus / Cross shadow / 50 everywhere.
7- Layers / Duplicate.
- Image / Mirror / Mirror vertical.
8- Image / Resize at 85% (Resize all the layers NOT checked).
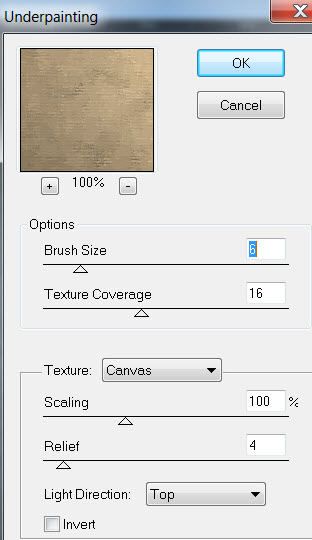
9- Effects / Plugins / Artistic / Underpainting as below :
10- Activate the layer at the bottom of the pile (raster 1).
11- Open the tube "Dentelle" (or another similar tube of your choice) in your Psp and copy it.
12- Paste it as a new layer on to your tag.
(The tube is then hidden behind your layer "Copie of raster 1" !)
13-Effects / Plugins / Mura's Meister / Copies as below :

- I have lowered the opacity of that layer to 70.
14- Activate, once more, the layer at the bottom of the pile (raster 1) and COPY IT.
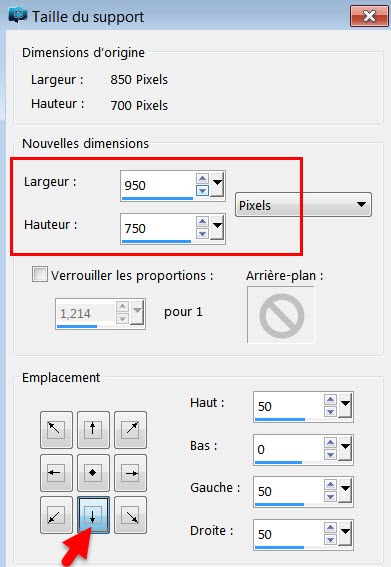
15- Image / Canvas size as below :
16- Selections / Select all.
17- Paste INTO THE SELECTION, on your layer raster 1.
- Select none.
18- Open the tube "Neige" in your Psp and copy it.
19- Paste it as a new layer on to your tag.
- I have lowered the opacity of that snow layer at 60 and set the mode on to Hard light.
- Rename that layer"Neige".
20- Activate the layer of the lace.
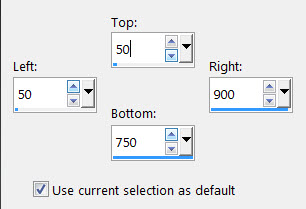
- Selections / Custom selection as below :

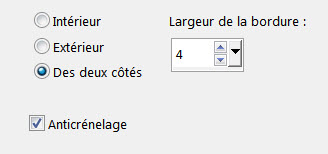
21- Selections / Modify / Select selection borders as below :
22- ADD A NEW RASTER LAYER.
23- Flood fill that border with your light foreground colour (left click).
- Selections / Select none.
- I have lowered the opacity of that layer on to 80.
24- Activate the layer "Copy of raster1".
- Selections / select all.
- Selections / Float.
- Selections / Defloat.
25- Activate layer "Neige".
- Selections / Promote selection to layer.
26- Layers / Arrange / Bring to top.
- Selections / Select selection borders as on point 21 but with width at 6.
27- ADD A NEW RASTER LAYER.
- Flood fill that selection, on your new layer, with a dark colour (1d170f for me).
- Select none.
28- Effects / Distortion Effects / Wave / 1 everywhere and transparent checked.
29- Open the tube "Coin"in your Psp and copy it.
- Paste it as a new layer on to your tag.
- Place it in the top left hand side corner of your frame like me.
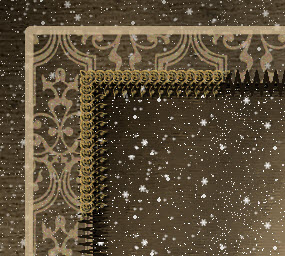
- Colorize if necessary.
30- Effects / 3d effects / Drop shadow / 2, 2, 80, 1,black.
31- Layers / duplicate.
- Image / Mirror / mirror horizontal.
32- Open the tube "Sol neigeux"in your Psp and copy it.
- Paste it as a new layer on to your tag.
- Place it against the bottom side of your tag as below :
- Effects / Image effects / Offset :
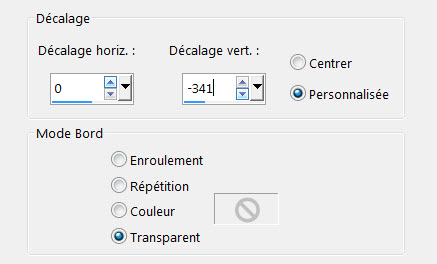
33- I have chosen to give my snow another hue as shown below :
- Adjust / Hue and saturation / Hue map as below :
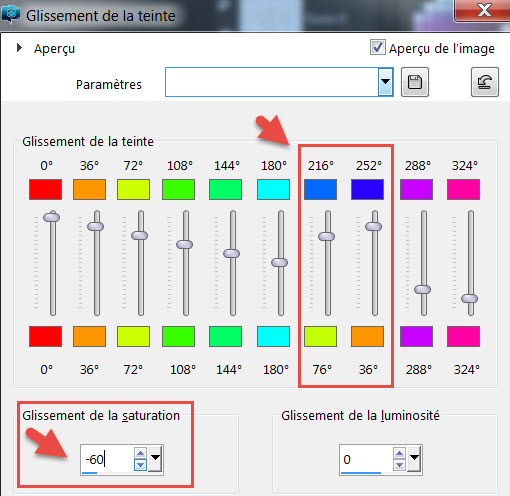
- Rename the layer "Sol neigeux" (to be able to find it easily later on).
*******************
You are now ready to use your own tubes it that is your wish... unless you prefer to make the tag just like me !
- Here are my choices :
34- Open the tube "rdgm~fireworks-001"in your Psp and copy it.
35- Paste it as a new layer on to your tag.
- I have set the mode of that layer on to Overlay.
36- Open the tube "Graph-Sabine Design-Tubes 477"in your Psp and copy it.
37- Paste it as a new layer on to your tag.
38- Place that tube as below :
- Effects / Image effects / Offset :
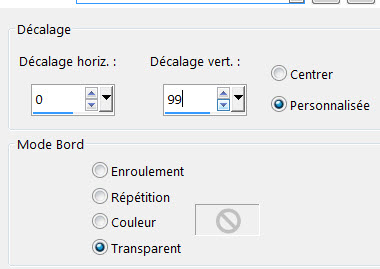
- I have lowered the opacity of that layer on to 30.
39- Open the tube "Lampadaire"in your Psp and copy it.
40- Paste it as a new layer on to your tag and place it like me.
- Drop shadow of your choice.
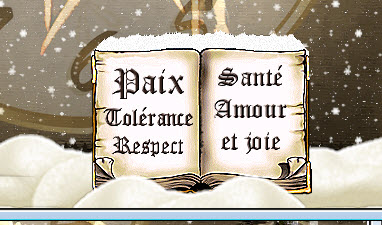
41- Open the tube "Livre"in your Psp and copy it.
42- Paste it as a new layer on to your tag and place it like me.
43- Open the tube "texte"in your Psp and copy it.
- You may prefer to write your own text with the font of your choice !
44- Paste it as a new layer on to your tag and place it on the pages of your book.
- Drop shadow of your choice.
45- Activate the layer "Sol neigeux" and duplicate it.
46- Place that layer on top of the pile (above your book and its text).
47- With your move tool, place the snow ground as shown below :
48- Open the tube "JHanna_553 tube"in your Psp and copy it.
49- Paste it as a new layer on to your tag.
- I have resized that tube at 75% (Resize all the layers NOT checked).
- Place it like me, in the bottom left hand side corner of your tag (her feet on the snow).
50- Effects / Plugins / Alien skin eye candy5 / Impact / Perspective shadow / Preset Fairymist_voeux2017.
51- Open the tube "Fairymist_voeux2017"in your Psp and copy it.
52- Paste it as a new layer on to your tag.
- Place it like me or to your liking.
- That text may be colorized.
- You may prefer to write down your own text with my fonts or fonts of your choice.
53- Apply your signature
- Make sure everything is at the right place.
54- Image / add some symmetrical borders of 2 pixels with your light foreground colour from the start :
cfb893 for me.
55 - Save your work as a jpeg file and resize your tag if necessary.
***************
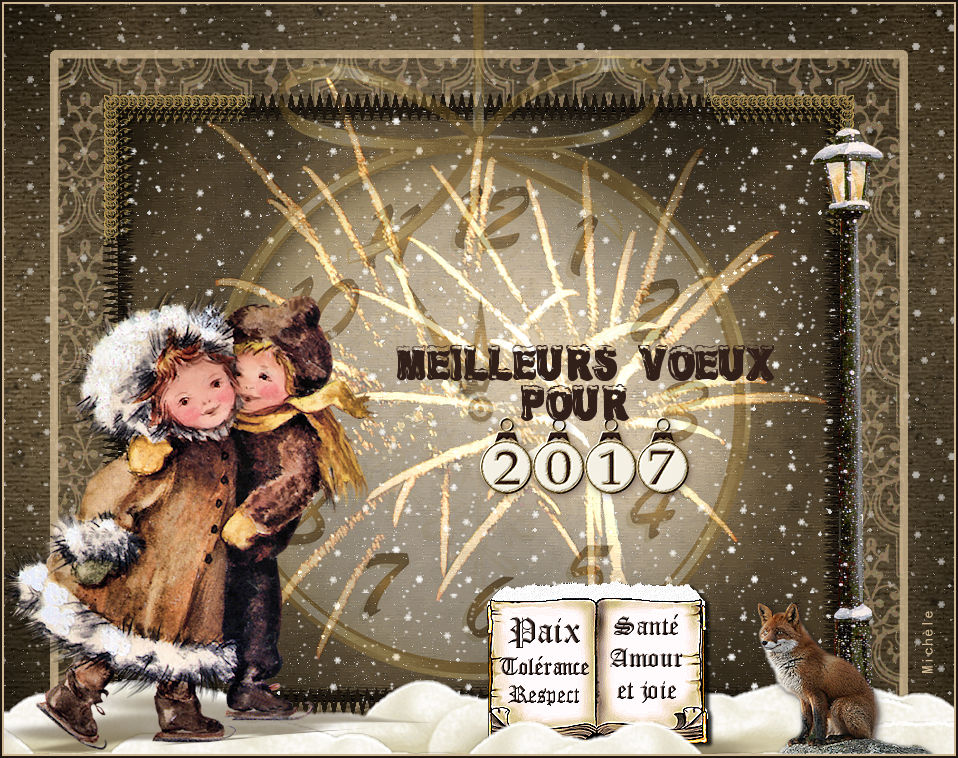
That's it !! You've done it !!
If you 've enjoyed doing my tutorial, it would be nice to write a few words in my guest book !
If you 've had the slightest problem, please, send me a mail so I can see to the problem
Tutorial translated on the 29th of december 2016
***********************
You'll find some versions of that tag in my gallery Here