Autres versions de ce tag / Other versions of that tag
************************
To realize that tag, you'll need the plugins :
- Filters Unlimited 2.0
- VDL Adrénaline
and the material zip down below :

**************
*It is forbidden to suppress watermarks on the material provided , to alter, mist or rename the tubes in order to respect the work of the tubers
- The tube of the animals is by Guismo
You'll be able to find her tubes on Dakara' s site here
and you can join in her sharing group here
- The image " insignificance_by_ocd1c_stock.jpg"' is by Ocd1_stock
- The image " MNK-textura020.jpg " is by MNK
The other elements have been found on the net
******************
Preparation
Duplicate your tubes and images. Close the originals and minimize the copies for now.
- Place your brushes in the brush folder of your Psp files
*****************
Click here to print the tutorial
*******************
You can use my arrow to follow your work

***************
1- Open a transparent image of 800 by 650 pixels
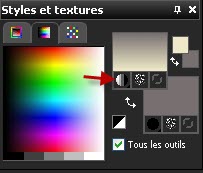
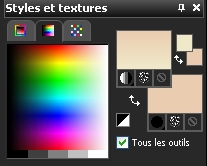
2- Set your colour palette with two colours matching your main tube
My choice : Foreground : colour efe9c9
Background : colour 787070
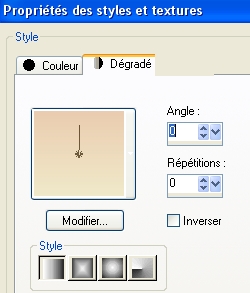
Set your foreground with a linear gradient as below :
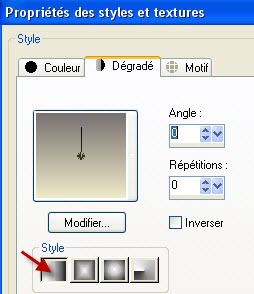
3- Flood fill your transparent layer with your gradient
4- Add a new raster layer and select all
5- Activate the image " insignificance_by_ocd1c_stock.jpg" or an image of your choice, copy it and paste it into the selection
Selections / Select none
I have set the mode of that layer on to Overlay and lowered its opacity at 75
It is up to you to see which mode and which opacity suit you better.
6- Activate the image " MNK-textura020.jpg" or an image of your choice.
Layers / Promote Background layer
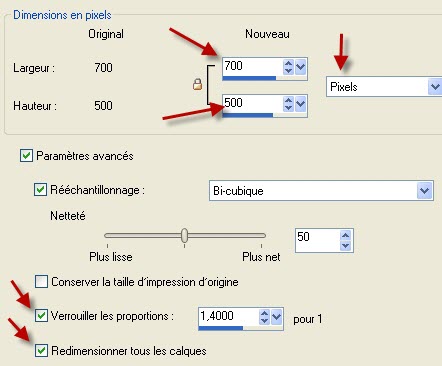
7- Image / resize that image at 700 by 500 pixels as below :
8- Effects / filters Unlimited 2.0 / Edges, square / edge square 13
9- Copy that modified image and paste it as a new layer on to your tag
I have set the mode of that layer on to Luminance legacy
10- Image / free rotation as below :

11- Effects / 3d effects / drop shadow / 1, 1, 50, 1, black
12- Activate the tube "chris_11.pspimage", copy it and paste it as a new layer
Leave it where it is.
13- Image / resize at 75% , twice ( Don't check Resize all the layers !!! ) Don't move that tube
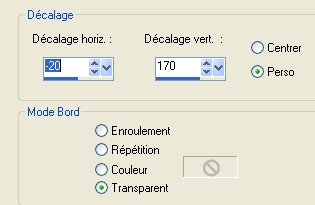
14- Effects / image effects / Offset as below :
15- With your free hand selection tool, set as below, select the first frame as shown below

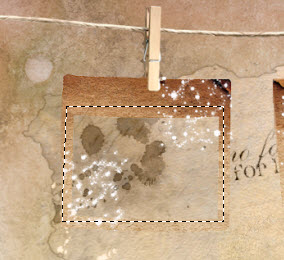
16- Add a new raster layer
17- If you don't use my images, choose three images which have a common theme ( nature, holiday decoration, people, sceneries, pictures etc ...) and common colours
Activate your first image ( "6k5.jpg" pour moi), copy it and paste it into the selection onto your transparent layer
If your image is distorted that way, you can copy it as a new layer, invert your selection and suppress what is outside the frame.
Selections / Select none
18- Layers / Arrange / move down
Your image is now underneath the frame!
19- Repeat steps 15, 16, 17 and 18 for the other frames.
20- When that is done, activate your top layer, the one with the frames
Effects /3d effects / drop shadow / 1, 1, 50, 1, black
21- Activate the tube "texte_voeux2010_fairymist.pspimage" or a tube of your choice, copy it and paste it as a new layer on to your tag
My text has been written with the font Espectro Swash (size 72)
Place as on my tag or to your liking
You may colorize the text or set the mode of that layer to Luminance legacy
22- Add a new raster layer and apply your signature
23- Make sure everything is at the right place
Image / add some symmetrical borders of 1 pixel with a colour of your choice ( 8c462b for me )
24- Layers /Promote Background layer
Image / resize at 90 °% (Resize all the layers NOT checked )
25- Add a new raster layer
Layers / arrange / move down
26- Set your layer palette with two colours matching the colours of your tag
I have kept my previous foreground colour and used another colour for my background : eaccb0 ( Use the same gradient as on step 2)
27- Flood fill your transparent layer with your gradient
You can apply an effect on that background if you wish ( I have left is as it is )
28- Activate your top layer
Activate the tube "calguisacut13128.pspimage"or a tube of your choice, copy it and paste it as a new layer on to your tag
Place as on my tag or to your liking
29- Effects / 3d effects / drop shadow of your choice / 0, 0, 50, 20, black for me
30- Add a new raster layer
With your brush tool, set as below, apply the brush "fleurs 100 1.PspBrush" or a brush of your choice using a colour of your choice, in the bottom left hand side corner of the tag or to your liking ! I have used the colour 9b9068

31- Image / add some symmetrical borders of 1 pixel with a colour of your choice ( 8c462b for me )
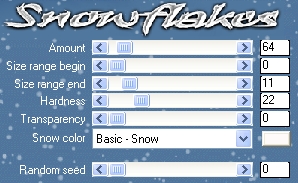
32- Effects / plugins / VDL Adrénaline / Snowflakes as below
Apply that effect once or twice ( I did it twice )
33- Save your work as a jpeg file and resize it if necessary
***************
That's it !! You've done it !!
If you 've enjoyed doing my tutorial, it would be nice to write a few words in my guest book !
If you 've had the slightest problem, please, send me a mail so I can see to the problem !
Tutorial translated on the 30th of December 2010
*************
Autres versions de ce tag / Other versions of that tag