
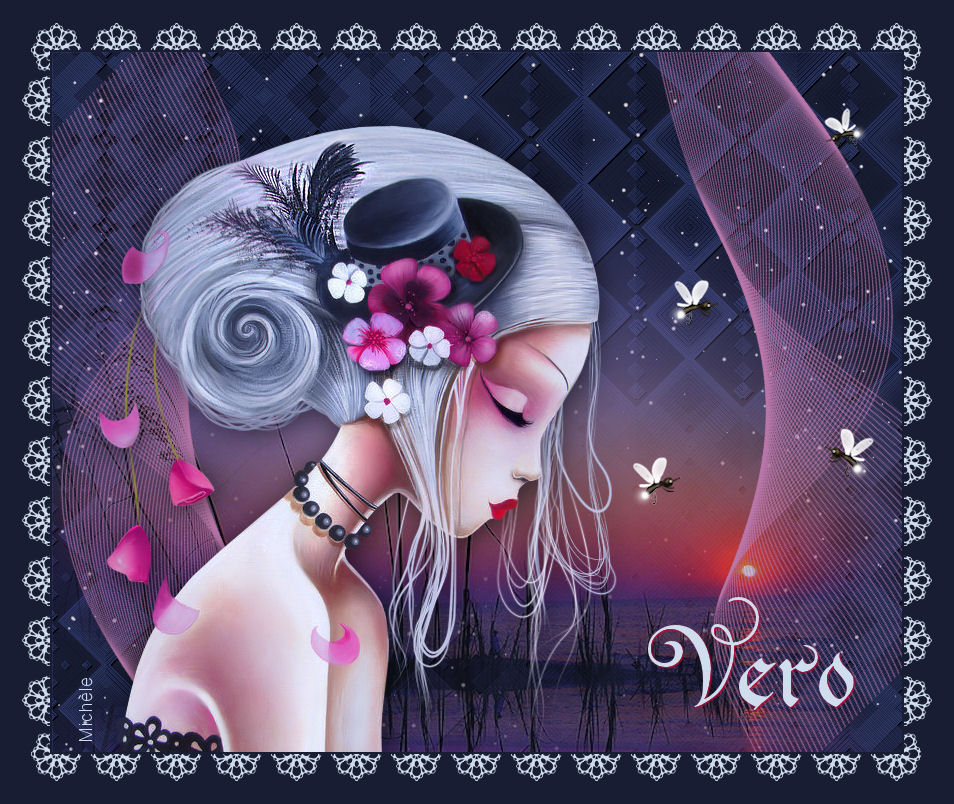
Other versions of that tag
************************
To make that tag, you'll need the plugins :
- VM Extravaganza
- Simple
- VDL ( VanderLee ) Adrenaline / Snowflakes
and the material zip down below :

**************
*It is forbidden to suppress watermarks on the material provided , to alter, mist or rename the tubes in order to respect the work of the tubers
- The tube of the woman is by Vero
Thank you Vero for that nice present !
You will find Vero's beautiful site here ici
- The tube of the scenery is by Guismo
You will find her tubes on Dakara's site here or on her sharing group here
- The mask I have used has been made by Lotty
You will find Lotty's site here.
The other elements that I haven't created, have been found on the net.
******************
Preparation
- To be on the safe side, duplicate your tube and image in your Psp :
-
Window / Duplicate
- Close the originals and work with the copies !
- Place the mask "Lotty_Mask07.PspMask"in the Mask folder of your Psp files.
- Place the selection files in the selection folder of your Psp files.
*****************
Click here to print the tutorial
**********************
You can use my arrow to follow your work
Click on it and drag it all along the tutorial !

***************
Tutorial realized with PSP XIII

Step 1 : The background of the tag
- If you have decided to use my colours, here is what you can do :
- Open the colour palette "Fairymist_Palette_Vero", in your Psp and using your dropper tool, pick out my colours to set your Material palette ( left click for your foreground / right click for your background )

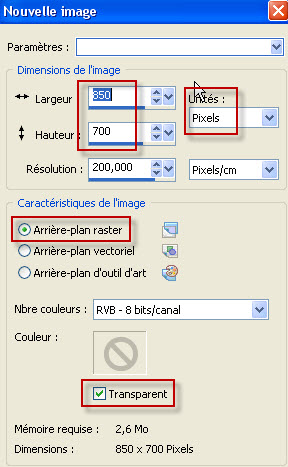
1 - Open a new transparent image of 850 by 700 pixels.
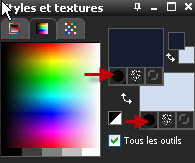
2 - Set your Material palette with two colours out of your main tube, as below :
My choice : Foreground : Colour 181d33
Background : colour d0ddef
3 - Flood fill your transparent image with your dark foreground colour. ( Left click ).
4- Add a new raster layer.
Flood fill that new layer with your light background colour ( Right click ).
5- Layers / Load a mask / From disk / Choose "Lotty_Mask07.PspMask" and set as below :

- Adjust / Sharpness / Sharpen more.
- Layers / Merge group.
6- Effects / Plugins / VM Extravaganza / Transmission default ( 6, 0, 40 )
7- Effects / edge effects / Enhance.
8- Effects / Plugins / Simple / Diamonds
9- Effects / Plugins / Simple / Zoom out and Flip . Apply that effect, 3 times in a row.
10- In your layers palette, set the mode of that layer on to Overlay.
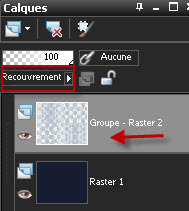
- Here is what I get in normal mode and afterwards in Overlay mode.

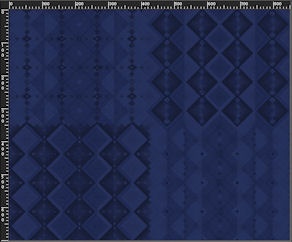
The Overlay mode allows me to see the pattern but not as much as in the normal mode ! The result must be dark ( It will show up the snow, we're going to put on later on, much better!)
If you are not happy with the result you get with your colours, try other modes que vous avez choisies, essayez avec d'autres modes .
11- Effects / 3d effects / Drop shadow / 1, 1, 100, 1, black.
12-Add a new raster layer.
Effects / Plugins / VDL Adrenaline / Snowflakes set as below :
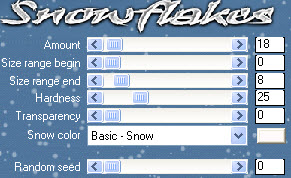
- I have set the mode of that layer on to Hard light ( See which mode is best for you !)

Step 2 : The scenery
1- Activate the tube "calguismist16410.pspimage" or a tube of your choice , in your Psp and copy it.
2- Paste it as a new layer on to your tag.
I have resized that layer at 120% ( Resize all the layers NOT checked ) so that the tube becomes as large as your tag.
I have placed my tube that way :
Effects / image effects / Offset :
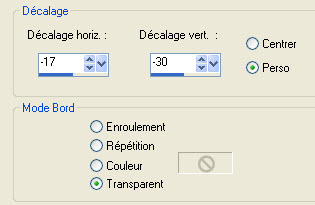
Optionnal : - I have duplicated my layer.
- Image / Flip.
- I have dragged that inverted copy underneath the previous scenery to create a reflect of that scenery. Place the tube at the right place

Step 3 : The veil
1-Add a new raster layer.
2- Selections / Load a selection / from disk / choose "fairymist_vero1.PspSelection" and set as below :

3- Activate your flood fill tool and set it as below :

- Choose the colour you are going to use to paint the veil .
I have chosen a third colour out of my main tube : Pink b876a9
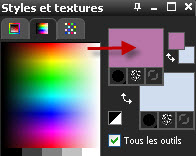
Click two or three times on each of the placed shown below, with your flood fill tool .
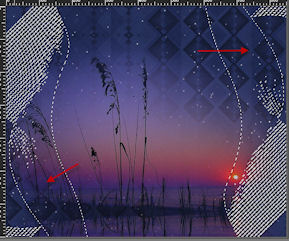
- Selections / Deselect all.
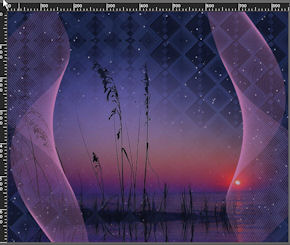
If it looks too pale, you may duplicate that layer.

Step 4 : The main tube and the tube of the insects
1- Activate the tube "Exkizz_Chapeau fleuri_20_08_11.pspimage"or a tube of your choice , in your Psp and copy it.
2- Paste it as a new layer on to your tag.
I did : Image / Mirror on that tube.
3- Place the tube as on my tag or to your liking.
4- Effets / effets 3d / Ombre portée de votre choix / 4, 4, 60, 40, noir pour moi.
5- Activate the tube "Insectes.pspimage"or a tube of your choice , in your Psp and copy it.
6- Paste it as a new layer on to your tag.
I have resized that layer at 30%
Place the tube as on my tag or to your liking.

Step 5 : The text (Optionnal )
1- Set your Material palette as below : Close your foreground and leave your light colour from Step one in your background ( Unless you prefer to use another colour to write down your text !)
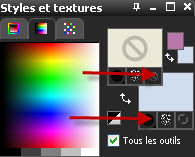
2- Activate your text tool, set as below :


Write down your word ( Vero for me )
Confirm your choice and convert your vectorial layer on to a normal one.
Place the text as on my tag or to your liking.
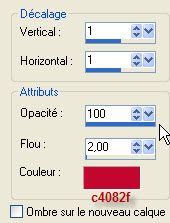
3- Effects / 3d effects / drop shadow as below with a contrasting colour of your choice.

Step 5 : The borders
1- Apply your signature
2- Make sure everything is at the right place !
- Image / add some symmetric borders of 2 pixels with your dark colour from step one or a colour of your choice ( Before your choose this colour read down below on step 6 !!) :

3- Layers / Promote background layer.
4-Add a new raster layer.
Layers / Arrange / Move down .
5- Image / Canvas size as below :
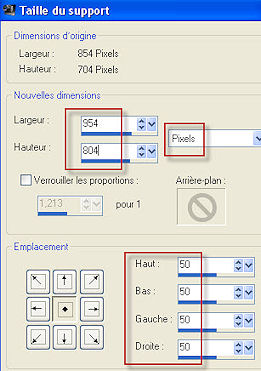
6- Flood fill your new layer with the same colour as the one you have used for your border.
We're going to put a lace round your tag. If you want to have a dark lace, your background must be light but if you prefer to have a light lace, your background will have to be dark !! It is up to you !
7- Make sure your bottom layer is activated
Add a new raster layer.
8- Selections / Load a selection / from disk / choose"fairymist_vero2.PspSelection" and set as for the first selection.
8- With your flood fill tool, set as below , click on that selection, TWO or THREE TIMES with your light background colour ( Right click ) or with the colour of your choice !

Deselect all.
9- Layers / Merge all.
10 - Save your work as a jpeg file and resize it if necessary .
***************
That's it !! You've done it !!
If you 've enjoyed doing my tutorial, it would be nice to write a few words in my guest book !
If you 've had the slightest problem, please, send me a mail so I can see to the problem
Tutorial translated on the 8th of October 2011
*************
Autres versions de ce tag / Other versions of that tag
