Thank you for putting a link to this tutorial, whenever you display your realization of that tag on a website, on a group or in a mail !
**************************
You'll find some versions of that tag in my gallery HERE
************************
To realize that tag, you'll need the plugins :
- PhotoSwizzle
- Filters Unlimited 2.0 / Paper textures et Photo Aging kit.
and the material zip down below :

**************
*It is forbidden to suppress watermarks on the material provided , to alter, mist or rename the tubes in order to respect the work of the tubers
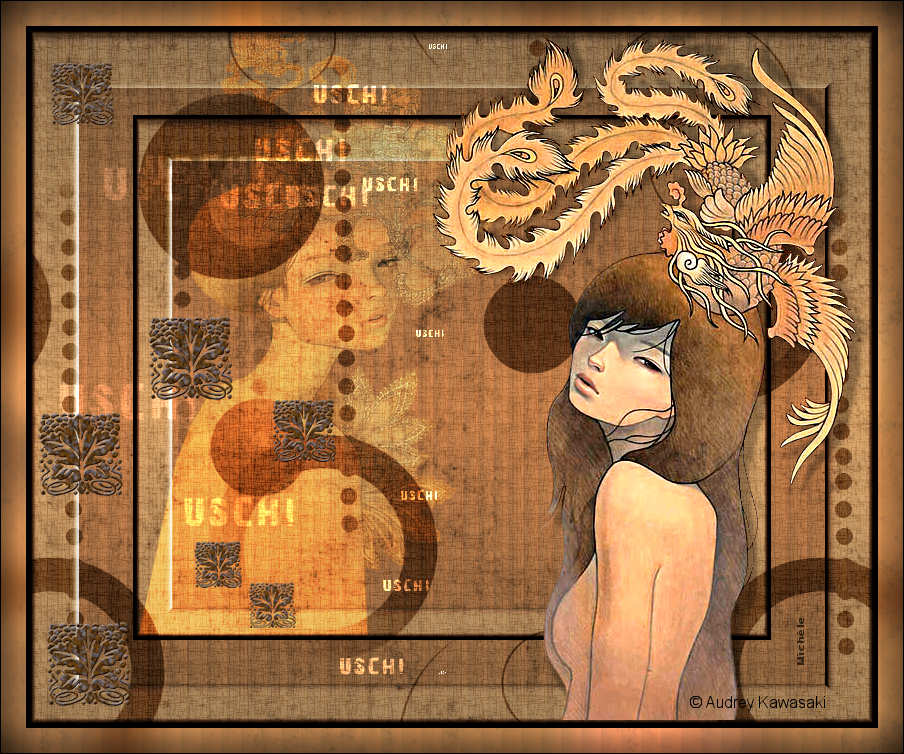
- The main tube is by Kikirou.
Thank you my friend for that beautiful tube.
- The other tube of a lady is by Jenny.
- You can join her tube sharing group by clicking here.
- The element of decoration that I have used is by Katussia
- The other elements that I haven't created, have been found on the net.
******************
Preparation
- To be on the safe side, duplicate your tubes and mask in your Psp :
-
Window / Duplicate
- Close the originals and work with the copies !
*****************
Click here to print the tutorial
**********************
You can use my arrow to follow your work
Click on it and drag it all along the tutorial !

***************
Tutorial realized with PSP XIII
Step 1
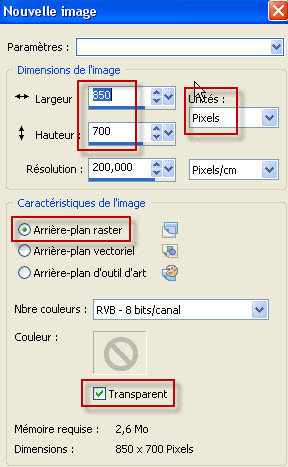
1 - Open a new transparent image of 850 by 700 pixels.
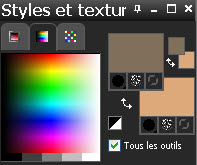
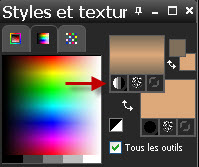
2 -2 - Set your Material palette with two colours out of your main tube.
- My choice : Foreground : colour 806f5b
- Background : colour dda97a
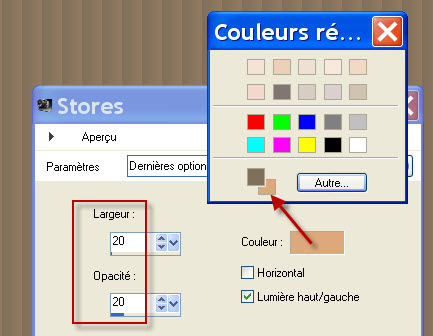
3- Flood fill your transparent layer with your dark foreground colour.
4- Effects / Texture effects / Blinds as below :
- Use your background colour (Right click on the colour rectangle).
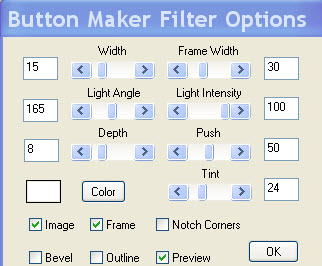
5- Effects / Plugins / Photoswizzle / Button maker / settings as below :
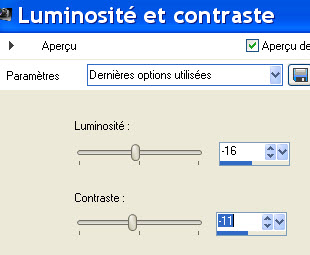
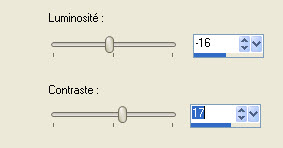
6- Optionnal : Adjust / Hue and contrast as below :
7- Layers / Duplicate
8- Image / Resize at 75 % (Resize all the layers NOT checked)
Step 2
We're now going to create a pattern with Cameron's mask.
Her mask being square, if you apply that mask on your rectangular tag, the circles will be distorted. So, here is what I did :
1- Take note of the dimensions of that mask, in that way :
- Image / Informations about the image :
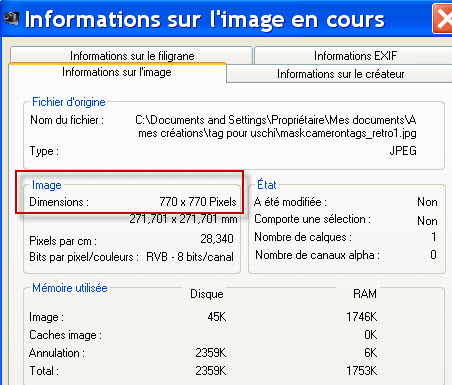
2- Open a new image of 770 by 770 pixels.
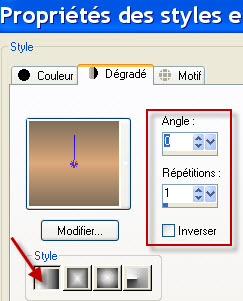
3- Set your Material palette, putting a linear gradient in your foreground as shown below :
- My colours haven't changed but they have just been reversed.
4 - Flood fill that new image with your foreground gradient.
5- ADD A NEW RASTER LAYER.
- Take the gradient off your foreground and flood fill that new layer with your dark foreground colour.
6- Open Cameron's mask in your Psp.
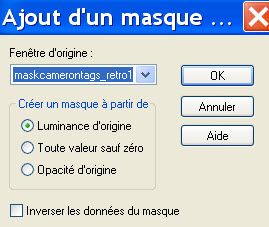
7- Layers / New mask layer / from image / Choose "maskcamerontags_retro1.jpg" and set as below :
- Layers / Merge group.
- I have set the mode of that merged layer on to Multiply. It is up to you to see which mode suits you.

8- Layers / Merge all.
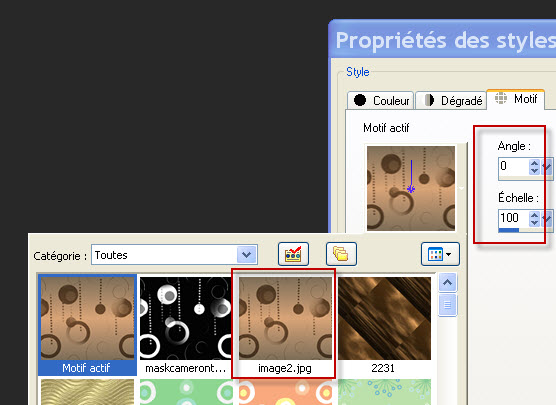
9- Set your Material palette, as below : Click on the pattern tag. You will see there the image you have just done with the mask and you will use that image as a pattern.
10- Go back to the original tag you started on step 1.
- ADD A NEW RASTER LAYER.
11- Flood fill that new layer with your foreground pattern.
- I have set the mode of that layer on to Overlay. It is up to you to see which mode suits you.
12- Effects / Plugins / ICNet software / Filters Unlimited 2.0 / Photo Aging Kit / Dirt and Dust / default : 128, 128.
13- Effects / Plugins / ICNet software / Filters Unlimited 2.0 / Paper textures / Rag paper / default : 128, 96.
Step 3
1- Open the tube "Jen_Vrouw 557_16-12-2011.psp" or a tube of your choice and copy it.
2- Paste it as a new layer on to your tag.
- I did : Image / mirror.
3- Set the mode of that layer on to Overlay.
- Place that tube as below :
4- Open my tube "Deco1_Uschi_Fairymist.pspimage" or a tube réalized with a word of your choice.
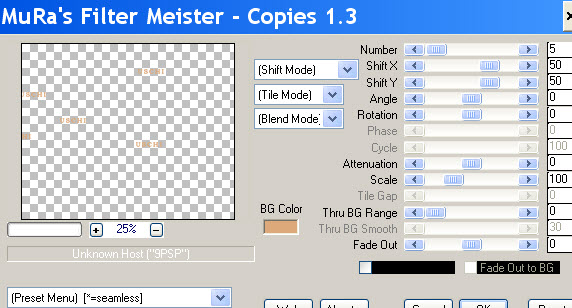
- I have used the Mura Meister / Copies to duplicate the word I have chosen but that effect is variable !
5- Copy that tube and paste it as a new layer on to your tag.
6- Here is what I did to place my tube :
- Effects / image effects / Offset as below :
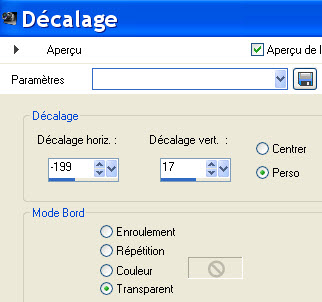
7- I have set the mode of that layer on to Dodge and lowered its opacit at 85. It is up to you to see which mode and which opacity suit you better !
8- Open my tube "Deco2_Uschi_Fairymist.pspimage" or a tube realized with a pattern of your choice.
- I have used the Mura Meister / Copies effect (as previously) to duplicate Katussia' s element of decoration that I have chosen.
9- Copy that tube and paste it as a new layer on to your tag.
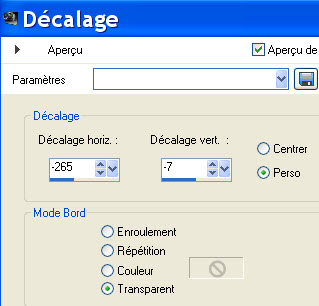
10- Here is what I did to place my tube :
- Effects / image effects / Offset as below :
11- Open the tube "KikiRou34.pspimage"or a tube of your choice and copy it.
12 - Paste it as a new layer on to your tag.
13- I did : Image / mirror on that tube.
14- I have slightly modified that tube so that it matches my tag nicely :
- Adjust / Hue and contrast as below :
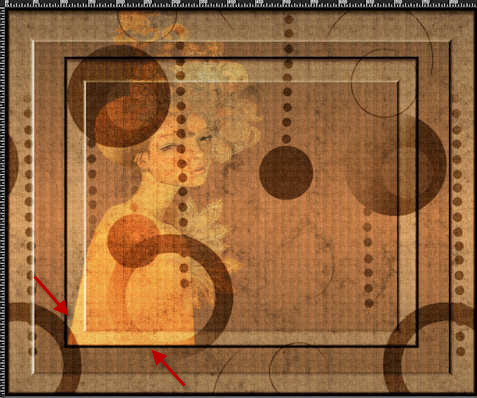
15- Place the tube as on my tag or to your liking.
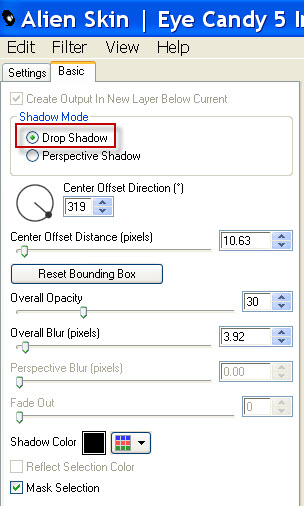
16- Effects / Plugins / Alien skin eye candy 5 / Impact / perspective shadow / basic tab set as below :
17- With your rectangular selection tool, set as below , select the part of your tube that covers the dark border as shown below :

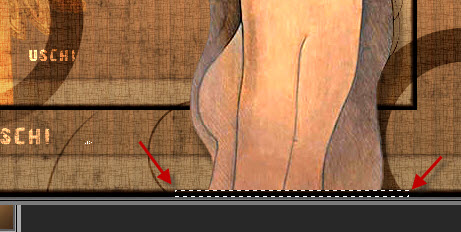
- Hit the delete key of your keyboard.
- Deselect all.
Step 4
1 - Make sure everything is in the right place.
Image / add some symmetrical borders of 1 pixel with the colour of your choice :
Black for me.
2- Copy your tag.
- Layers / Promote background layer (to a raster layer)
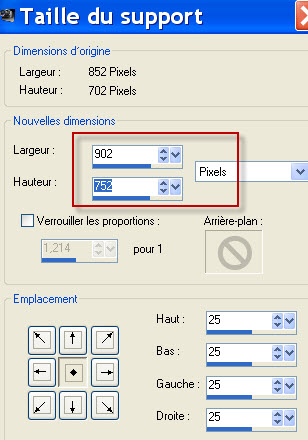
3- Image / Canvas size as below :
- Add 50 pixels to the length and width of your tag. you will get a 25 pixels transparent border all around your tag.
4- ADD A NEW RASTER LAYER.
- Layers / arrange / Move down.
5- Select all.
- Paste INTO SELECTION ( The copy you have just made of your tag).
- Deselect all.
6- Adjust / Blur / Gaussian blur / 20.
7- ADD A NEW RASTER LAYER.
- Flood fill that new layer with your dark foreground colour.
8- Effects / Texture effects / Blinds as on point 4 of step 1.
9-Effects / Plugins / ICNet software / Filters Unlimited 2.0 / Photo Aging Kit / Dirt and Dust / default : 128, 128.
10- Set the mode of that layer on to Dodge or any other mode of your choice.
- I have lowered the opacity of that layer at 70. See what is best for you.
11- Apply your signature
12 - Image / add some symmetrical borders of 1 pixel with the colour of your choice :
Black for me.
13 - Save your work as a jpeg file.
***************
That's it !! You've done it !!
If you 've enjoyed doing my tutorial, it would be nice to write a few words in my guest book !
If you 've had the slightest problem, please, send me a mail so I can see to the problem
Tutorial translated on the 31th of August 2012
*************
You'll find some versions of that tag in my gallery HERE