
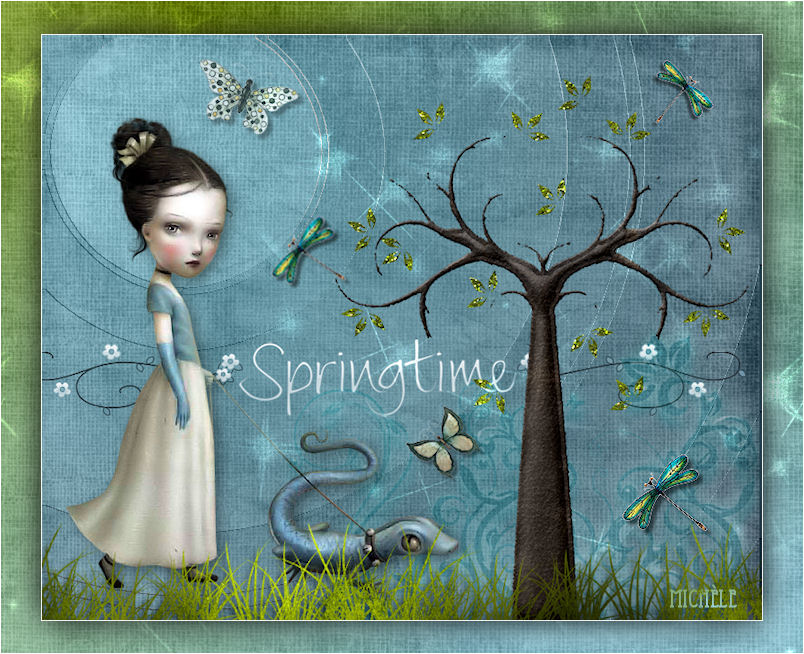
Thank you for putting a link to this tutorial, whenever you display your realization of that tag on a website, on a group or in a mail !
**************************
You'll find some versions of that tag in my gallery HERE
************************
To realize that tag, you'll need the plugin Graphic plus here
and the material zip down below :

**************
*It is forbidden to suppress watermarks on the material provided , to alter, mist or rename the tubes in order to respect the work of the tubers
- The tube of the girl is by JHanna
You can join in her sharing group here
- The tube of the grass is an element of a scrap kit by Jaelop Designs
- The tubes of the butterflies are by Kubivet
- The tube of the tree is an element of a scrap kit by MissVivi
The other elements have been found on the net
******************
Preparation
Duplicate your tubes and image. Close the originals and minimize the copies for now
*****************
Click here to print the tutorial
*******************
You can use my arrow to follow your work

***************
1- Open a new transparent image of 800 by 650 pixels
2- Set your colour palette with two colours matching your main tube
My choice : Foreground : light colour 9ed1de 
Background : dark colour 283946 
Set your foreground with a sunburst gradient as below :
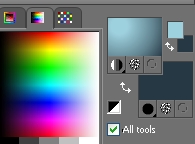
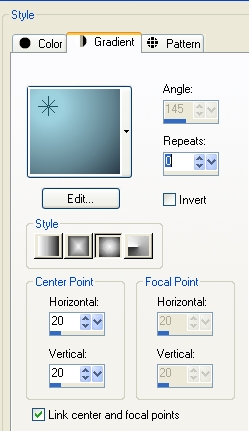
3- Flood fill your new layer with that gradient
4- Layers / duplicate
Effects /artistic effects / topography as below :
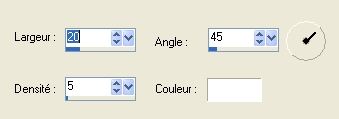
Set the mode of that layer to Luminance Legacy
5- Add a new raster layer and select all
6- Open the picture "texture1" or a texture of your choice, copy it and paste it into the selection
Select none
Set the mode of that layer to Luminance Legacy or a mode of your choice
I have lowered its opacity to 50
7- Open the tube " Doodles" or a fancy tube of your choice, copy it and paste it as a new layer
Place that tube in the bottom right hand side of your tag
I have set the mode of that layer to Soft light
( You may change the mode, or the opacity of your fancy tube or even colorize it )
8- Open the tube "glt 2", copy it and paste it as a new layer
I have set the mode of that layer to Dodge and lowered its opacity to 40 but you may do it to your liking !
9- Open the tube "CCAFE_wa_springtime1" or a text of your choice, copy it and paste it as a new layer
I have set the mode of that layer to Luminance Legacy
Place the text to your liking
10- Open the tube "MissVivi_edge-of-wood _element07" or a tube of your choice ( tree or other element ), copy it and paste it as a new layer
Place the tube at the right place
You may apply on that tube a very soft drop shadow ( I haven't put any !)
10- Open the tube "JHanna_191@c_Nicoletta_120809" or a tube of your choice, copy it and paste it as a new layer
Place the tube at the right place
Apply a drop shadow of your choice
My choice : 5, 5, 40, 20, black
11- Open the tube "20" ( grass ) or a tube of your choice, copy it and paste it as a new layer
Place the tube in the bottom of your tag, as shown on my tag
12- Effects / Graphic plus / cross shadow default
13- Open the tubes "papillons" or tubes of your choice, copy them and paste them as new layers on your tag; place them to your liking
14- Add a new raster layer and apply your signature
15- Make sure everything is in its place
Image / add some symmetrical borders of 1 pixel in white ( or colour of your choice)
16- Layers / Promote Background layer !!
17- Image / resize at 90% ( Resize all the layers NOT checked )
18- Effects / 3d effects / drop shadow / 0, 0, 100, 50, black
19- Add a new raster layer
Layers / arrange / move down
20- Set your colour palette as follows with the light colour used on step 2 and another light colour out of your tag;
My choice : 6F840C 
Set your foreground with a radial gradient as shown below :
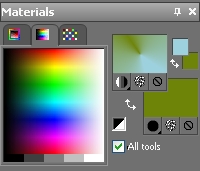
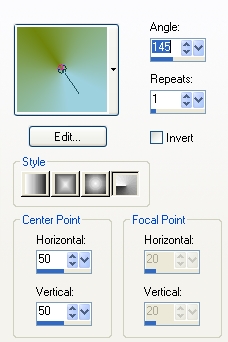
Flood fill your layer with that gradient
21- Add a new raster layer and select all
22- Open the picture "texture1", copy it and paste it into the selection
Select none
Set the mode of that layer to Luminance Legacy and lower its opacity to 50
23- Open the tube "glt2", copy it and paste it as a new layer
Set the mode of that layer to Dodge and lower its opacity to 50
24- Image / add some symmetrical borders of 1 pixel in white ( or colour of your choice)
25- Save your work as a jpeg file and resize the tag if necessary
***************
That's it !! You've done it !!
If you 've enjoyed doing my tutorial, it would be nice to write a few words in my guest book !
If you 've had the slightest problem, please, send me a mail so I can see to the problem !
Tutorial translated on the 20th of March 2010
*************
You'll find some versions of that tag in my gallery HERE
