
Thank you for putting a link to this tutorial, whenever you display your realization of that tag on a website, on a group or in a mail !
**************************
You'll find some versions of that tag in my gallery HERE
***********
To realize that tag, you'll need the plugin AP01( but not necessary)
and the material zip down below :

**************
*It is forbidden to suppress watermarks on the material provided , to alter, mist or rename the tubes in order to respect the work of the tubers
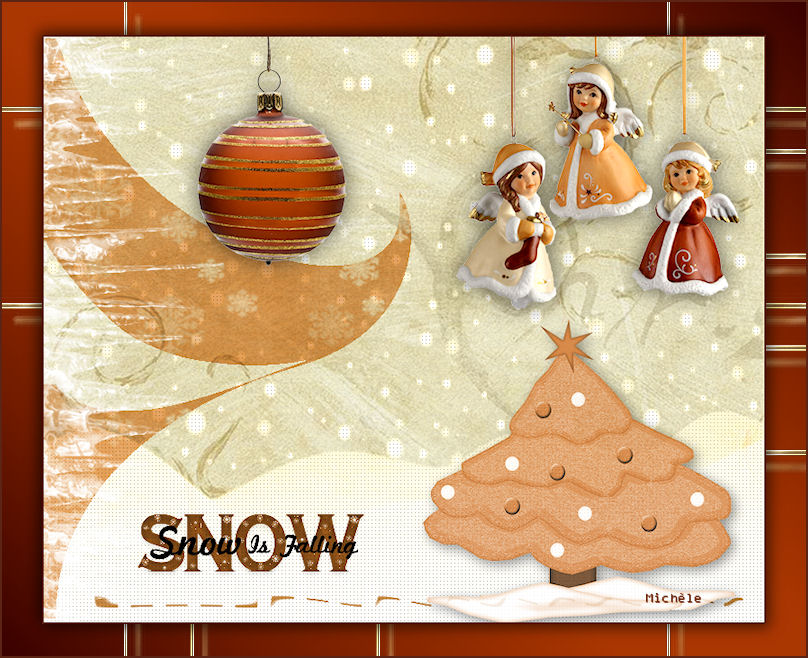
- The tube of the figures and the paper are elements of a freebie scrap kit by Kubivet
- The tubes of the fir tree and of the text Snow are elements of a scrap kit by BluedreamDesign
- The tube of the Xmas ball is by Katussia
You may join in her sharing group here
The christmas mask is by Brujita
The other elements have been found on the net
******************
Preparation
Duplicate your tubes and images. Close the originals and minimize the copies for now.
- Put the file preset shapes "ib AltemusBordersFour" in your preset shapes folder
- Put your masks in your mask folder
- Put your gold pattern in the pattern folder of your Psp files.
*****************
Click here to print the tutorial
*******************
You can use my arrow to follow your work

***************
1- Open a new transparent image of 800 by 650 pixels
2- Select all
3- Open the paper 3jpg or a christmas paper of your choice, copy it and paste it into the selection
Select none
You may colorize your paper so it matches your main tube ( I have left it as it is )
4- Add a new raster layer and flood fill it in white ( unless you want your snow to be coloured ...Why not !? )
5- Layers / load a mask / from disk / choose Brujita-navidad 0011 / set as below:
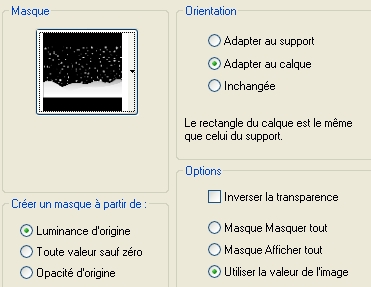
Merge group
Set the mode of that layer to Luminance Legacy
6- Effects / plugins / AP01 / Lines- silverlining / Dotty grid as below :
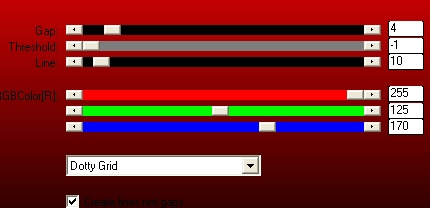
According to the colours you have chosen you may have to play around with the 3 coloured lines
* You may use another filter and effect if you wish !
7- Add a new raster layer and select all
Open the paper 4 jpeg or a christmas paper of your choice, copy it and paste it into the selection
Select none
8- Set the mode of that layer to Multiply
Colorize that layer to your liking
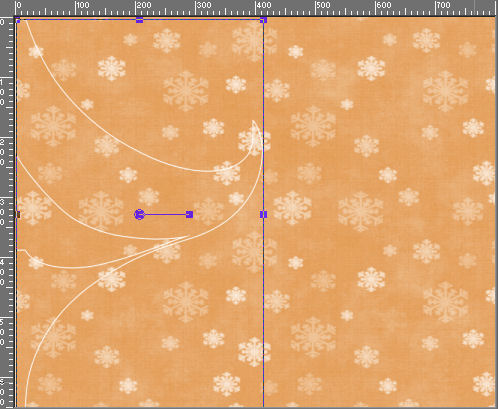
9- Activate your preset shape tool ( press key P) / choose the shape AltemusBorderFour and set as below :

Your white is in your foreground and your background is closed !
10- Apply your shape against the left hand side of your tag , starting from the top left hand side corner to the bottom left hand side corner; the width of your shape is about 400 pixels :
11- Layers / promote to a raster layer
12- With your magic wand,set as below, select the inside of your shape ( one click should make it !). Make sure you are on the shape layer when you do it !

13- Selections / Invert
Activate the layer where your paper 4jpeg is and hit delete to suppress part of the paper
Select none
14- Suppress the layer where you have drawn your shape, we don't need it anymore!
15- Open the tube "givre", copy it and paste it as a new layer
Move it again the left hand side border of your tag
Set the mode of that layer to Hard light
16- Open the tube Bd-SnowBlue-tree4 or a tube of your choice, copy it and paste it as a new layer
Resize the tube at 25 % and 50%
Colorize to your liking ( 22, 140 for me )
Place as on my tag or to your liking
17- Effects /3d effects / drop shadow / 4, 4, 40, 20, black or with a colour of your choice
18- Open the tube 3 pspimage or a tube of your choice, copy it and paste it as a new layer
Resize the tube at 25 %
Place in the top right hand side of your tag
19- Same drop shadow as on step 17
20- Open the tube KTs_lk6059 or a tube of your choice, copy it and paste it as a new layer
Resize that tube at 50%
Place as on my tag or to your liking
21- Same drop shadow as on step 17
22- Open the tube wordart3 or a tube of your choice, copy it and paste it as a new layer
Colorize the tube to your liking ( I colorized it as on step 16)
Place at the right place
23- Open the tube fairymist_trait_snow or a tube of your choice, copy it and paste it as a new layer
Place at the right place
Instead of the tube, you may use a brush ( don't forget to add a new layer then !)
24- Add a new raster layer and apply your signature
24- Make sure everything is in its place
Image / add some symmetrical borders of 2 pixels with a colour of your choice
( colour 5c2415 for me )
25- Layers / Promote Background layer
26 - Image / resize at 90% ( Resize all the layers NOT checked )
27- Effects /3d effects / drop shadow / 4, 4, 50, 20, noir and the same with : - 4 vert and horiz
28- Add a new raster layer
Layers / arrange / move down
29- Set your colour palette with two colours out of your main tube; make sure these colours will bring out your tag nicely !
My choices : Foreground cd5925 
Background : 5c2415 
Set your foreground with a linear gradient as follows :

30- Flood fill your transparent layer with that gradient
31- Adjust / Brightness and contrast / Brightness - 35, Contrast 0
That will slightly darken your colours
32- Add a new raster layer
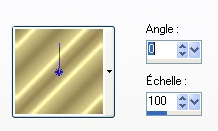
Flood fill it with your gold texture out of your texture palette as below :
33- Layers / load a mask / from disk / choose manjana-mask_040707/ set as below :
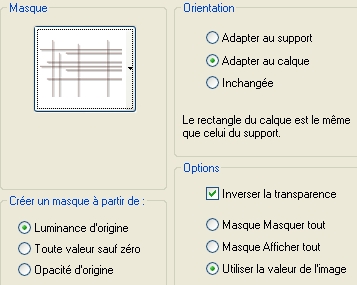
Merge group
34- Effects / edge effects / enhance
35-Image / add some symmetrical borders of 2 pixels with a colour of your choice
( colour 5c2415 for me )
36- Save your work as a jpeg file and resize if necessary
******************
That's it !! You've done it !!
If you 've enjoyed doing my tutorial, it would be nice to write a few words in my guest book !
If you 've had the slightest problem, please, send me a mail so I can see to the problem !
Tutorial translated on the 5 th of december 2009
Other versions of that tag
*****************