Thank you for putting a link to this tutorial, whenever you display your realization of that tag on a website, on a group or in a mail !
**************************
You'll find some versions of that tag in my gallery HERE
************************
To realize that tag, you'll need the plugins :
- Videorave / Nail Art
- Alien Skin Eye Candy 5 / Impact
and the material zip down below :

**************
*It is forbidden to suppress watermarks on the material provided , to alter, mist or rename the tubes in order to respect the work of the tubers
- The tube of the woman is by Karine
You can get her tubes by joining her sharing group here
The element of decoration I have used is by Scrap' by Graphic Chic
******************
Preparation
Duplicate your tubes. Close the originals and minimize the copies for now.
- Place the texture "patternx~02_gxchic!.bmp" in the Texture folder of your Psp file
Place the pattern "goldbeads.jpg" in your pattern folder of your Psp files
- Place the selections in your selection folder of your Psp files
*****************
Click here to print the tutorial
*******************
You can use my arrow to follow your work

***************
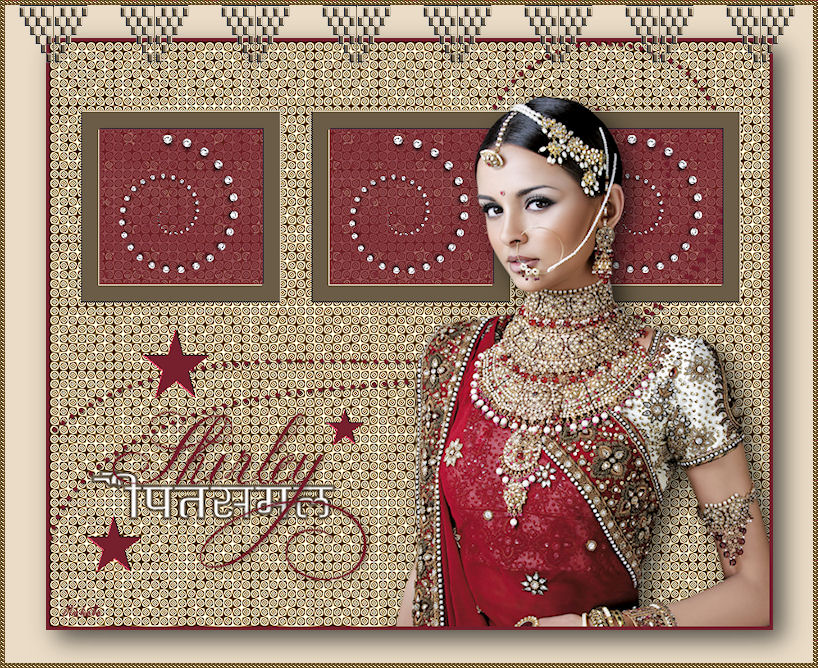
1- Open a transparent image of 800 by 650 pixels
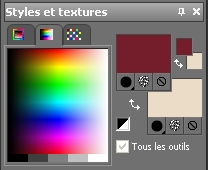
2- Set your colour palette with two colours matching your main tube
My choice : Foreground : dark colour 741e2c
Background : light colour eadcc6
3- Flood fill your transparent layer with your light background colour
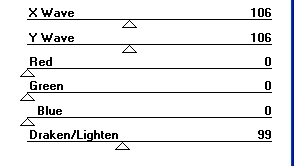
4- Effects / plugins / Videorave / Nail art as below
5- Add a new raster layer
Selections / load a selection / from disk / choose "fairymist_shirley0.PspSelection" / Check Source Luminance and Replace the selection
6- With your Flood fill tool, set as below, flood fill the selection with your foreground colour

Select none
7- Effects / 3d effects / drop shadow / 1, 1, 80, 2, black
8-Add a new raster layer
Selections / load a selection / from disk / choose "fairymist_shirley1.PspSelection" / Check Source Luminance and Replace the selection
9- Flood fill the selection with your light colour
Select none
10- Activate your Emboss brush as below :

If you can't see that tool , go to View / Customize / Tools / Emboss / drag it onto your tool palette
Set your Emboss brush as below :

Apply your Emboss brush on your 3 frames , they will take a golden colour thanks to the mode Difference I have chosen !
It is up to you to find the mode which gives your light colour the better effect that matches your tube !!
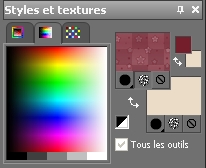
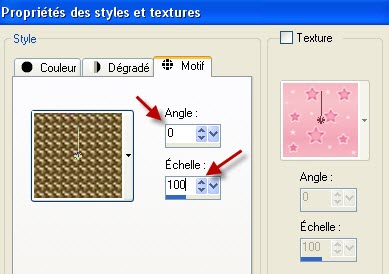
11- Set your colour palette as below with the texture " patternx~02_gxchic!.bmp"
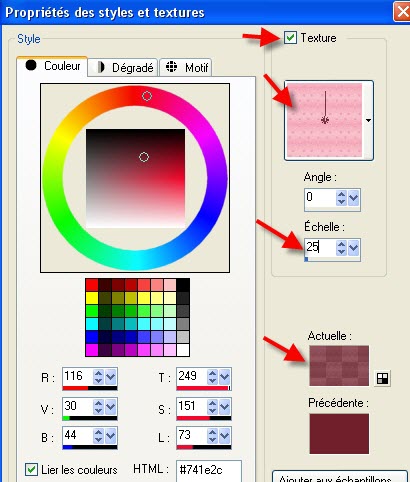
12-Add a new raster layer
Layers / arrange / move down
13- In your layer palette, activate the layer where your frames are
With your magic wand , set as below, select the inside of your three frames while keeping the shift key pressed

14- Selections / Modify / Expand by 4 pixels
15- In your layer palette, activate the transparent layer which is underneath the layer with the 3 frames
Flood fill these selections with your foreground texture
Select none
Uncheck the texture in your foreground palette in order to get the setting you had on step 2
16- In your layer palette, activate your top layer
Activate the tube "GxChic_BlinginGarden_bling.pspimage"
Activate the layer of that tube named Spiral , copy it and paste it as a new layer
Place the tube in the middle of one of your frames
Repeat step 16 for the other frames
You may choose another tube or different tubes to put in your frames
17- Activate the tube "deco_shirley_fairymist.pspimage" or a tube of your choice, copy it and paste it as a new layer
Place at the right place
18- Activate your text tool, set as below , and write down your title with the font "Copper Alt Caps Expert.ttf" or a font of your choice
Put your dark colour in your background and close your foreground !

19- Effects / 3d effects / drop shadow / 1, 1, 60, 10, black
20-Add a new raster layer
Activate your selection tool and choose Star 1 as below
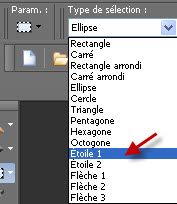

Draw a star
21- Flood fill the selection with your dark colour
Select none
22- Activate your Emboss brush set as below

I chose the mode Hardlight because it enhanced my star , it is up to you to choose your mode !
23- Repeat steps 20 to 22 with two more stars ( or more ! ) in different sizes
24- Activate the tube "k@rine_ dreams _Beautiful _Hindu_1175_JUIN2010.pspimage"or a tube of your choice, copy it and paste it as a new layer
I have resized that tube at 75%
Place the tube as on my tag
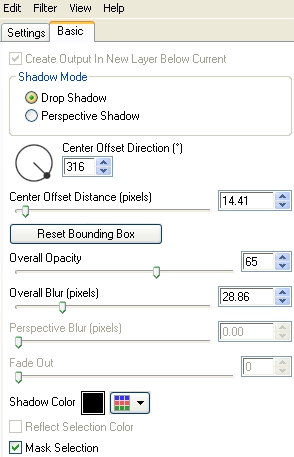
25- Effects / Plugins / Alien Skin Eye Candy 5 / Impact / Perspective shadow as below of according to your own settings
26-Add a new raster layer and apply your signature
27- Make sure everything is at the right place
Add some symmetrical borders of 4 pixels with your dark colour
28- Layers / Promote Background layer
29- Image / resize at 90 °% (Resize all the layers NOT checked )
30- Effects / Alien Skin Eye Candy 5 / Impact / Perspective shadow as on step 25
31- Add a new raster layer
Layers / arrange / move down
32- Flood fill that transparent layer with your light colour
( You may add an effect on that layer if you wish ( Graphic plus / cross shadow for example or a texture effect .........)
33- Activate your top layer
Activate the tube " deco2_shirley_fairymist.pspimage"or a tube of your choice, copy it and paste it as a new layer
Place it on top your tag
You may colorize this tube if you wish or add a light drop shadow to it
I made that element with the preset shape tool included in the zip and I applied the Emboss brush on it
34- Add some symmetrical borders of 5 pixels with any contrasting colour
35- With your magic wand set as previously, select that border
36- Set your material palette as below with the pattern " goldbeads.jpg"
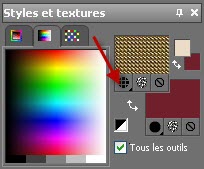
37- Flood fill your selected border with that pattern
Select none
38-Save your work as a jpeg file and resize it if necessary
***************
That's it !! You've done it !!
If you 've enjoyed doing my tutorial, it would be nice to write a few words in my guest book !
If you 've had the slightest problem, please, send me a mail so I can see to the problem !
Tutorial translated on the 20th of november 2010
*************
Other versions of that tag