
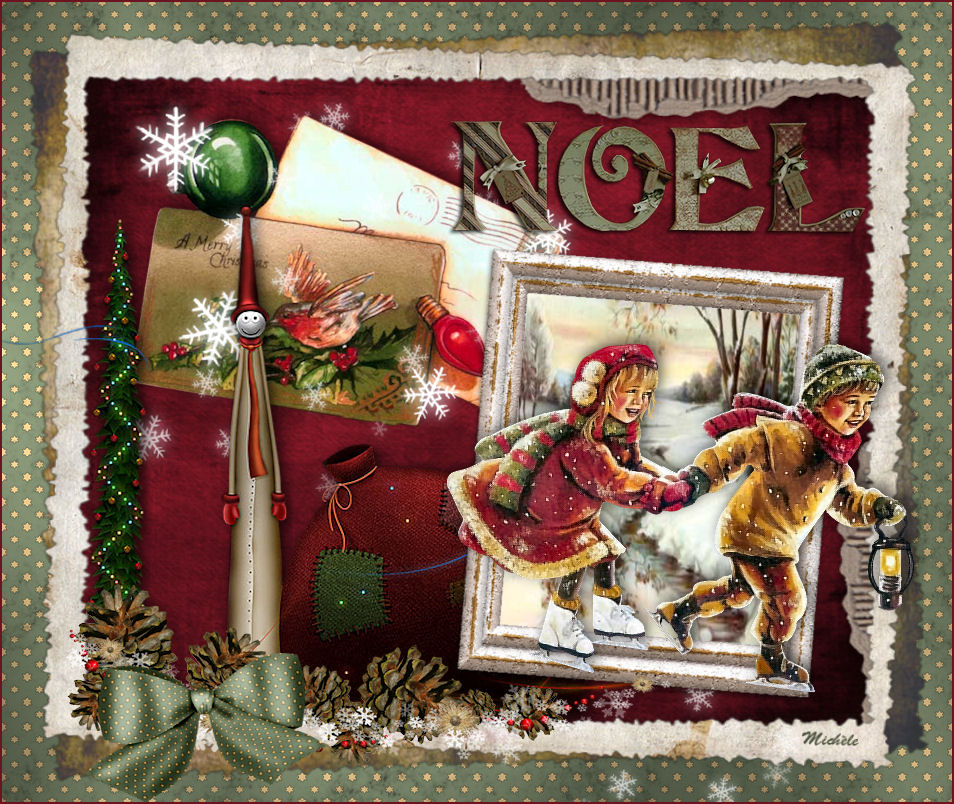
Thank you for putting a link to this tutorial, whenever you display your realization of that tag on a website, on a group or in a mail !
**************************
You'll find some versions of that tag in my gallery here
***********************
To make that tag, you'll need the plugins :
- Filters Unlimited 2.0
- Graphic plus / Cross shadow.
- Photo aging kit.
and the material zip down below :

**************
*It is forbidden to suppress watermarks on the material provided , to alter, mist or rename the tubes in order to respect the work of the tubers
- The tube of the fir tree and of the red ball is by Mtfp.
- The tube of the children is by Kikirou
- The tube of the christmas cards is by Guismo.
Thank you to all of them for sharing their lovely tubes.
- The other elements that I haven't created, have been found on the net.
******************
Preparation
To be on the safe side, duplicate your tubes and image in your Psp :
-
Window / Duplicate
- Close the originals and work with the copies !
- Place the selection in the selection folder of your Psp files.
*****************
Click here to print the tutorial
**********************
You can use my arrow to follow your work
Click on it and drag it all along the tutorial !

***************
Tutorial made with PSP XIII
******************
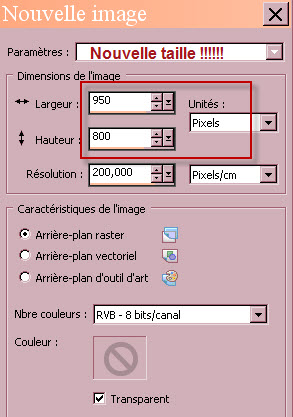
1 - Open a new transparent image of 950 by 800 pixels (NEW SIZE !)
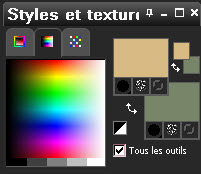
2 - Set your Material palette with two colours matching your tubes :
- My choice : Foreground : Light colour : d8ba83.
Background : Darker colour 788569
3 - Open a new transparent image of 100 by 100 pixels which we are going to use to make a pattern
for the background of the tag we have previously opened.
4- Flood fill that small transparent image with your background colour.
5- ADD A NEW RASTER LAYER.
6- Selections / Load a selection / from Disk / Choose the selection "Fairymist_scrapdenoel_star" and set it as below :
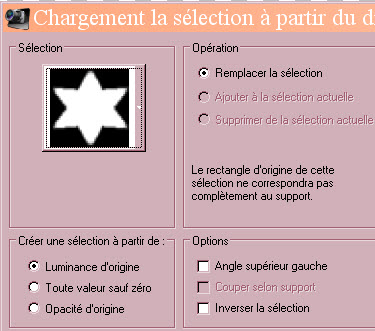
7- Flood fill that selection , on that new layer, in black (I have replaced my first background colour by black).
8- Selections / Modify / Contract by 1 pixel.
9- Flood fill that selection with your foreground colour. Deselect all.
10- Layers / Merge all.
11- Effects / Image effects / Seamless tiling default.
- Your pattern is ready and is called image 2.
12- Set your Material palette as shown below :
- Set your foreground with the pattern you have just created (Image2) so you can flood fill your tag with it.
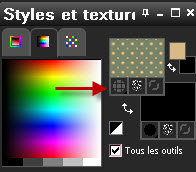
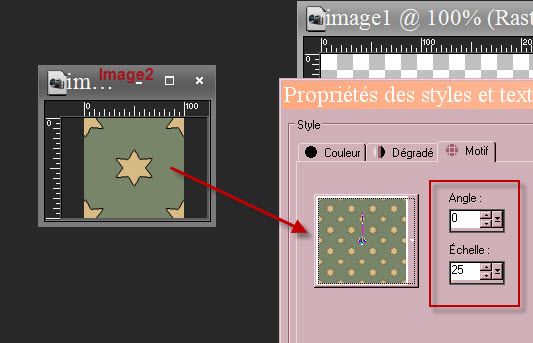
13- Activate the transparent image of your tag (Image1) and flood fill it with your pattern.
14- Effects / Plugins / Filters Unlimited / Photo aging kit / Dirt and dust default.
15- Effects / Plugins / Graphic plus / Cross shadow set as below :
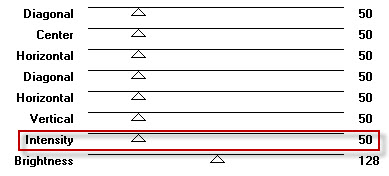
16- Open Paper1 or a paper of your choice (same size), in your Psp and copy it.
17- Paste it as a new layer on to your tag.
18- Open Paper2 or a paper of your choice (same size), in your Psp.
- Layers / Promote background layer.
19- Effects / Plugins / Filters Unlimited / Edge square / Square edge 17 default.
20- Copy and paste as a new layer on to your tag.
21- Open Paper3 in your Psp and copy it.
22- Paste it as a new layer on to your tag.
23- Optionnal : You may, if you wish, add a free rotation on one or two of these layers.
- I have made a free rotation of 2 pixels towards the right on Paper2.
and a free rotation of 2 pixels towards the left on Paper1.
- We are now going to place the different elements of scrap that I have chosen but your may replace them all with your own if you feel like it !
24- Open the tube "calguischrismascard13129.pspimage" in your Psp and copy it.
25- Paste it as a new layer on to your tag.
- I have resized that tube at 80% (Resize all the layers NOT checked).
- Place like me or to your liking.
26- Open the tube "snow" in your Psp and copy it.
27- Paste it as a new layer on to your tag.
- Place like me or to your liking.
28- Open the tube "mtfp_xmas_bag_©Vladstudio" in your Psp and copy it.
29- Paste it as a new layer on to your tag.
- Place like me or to your liking.
30- Effects / 3d effets / drop shadow of your choice / 4, 4, 80, 20, black for me.
31- Open the tube "cadre blanc et or" in your Psp and copy it.
32- Paste it as a new layer on to your tag.
- Place like me or to your liking.
33- With your magic wand, set as below, select the inside of that frame.

- Selections / Modify / Expand 5 pixels.
34- ADD A NEW RASTER LAYER.
- Layers / Arrange / Move down.
35- Open the image "Paysage" in your Psp and copy it.
36- Paste it INTO THE SELECTION. Deselect all.
37- Activate the layer on top of the pile.
- Layers / Merge down.
38- Open the tube "kikirou1322" in your Psp and copy it.
39- Paste it as a new layer on to your tag.
- Place it like me so that is gives the impression that the children are coming out of the frame !
40- Effects / 3d effets / drop shadow of your choice /- 4, 4, 60, 20, black for me.
41- Open the tube "Deco_noel" in your Psp and copy it.
42- Paste it as a new layer on to your tag.
- Place it like in the bottom left hand side of your tag.
43- Open the tube "noeud_noel" in your Psp and copy it.
44- Paste it as a new layer on to your tag.
- Place it like in the bottom left hand side of your tag.
45- Open the tube "titre_noel" in your Psp and copy it.
46- Paste it as a new layer on to your tag.
- Place it like me or to your liking.
47- Apply your signature
- Make sure everything is at the right place
- Image / add some symmetrical borders of 2 pixels with a colour of your choice :
6C1420 for me
Save your work as a jpeg file.
***************
That's it !! You've done it !!
If you 've enjoyed doing my tutorial, it would be nice to write a few words in my guest book ! If you've had the slightest problem,
please, send me a mail so I can see to the problem.
Tutorial translated on the 7th of december 2013
*************
You'll find some versions of that tag in my gallery HERE
