Thank you for putting a link to this tutorial, whenever you display your realization of that tag on a website, on a group or in a mail !
**************************
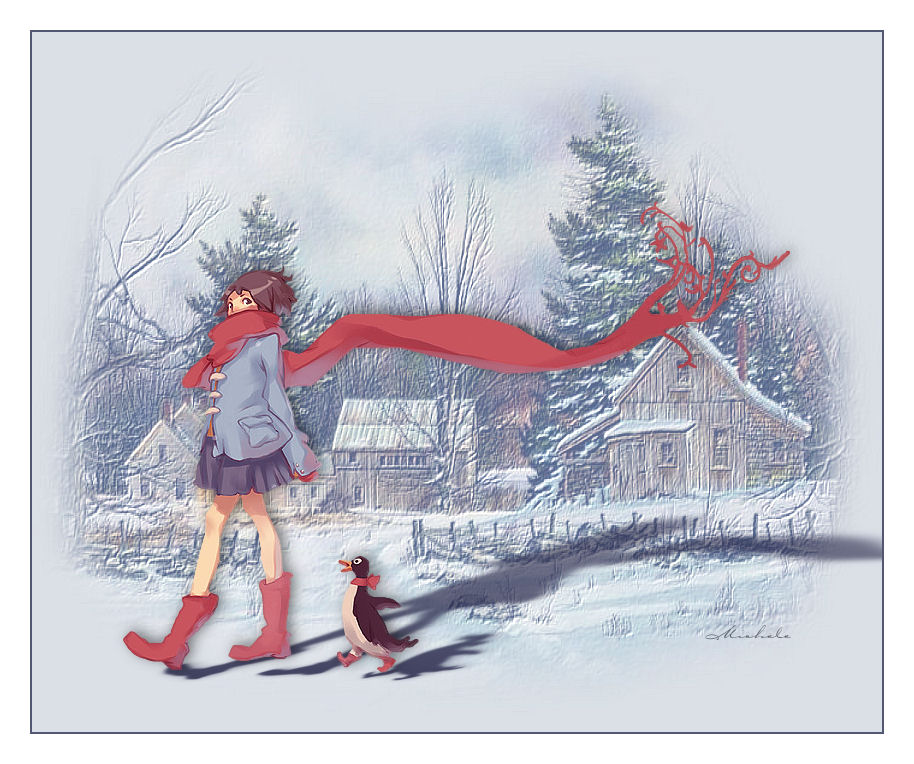
You'll find some versions of that tag in my gallery HERE
************************
To realize that tag, you'll need the plugins :
- FM Tile Tools,
- Alien skin Eye candy 5 / impact
and the material zip down below :

*******************
*It is forbidden to suppress watermarks on the material provided , to alter, mist or rename the tubes in order to respect the work of the tubers.
- The tube of the woman is by Dini, thank you Dini to have shared it with me !
- The image of the scenery has been found on the net
****************
Preparation
To be on the safe side, duplicate your tubes and image in your Psp :
-
Window / Duplicate
- Close the originals and work with the copies !
- Place the frame "Sous-verre 02" in the picture frame folder of your Psp files.
*******************
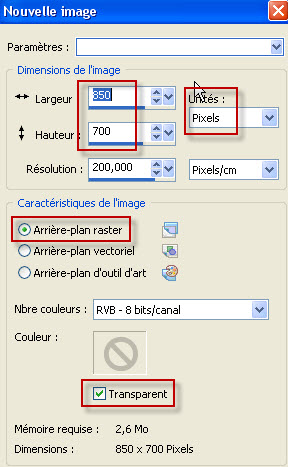
1 - Open a new transparent image of 850 by 700 pixels and flood fill it with a colour out of your tube (ABB3C6 for me) 
2- Select all and ADD A NEW RASTER LAYER.
- Open the image of the scenery ; copy it and paste it in the selection, in your new layer.
- Deselect all.
3- I have put the mode of that layer on to Overlay ; it is up to you to see which mode looks better with your own colours.
- Lower the opacity of that layer if necessary..
4- Effects / Plugins / FM tile tools / Blend emboss, default / twice !
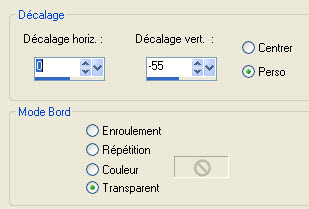
5- Open the tube of the woman, copy it and paste it as a new layer on to your tag.
- I have placed my tube that way :
- Effects / Image effects / Offset as below :
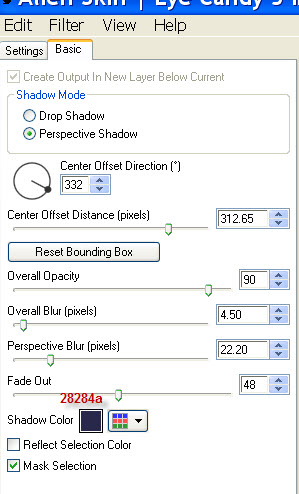
6- Effects / plugins / Alien skin Eye candy 5 / impact / perspective shadow / factory Default with a dark colour out of your image :
7- Layers / Merge all.
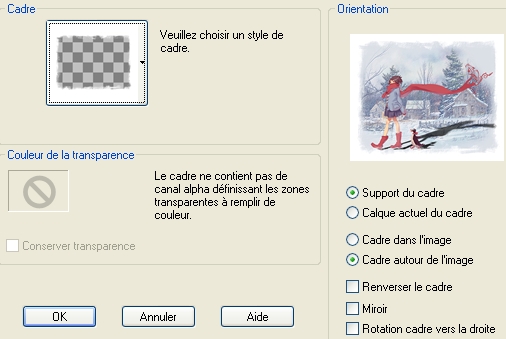
8- Image / Picture Frame / "sous verre o2" as below :
9- Apply your signature.
10- Image / add some symmetrical borders of 1 or 2 pixels with a colour out of your scenery tube.
11- Image / add some symmetrical borders of 30 pixels with a colour of your choice (white for me).
- You may prefer to make another sort of frame on your tag !
12- Save your work as a jpeg file
*********************
That's it !! You've done it !!
If you 've enjoyed doing my tutorial, it would be nice to write a few words in my guest book !
If you 've had the slightest problem, please, send me a mail so I can see to the problem.
Tutorial translated on the 19th of December 2008
*****************
You'll find some versions of that tag in my gallery HERE
***************