Thank you for putting a link to this tutorial, whenever you display your version of that tag on a website, on a group or in a mail !
**************************
You'll find some versions of that tag in my gallery Here
***********************
To make that tag, you'll need the plugins
- Mura's Meister / Copies
- Mura's Seamless / Emboss at alpha
and the material zip down below :

**************
*It is forbidden to suppress watermarks on the material provided , to alter, mist or rename the tubes in order to respect the work of the tubers
- The tube of the stars is by Sabine.
- The other elements that I haven't created, have been found on the net.
******************
Preparation
To be on the safe side, duplicate your tubes and image in your Psp :
-
Window / Duplicate
- Close the originals and work with the copies !
- Place the selection files in the selection folder of your Psp files.
**************
Click here to print the tutorial
**********************
You can use my arrow to follow your work
Click on it and drag it all along the tutorial !

***************
Tutorial made with PSP X8
***************
1 - Open a new transparent image of 850 by 700 pixels.
2 - Open the palette "Fairymist_Palette_Princesse_Vera" in your PSP.
- Those are the colours to use, if you make my tutorial with the same items as me.
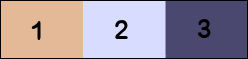
- In that case, activate your drop tool and make a left click on the salmon colour of the palette (n°1).
- That colour will appear in the foreground of the Materials palette of your PSP.
- Right click now on the pale lilac colour (2).
- This colour will then appear in the background of the Materials palette of your PSP.
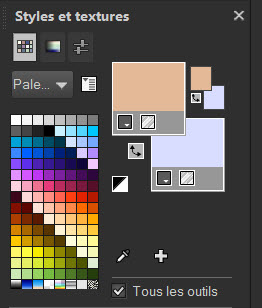
3 - Flood fill your transparent image with your light foreground colour (left click).
4- ADD A NEW RASTER LAYER.
5- Selections / select all.
6- Open the tube "Princesse Vera" or a tube of your choice in your PSP and copy it.
- Paste it into the selection on your new layer.
- Layers / Select none.
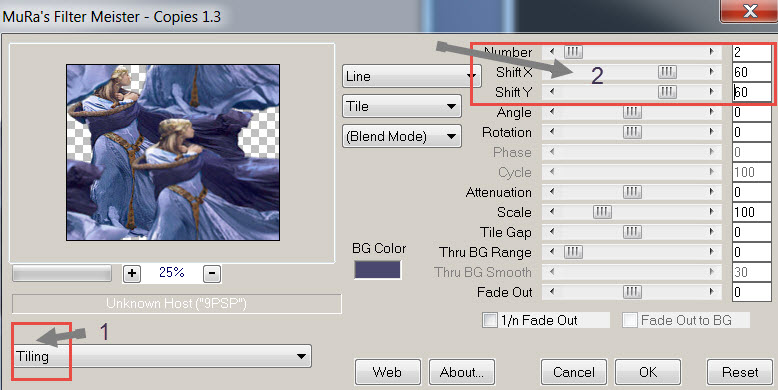
7- Effects / Plugins / Mura's Meister / Copies as below :
8- Layers / Merge down.
9- Adjust / Blur / Gaussian blur to your liking (70 for me).

10- ADD A NEW RASTER LAYER.
11- Flood fill that new layer with your background colour (right click).
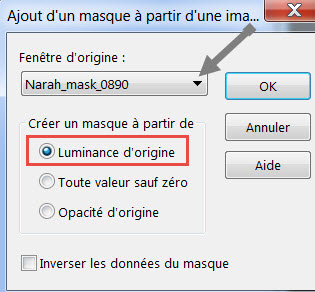
12- Open the mask "Narah_mask_0890" in your PSP and minimize it.
- On your tag : Layers / New mask layer / From image / Set as below :
13- Adjust / Sharpness / Sharpen more.
- Layers / Merge group.
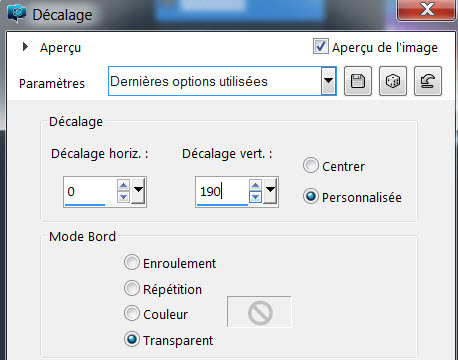
14- Effects / Image effects / Offset as below :
15- I have set the mode of that layer on to Overlay.
16- ADD A NEW RASTER LAYER.
17- Flood fill your new layer with your light foreground colour (left click).
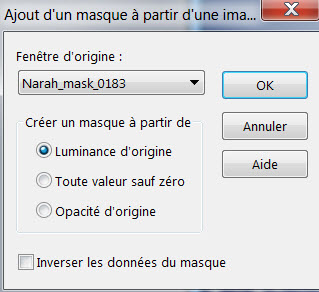
18- Open the mask "Narah_mask_0183" in your PSP and minimize it.
- On your tag : Layers / New mask layer / From image / Set as below :
- Adjust / Sharpness / Sharpen more.
- Layers / Merge group.
19 - I have set the mode of that layer on to Dodge and lowered its opacity at 72.
20- ADD A NEW RASTER LAYER.
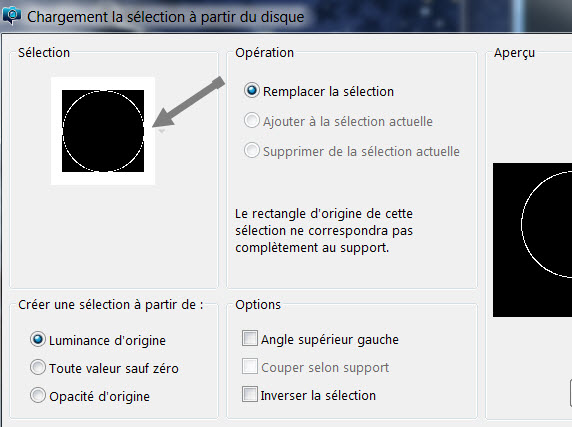
21- Selections / Load a selection / From disk / Choose the selection "Fairymist_Princesse_Vera 1".
22- Flood fill that selection, on your new layer, with your foreground colour.
( Flood fill the outside circle !).
- Selections / Select none.
23- Layers / Duplicate.
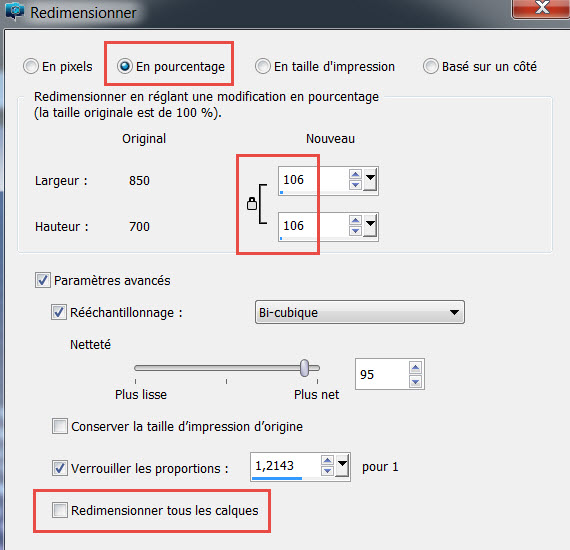
24- Image / Resize as shown below :
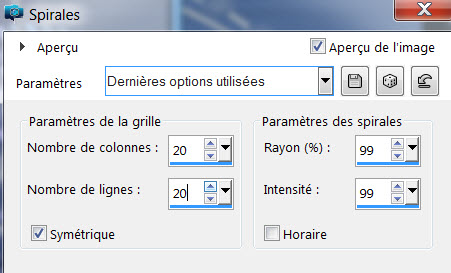
25- Effects / Distortion effects / Curlicues as below :
26- Activate the layer just underneath (the layer of the circle without curlicues).
- With your magic hand, select the inside of that circle.
27- Selections / Modify / Expand by 2 pixels.
28- ADD A NEW RASTER LAYER.
29- Open the tube "Fairymist_Princesse_Vera_nuages" in your PSP and copy it.
30- Paste that tube into the selection, on your new layer.
- That cloud layer must remain in a normal mode otherwise the effects produced by my two masks would appear in the circle !
- You may change the colours of the clouds by using the Hue map effects :
- Adjust / Hue and saturation / Hue map :
- Play with the different cursors until you get the colours that go well with your tubes and other colours.
- Don't forget that you can change the saturation and lightness opacities too.
- Keep selection.
31- Layers / Arrange / Move down.
(The cloud layer will then be just underneath your round frame).
32- Open the misted tube "Château" or a misted tube of your choice in your PSP and copy it.
- Don't use an image as it would hide the clouds placed on step 30 !
33- Paste the tube of the misted château as a new layer and place it in the middle of your circle with your move tool.
- If you paste it into the selection, it will probably be distorted !
- If your own misted tube is larger than the circle, resize it or invert your selection and hit the delete key.
- Selections / Select none
34- When I got to that point of my creation, I felt I wanted to darken my background, so here is what I did :
- Activate layer Raster 1 and duplicate it (Layers / Duplicate).
- I have then set the mode of that new layer on to Multipliy.
35- Activate now the layer where Mask 2 is (the 4th one from the bottom for me).
36- Open the tube "Etoiles_grsab"or a similar tube of your choice in your PSP and copy it.
37- Paste it as a new layer on to your tag.
38- Place it that way :
- Effects / Image effects / Offset / 0, 246 / "Custom" and "Transparent" ticked.
- I have set the mode of that new layer on to Multipliy.
39- Activate now your top layer.
- Open the tube "Stars"or a similar tube of your choice in your PSP and copy it.
40- Paste it as a new layer on to your tag.
41- Place it that way :
- Effects / Image effects / Offset / 426, 140 / "Custom" and "Transparent" ticked.
42- Layers / Duplicate.
- Image / Mirror / Mirror horizontal.
43- Open the tube "Princesse Vera"or a tube of your choice in your PSP and copy it.
- Paste it as a new layer on to your tag.
- Place it as on my tag (bottom left hand side).
- I have put a slight drop shadow on my tube :
- Effects / 3D effects 3D / Drop shadow / - 4, 4, 30, 20, black.
44- Open the tube "Fairymist_Princesse_Vera_Texte" in your PSP and copy it.
45- Paste it as a new layer on to your tag.
- Place it as on my tag
( If you wish to write down your own text, I have used the font Mon amour script, size 40 on a vectorial circle).
You can do it this way : Draw a vectorial circle / Image, Vertical mirror so that your text isn't upside down ! /
Add a new raster layer / Start writing as soon the T of your text tool is underlined by a curved line when you touch the circle / Apply /
- Delete the vectorial layer of your circle.
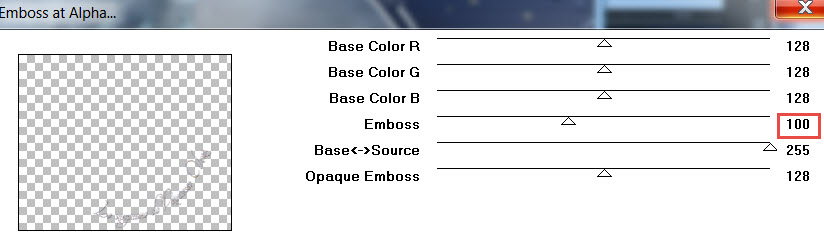
46- Effects / Plugins / Mura's Seamless / Emboss at alpha as below :
47- Effects / 3D effects / Drop shadow / 1, 1, 60, 1, black.
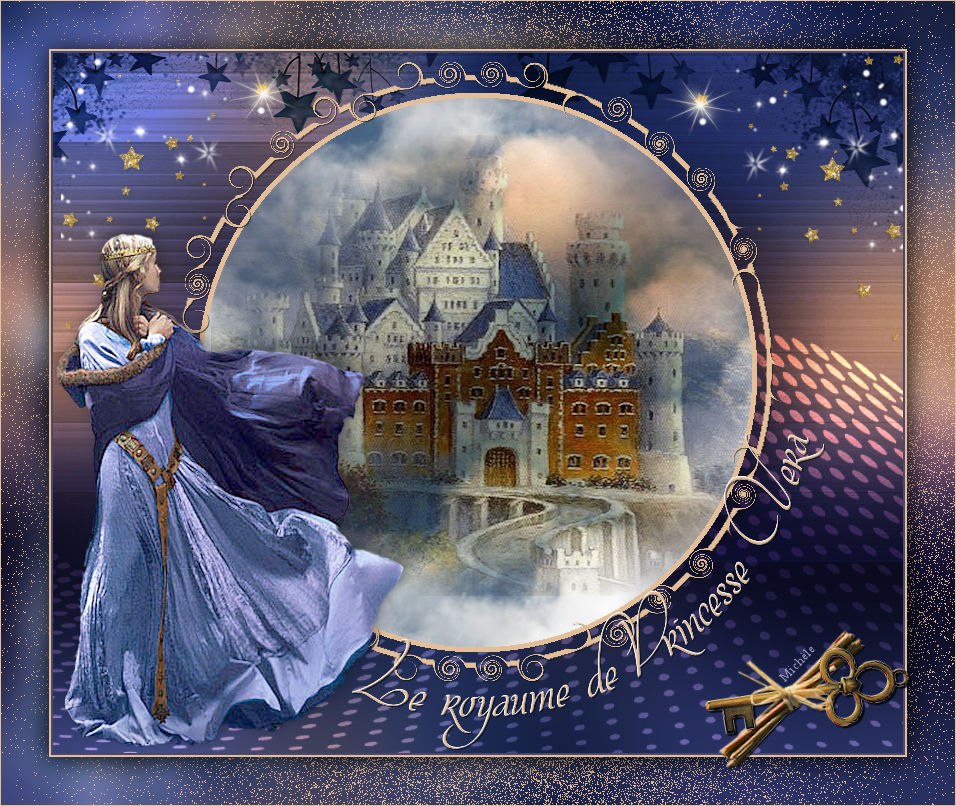
48- Make sure everything is at the right place !
- Layers / Merge all.
- Copy that merged layer.
49- Image / Add some symmetrical borders of 2 pixels
with the dark colour of the palette "Fairymist_Palette_Princesse_Vera" (n° 3 = dark purple for me).
50- Image / Add some symmetrical borders of 2 pixels with your light foreground colour.
51- Layers / Promote background layer.
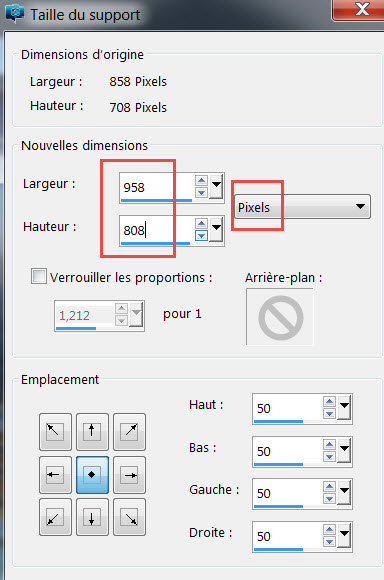
52- Image / Canvas size / Set as below :
53- ADD A NEW RASTER LAYER.
- Layers / Arrange / Send to bottom.
54- Selections / Select all.
- Paste into the selection (the copy of your tag that is still in memory!).
- Selections / Select none.
55- Adjust / Blur / Gaussian blur at 20.
56- ADD A NEW RASTER LAYER.
57- Activate your airbrush tool and set it as below if you can :

- Apply (once ) that tool in the center of your tag (left click with my light foreground colour).
- If your PSP doesn't allow you to get a brush size as large as mine, you will have to apply your brush several times in order to cover your whole background.
58- In your layers palette, activate the layer on top of the pile.
59- Effects / 3D effects / Drop shadow / 0, 0, 100, 40, black.
60- Open the tube "Clé"or a tube of your choice in your PSP and copy it.
61- Paste it as a new layer and place it like me.
62- Add your signature.
63- Image / Add some symetrical borders of 1 pixel
with you foreground colour.
64 - Save your work as a jpeg file.
***************
That's it, you have done it !
If you have the slightest problem, don't hesitate to get in touch with me !
Tuto translated on the 26th of november 2017.
*******************
You'll find some versions of that tag in my gallery Here