
Thank you for putting a link to this tutorial, whenever you display your realization of that tag on a website, on a group or in a mail !
**************************
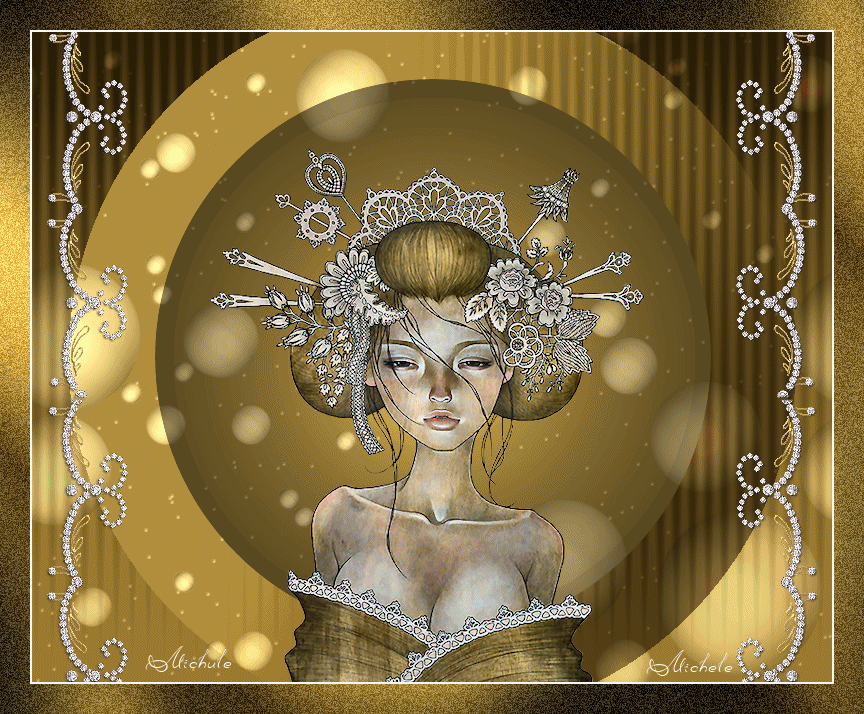
You'll find some versions of that tag in my gallery HERE
************************
To realize that tag, you'll need the plugins !
- Unplugged tools ( effects Wavemaker and Round button ) here
- VM Natural ( effect Bubble planet ) here
- Graphic plus ( effect Cross shadow) here
and the material zip down below :

**************
*It is forbidden to suppress watermarks on the material provided , to alter, mist or rename the tubes in order to respect the work of the tubers
- The tube of the woman is by Kikirou
You'll be able to get her tubes by joining in her sharing group here
- The decorative tube is by Angel Keeper
******************
Preparation
Duplicate your tubes. Close the originals and minimize the copies for now.
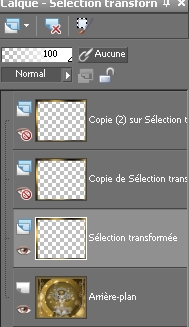
Place your selection in your selection folder
*****************
Click here to print the tutorial
*******************
You can use my arrow to follow your work

***************
1- Open a transparent image of 800 by 650 pixels
2- Set your colour palette with two colours matching your main tube
My choice : Foreground : light colour dfd5bd
Background : Dark colour 3d351c
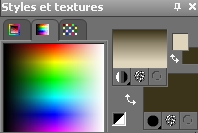
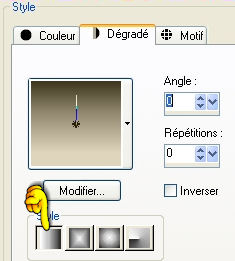
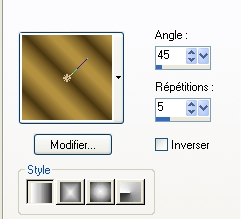
Set your foreground with a linear gradient as below :
3- Add a new raster layer and flood fill your transparent layer with your background colour
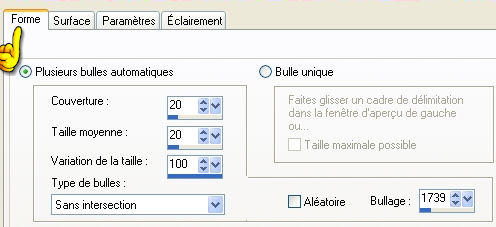
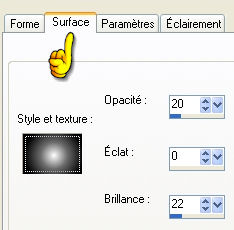
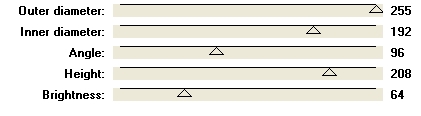
4- Effects / artistic effects / Balls and bubbles as below :
5- Add a new raster layer and flood fill your transparent layer with your background colour ( a second time !)
6- Add a new raster layer and flood fill your transparent layer with your foreground gradient
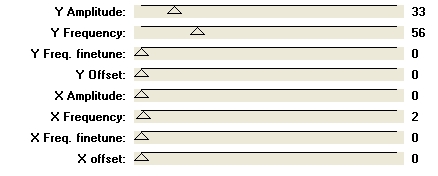
7- Effects / plugins / Unplugged tools / Wavemaker as below :
8- Effects / edge effects / enhance more
9- Effects / plugins / Unplugged tools / Round button as below :
10- Set the mode of that layer to Overlay or Multiply or a mode of your choice
11- Selections / load a selection from disk / choose "selection_princesse_fairymist" / check Source Luminance and replace the selection
12- HIt Delete to suppress the inside of the circle
13- Keep selection and activate raster layer 2 (that you have flood filled with your dark colour on step 5)
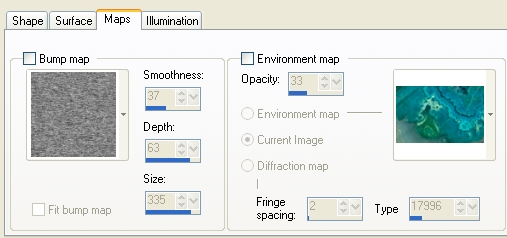
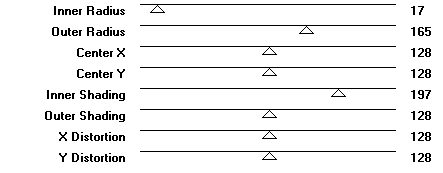
Effects / plugins / VM natural / Bubble planet as below :
Select none
14- Set the mode of that layer to Dodge or to a mode that suits you better.
In order to give my tag a brighter tone , I have duplicated that layer but lowered its opacity to 50; it will all depend on the colours you have chosen !
15- Open the tube "kikirou1442_yuuwaku_audrey_kawasaki.pspimage" or a tube of your choice, copy it and paste it as a new layer
I have resized my tube at 90%
Place as on my tag
You may add a drop shadow on your tube ; I haven't put any !
16- Open one ot the tubes "CJ_Edges 78A.pspimage" or a decorative tube of your choice matching your main tube, copy it and paste it as a new layer
Place on the top, left hand side of your tag
Layers / duplicate
Image / flip
Layers / merge down
17- Layers / duplicate
Image / mirror
You may add a drop shadow on your tube ; I haven't put any !
18- Add a new raster layer and apply your signature
19- Make sure everything is at the right place
Image / add some symmetrical borders of 2 pixels with a colour of your choice ( I have chosen white )
20- Image /add some symmetrical borders of 30 pixels with a contrasting colour
21- With your magic wand, set as below, select that border

22- Selections / Promote selection to Layer
23-Set your colour palette with two colours matching your tag
My choice : Foreground : light colour b3913f
Background : dark colour 493611
Set your foreground with a linear gradient as below :
24- Flood fill your selected frame with your foreground gradient
Select none
25- Effects / plugins / graphic plus / Cross shadow default
26- Duplicate that layer twice
27- Activate your first frame
Adjust / Add noise / uniform, monochrome, 20
( If you don't wish to do the animation, you can merge all and save your tag as a jpeg file !)
28- Activate now your second frame
Adjust / Add noise / uniform, monochrome, 30
29- Activate your third frame
Adjust / Add noise / uniform, monochrome, 40
30- Close the frames 2 and 3 and activate frame 1 as below :
31- Edit / copy Special / copy merged
32- Open your Animation shop
In Animation shop : Edit / paste as new animation
33- Go back to your Psp
Close frame 1
Activate frame 2 and open its eye
Edit / copy Special / copy merged
34- In Animation shop : Edit / after current frame
35- Go back to your Psp
Close frame 2 ,
Activate frame 3 and open it
Edit / copy Special / copy merged
36- In Animation shop : Edit / after current frame
37- In Animation shop
Edit / Select all
38- Check your animation, in your animation shop, by clicking here

Stop the animation by clicking at the same place
If you like your animation, all you have to do is save your work as a gif file , in your animation shop !
39- You may resize your file in your Animation shop :
Animation / Resize animation / choose the right size in pixels
***************
That's it !! You've done it !!
If you 've enjoyed doing my tutorial, it would be nice to write a few words in my guest book !
If you 've had the slightest problem, please, send me a mail so I can see to the problem !
Tutorial translated on 24th of april 2010
*************
You'll find some versions of that tag in my gallery HERE