
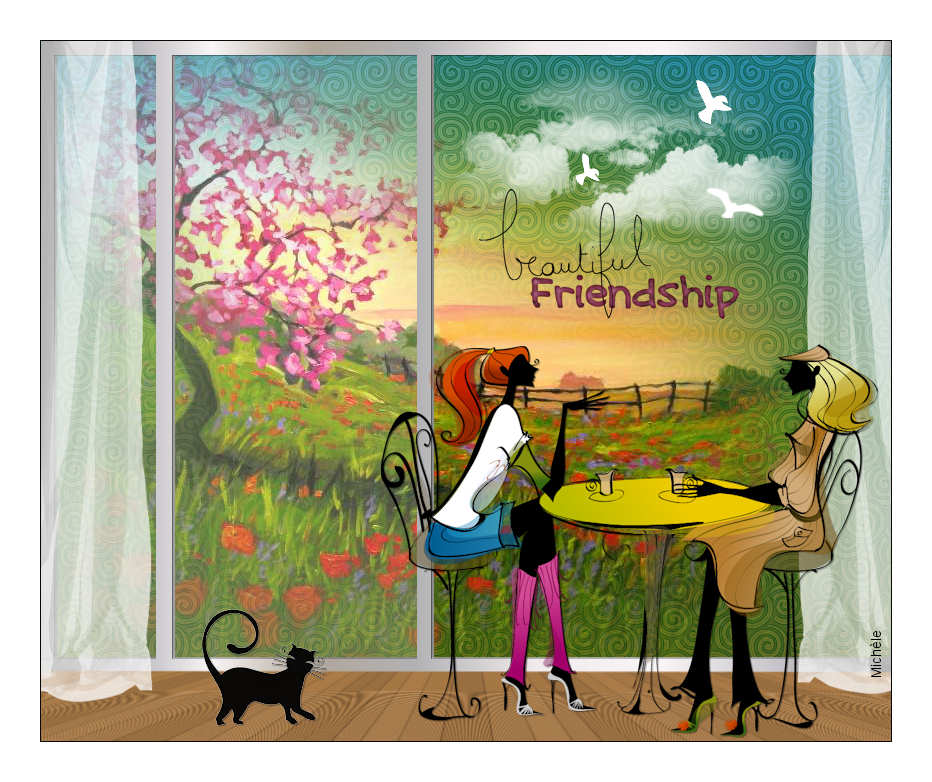
Thank you for putting a link to this tutorial, whenever you display your realization of that tag on a website, on a group or in a mail !
**************************
You'll find some versions of that tag in my gallery HERE
***********************
To realize that tag, you'll need the plugin :
- Alien skin Eye candy 5 / Impact / Extrude
and the material zip down below :

**************
*It is forbidden to suppress watermarks on the material provided , to alter, mist or rename the tubes in order to respect the work of the tubers
- The tube of the couple of friends is by Sabine.
- The tube of the cat is by Kikirou.
- The tube of the scenery is by Guismo
You'll be able to find her tubes on Dakara' s site here
and you can join in her sharing group here
- The tube of the clouds is an element of the Freebie kit Tendre rêverie by Yaya
The other elements that I haven't created, have been found on the net.
******************
Preparation
- To be on the safe side, duplicate your tube and image in your Psp :
-
Window / Duplicate
- Close the originals and work with the copies !
- Place the mask "2020.msk" in the mask folder of your Psp files.
- Place the pattern in the pattern folder of your Psp files.
- Place the gradient in the gradient folder of your Psp files.
- Place the two brush files in the brush folder of your Psp files.
- Plac the file "fairymist_pierrette.PspSelection" in the selection folder of your Psp files.
*****************
*****************
Click here to print the tutorial
**********************
You can use my arrow to follow your work
Click on it and drag it all along the tutorial !

***************
Tutorial realized with PSP XIII


Step 1 : The background of the tag
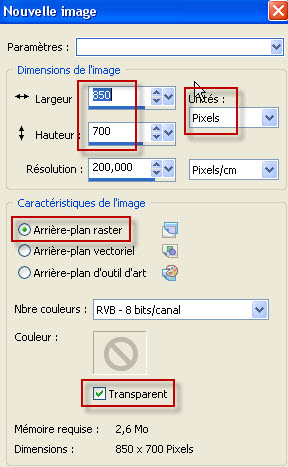
1 - Open a new transparent image of 850 by 700 pixels.
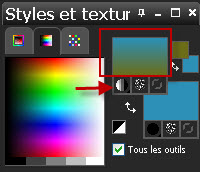
2 - Set your Material palette with two colours matching your scenery tube.
My choice : Foreground : green 6c6c18
Background : colour turquoise 2c90b6
- Set your foreground with a linear gradient as below :
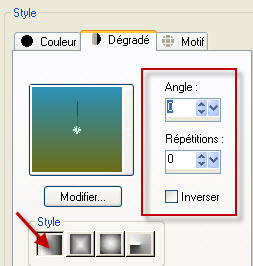
3 - Flood fill your transparent image with that gradient.
4- ADD A NEW RASTER LAYER.
Set now your background ( or your foreground ! ), with a third colour matching your scenery tube.
My choice : Green: 90a108
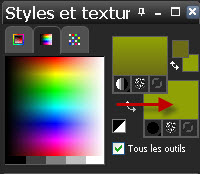
Flood fill your new layer with this new colour ( Right click for me as I have put that colour in my background )
5- Layers / Load a mask / From disk / choose the mask 2020 and set it as below :

- Layers / Merge group.
I have left that layer on a Normal mode but your may change the mode of it if that suits you better !
6- ADD A NEW RASTER LAYER.
- Set now your foreground with the Pattern "Corel_08_041.jpg " and set as below :
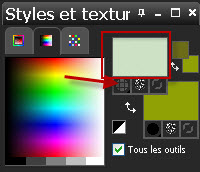
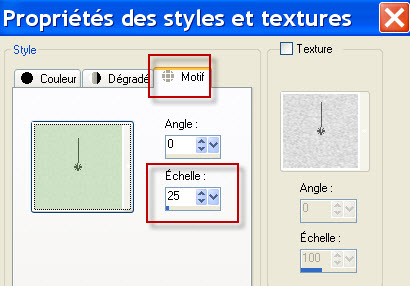
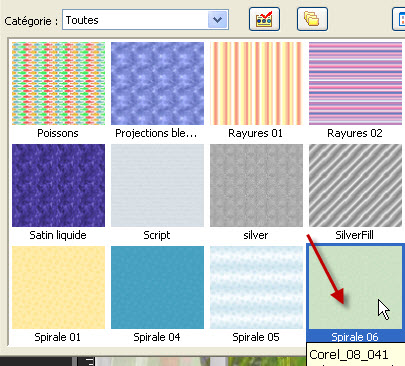
- Flood fill your new layer with this foreground pattern.
7- Effects / Edge effects / Enhance more.
8- I have set the mode of that layer on to Multiplly . It is up to you to see which mode gives a nicer effect with your colours ! You may lower the opacity of that layer if necessary.


Step 2 : The scenery
1- Open the tube " calguismistedpainting21092011.pspimage" or a big size tube of your choice and copy it.
2- Paste it as a new layer on to your tag.
- I have duplicated that layer so that my tube is enhanced and then I did : Layers / Merge down.
3- I have then moved that tube upwards like this :
- Effects / Image effects / offset :

If you use another tube, you will have to use your Move tool to place it !
4- Open the tube "elements kit tendre reverie by yaya (34).pspimage" or a cloud tube of your choice and copy it.
5- Paste it as a new layer on to your tag.
- Place it as on my tag or to your liking.
6- Open the tube "birds.pspimage" or a bird tube of your choice and copy it.
7- Paste it as a new layer on to your tag.
- Place it as on my tag or to your liking.


Step 3 : The Veranda
THE PICTURE WINDOW
1- Set your Material palette with a gradient of your choice to flood fill the frame of your picture window.
I have chosen a metallic gradient set as below :
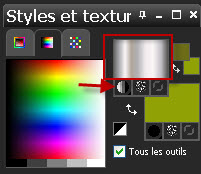
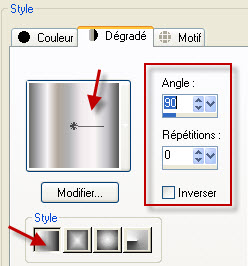

2- ADD A NEW RASTER LAYER.
3- Selections / Load a selection / From disk / choose "fairymist_pierrette.PspSelection" and set it as below :
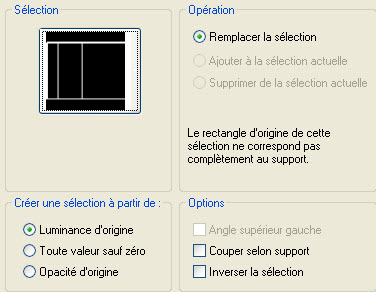
4- Flood fill that selection with your foreground gradient.
Keep selection !
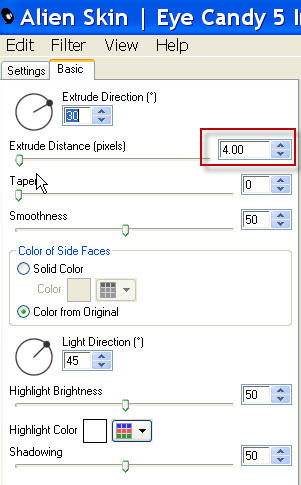
5- Effects / Plugins / Alien skin Eye candy 5 / Impact / Extrude as below :
6- Effects / 3d effects / drop shadow / 1, 1, 40, 1, black.
Deselect all ( Optionnal ! as the next selection with your magic wand will cancel the previous selection !! )
7- Activate your magic wand and set it as below :

Click inside the first window from the left and keep the shift key presses while clicking on the second window from the left as shown below :
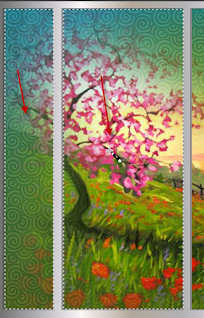
8- Selections / Modify / Expand by 3 pixels
9- ADD A NEW RASTER LAYER.
- Layers / Arrange / Move down.
10- Set your Material palette as below ( Put white in your foreground )
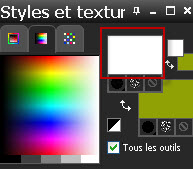
11- Flood fill the selection in white.
- Deselect all.
12- Lower the opacity of that layer between 15 and 20 ( 20 for me ).
THE FLOOR
13- Activate the layer on top of the pile of layers !
- Open the tube" fairymist_sol_pierrette.pspimage" and copy it.
14- Paste it as a new layer on to your tag.
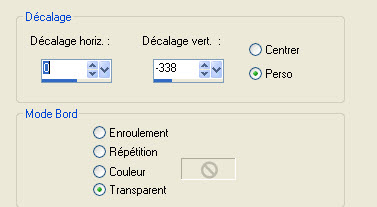
15- Place it like this :
Effects / Image effects / Offset as below :
THE CURTAINS
16- ADD A NEW RASTER LAYER.
- Activate your brush tool , choose the brush "curtain_Brushes_2_by_farmerstochter_8.png.PspBrush" and apply it in the middle of your tag with your foreground white colour (left click )

- With your move tool, move your curtain against the left hand side of your tag, like me.
17- Layers / Duplicate
18- Image / Mirror
- Place it as on my tag or to your liking.
!!! For those who can't use a big brush in their Psp , I have included my brush layer in the material !!!


Step 4 : The people
1- Open the tube " graphsabine_design164.pspimage" or a tube of your choice and copy it.
2- Paste it as a new layer on to your tag.
- Place it as on my tag or to your liking.
3- Effects / 3d effects / Drop shadow / 1, 1, 40, 1, black.
4- Open the tube "kikirou1338_three_cats.pspimage" ( se positionner sur le calque du chat choisi ! ) or a tube of your choice and copy it.
5- Paste it as a new layer on to your tag.
- I have resized my cat tube at 50% ( Resize all the layers NOT checked )
- Place it as on my tag or to your liking.
6- - Effects / 3d effects / Drop shadow / 1, 1, 40, 1, black.


Step 5 : The text and the borders
1 - Apply your signature
2- Open the tube "texte.pspimage"or a tube of your choice and copy it.
- Paste it as a new layer on to your tag.
- Place it as on my tag or to your liking.
( You may use your text tool to write a text of your choice on a new layer ! )
- Make sure everything is at the right place !
2 - Image / add some symmetrical borders of 1 pixel with a colour of your choice:
- Black for me.
4 - Image / add some symmetrical borders of 40 pixels with a colour of your choice :
- White for me.
- Optionnal : Image / add some symmetrical borders of 1 pixel with a colour of your choice:
- Black for me.
( I haven't added that last border on my tag !)
Save your work as a jpeg file and resize it if necessary .
***************
That's it !! You've done it !!
If you 've enjoyed doing my tutorial, it would be nice to write a few words in my guest book !
If you 've had the slightest problem, please, send me a mail so I can see to the problem.
Tutorial translated on the 21st of April 2012
*************
Vous trouverez d'autres versions de ce tag dans la galerie ICI
