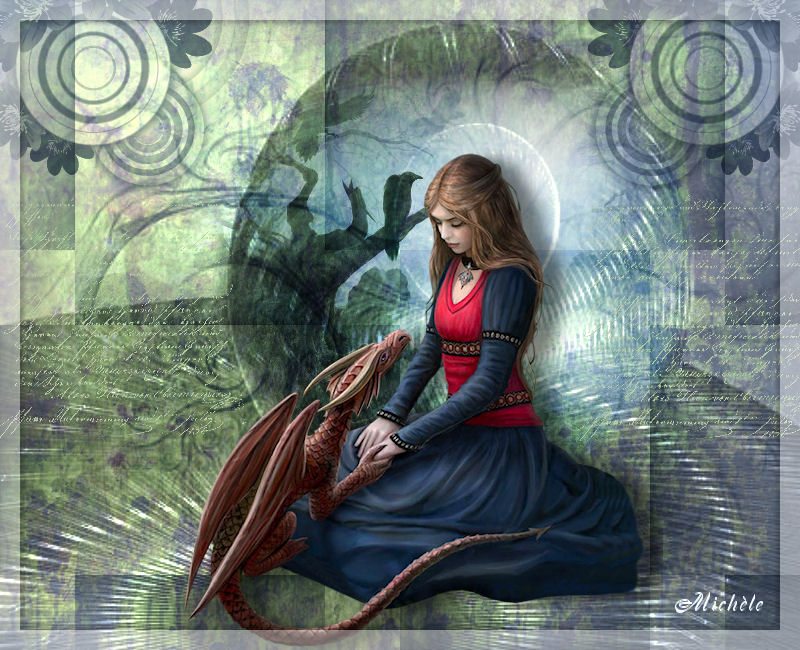

Thank you for putting a link to this tutorial, whenever you display your realization of that tag on a website, on a group or in a mail !
**************************
You'll find some versions of that tag in my gallery HERE
******************
To make that tag, you will need
the material down below :

**************
*It is forbidden to suppress watermarks on the material provided , to alter, mist or rename the tubes in order to respect the work of the tubers
- The tube of the girl is by FBR
- The tube of the scenery is by Nurso
- One of the masks is by Brujita
- One of the brushes I have used is by Coby 17
- The other elements have been found on the net
******************
Preparation
Duplicate your tubes; close the originals and minimize the copies for now.
- Export your brushes in your Psp as custom files.
- Place the mask Brujita 0015 in the mask folder of your Psp files.
*****************
Click here to print the tutorial
*******************
You can use my arrow to follow your work

***************
1- Open a new transparent image of 800 by 650 pixels
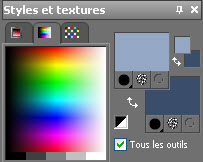
2- Set your Material palette with two colour matching your main tube
My choice : Foreground : Light colour 94a8c4 
Background : Dark colour 3a4e6a 

3- Flood fill your new transparent layer with your light foreground colour.
4- Effects / Texture effects / Weave as below ( same colours as on point 2)

5- Add a new raster layer and select all
6- Open the image "texture28" or a, image of your choice, copy it and paste it into the selection
Deselect all.
I have chosen to set the mode of that layer on to Hard light and lower its opacity to 50
It is up to you to see which mode and which opacity with go better with your main tube.
As I don't merge my layers, you can play with the different modes of your layers at any time !
7- Add a new raster layer and flood fill it with your dark background colour (right click)
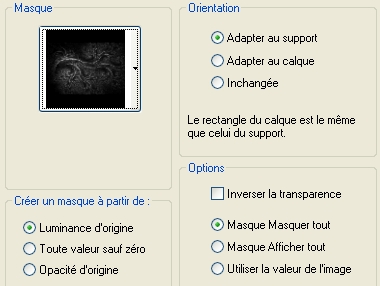
8- Layers / New mask layer from disk / choose Brujita_mask_0015 and set as below :

Adjust / Sharpness / sharpen more
Layers / Merge group.
I have set the mode of that layer on to Multiply
9- Add a new raster layer and flood fill it in white or with a light colour of your choice.
10- Layers / New mask layer / from image / choose Narah_Abstract019 / check only Luminance Legacy
Adjust / Sharpness / sharpen more
Layers / Merge group.
I have set the mode of that layer on to Dodge
11- Layers / duplicate
I have set the mode of that layer on to Soft light
12- Selections / Load a selection from disk / choose "selection_petitami_fairymist" / check Luminance and replace the selection
13- Open the tube "paysage NS_50_1009" or a tube of your choice, copy it and paste it as a new layer.
With your move tool, place your tube in the middle of the selection
14- Selections / Invert
Hit the delete key of your kebyboard.
Deselect all.
15- I have set the mode of that layer on to Hard light
16- Add a new raster layer
Activate your brush tool, set as below and appy the brush Heavenly _flowers_brushes_ 12 with your dark colour in the top left hand side corner of your tag

I have set the mode of that layer on to Multiply and lowered its opacity at 75
17- Layers / duplicate
Image / Mirror
18- Add a new raster layer
With your brush tool, apply the brush "texte lettre" using white or a light colour (click twice without moving !) on the left hand side of your scenery tube; repeat on the right hand side of the scenery tube as on my tag.

19- Open the tube FBR_SecretGarden_Ironshod or a tube of your choice, copy it and paste it as a new layer
I have resized that tube at 75%
Place the tube at the right place
20- Effects / 3d effects / drop shadow / 4, 20, 50, 20, black
21- Add a new raster layer and flood fill it in white
22- Selections / Select all
23- Selections / modify / contract by 20 pixels
Hit the delete key of your keyboard
24- Selections / Invert
25- Effects / 3d effects / drop shadow / 4, 4, 50, 5, black
then - 4 horiz and vert
Deselect all !
26- Lower the opacity of that white frame to about 40
27- Apply your signature
28- Layers / Merge all.
29- Save your work as a jpeg file and resize it if necessary
***************
That's it !! You've done it !!
If you 've enjoyed doing my tutorial, it would be nice to write a few words in my guest book ! If you 've had the slightest problem, please, send me a mail so I can see to the problem !
Tutorial translated on the 6th of February 2010
*****************
You'll find some versions of that tag in my gallery HERE
