
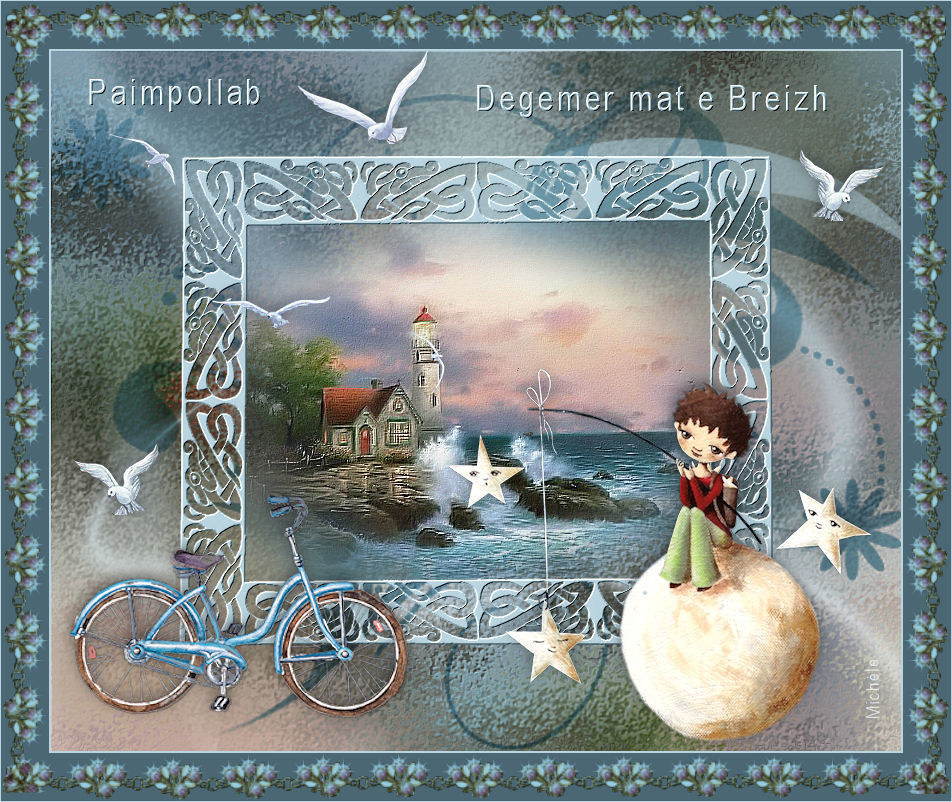
Thank you for putting a link to this tutorial, whenever you display your realization of that tag on a website, on a group or in a mail !
**************************
You'll find some versions of that tag in my gallery HERE
***********************
To make that tag, you'll need the filters :
- Medhi / Melt.
- FM tile tools / Blend Emboss.
- Mura's Seamless / Emboss at alpha.
and the material zip down below :

**************
*It is forbidden to suppress watermarks on the material provided , to alter, mist or rename the tubes in order to respect the work of the tubers
- The tube of the fisher boy is by Odette
- You may find her tubes here.
- The tube of the scenery is by Suzi Sgai.
- The mask 014 is by Tine
- The mask LF-Mask-53 is by Linda Ferdinand.
- The font I have used to write the title of the tutorial is Boutiquedisplaycaps
- The other elements that I haven't created, have been found on the net.
******************
Preparation
To be on the safe side, duplicate your tubes and image in your Psp :
-
Window / Duplicate
- Close the originals and work with the copies !
- Place the selection in the selection folder of your Psp files.
*****************
Click here to print the tutorial
**********************
You can use my arrow to follow your work
Click on it and drag it all along the tutorial !

***************
Tutorial made with PSP XIII
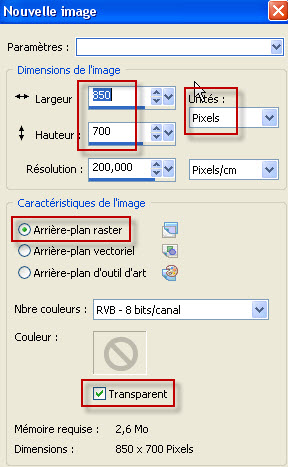
1 - Open a new transparent image of 850 by 700 pixels
2 - Open the scenery tube "SS_Art_01" or a tube of your choice, in your Psp.
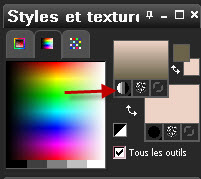
- Set your Material palette with two colours out of that scenery tube as explained below :
- With my dropper tool, I did a left click on the dark colour at the bottom of my scenery tube
and a right click on the light colour at the top of that tube.
- Foreground : Brown 6b634a.
- Background : Pink ecd2c5.
- I have set my foreground with a linear gradient as shown below :

3 - Flood fill your transparent image with that foreground gradient.
4- Copy your scenery tube and paste it as a new layer on to your tag.
5- As I wished that my scenery tube covers most of my tag, I have resized it at 200%
(Resize all the layers NOT checked !).
- It is up to you to see if you need to resize your tube !
- Layer raster 1 is used to fill the spaces of your tag that aren't covered with your tube !
6- On the layer of the scenery : Adjust / Blur / Gaussian blur at 20.
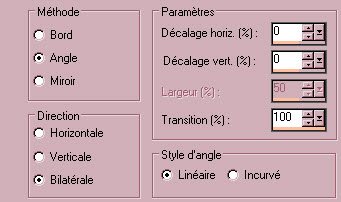
7- Effects / Image effects / Seamless Tiling as below :
8- Layers / Merge all.
9- Effects / Plugins / Medhi / Melt / 2 / 25 / 0.
10- Effects / Plugins / FM tile tools / Blend Emboss default.
11- Add a new raster layer.
12- With your flood fill tool, flood fill that layer in white.
13- Open the mask "LF Mask 53" in your Psp and minimize it.
- Layers / New mask layer / from image / choose LF-Mask-53 and set as below :
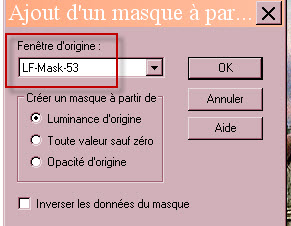
- Layers / Merge group.
- I have lowered the opacity of that layer at 60.
14- Add a new raster layer.
- Selections / select all.
15- Open the mask "creation_tine_masque014" in your Psp and copy it.
16- Paste it into the selection, on that new layer. Deselect all!
17- Edit / Cut.
- Edit / Paste as a NEW IMAGE (Image 2 for me). Minimize that image.
18- With your flood fill tool, flood fill that empty layer of your tag (layer on top of the pile) with a dark colour of your choice.
- I have chosen a dark blue (2c4956).
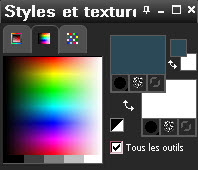
19- Layers / New mask layer / from image / choose Image 2 and set as below :
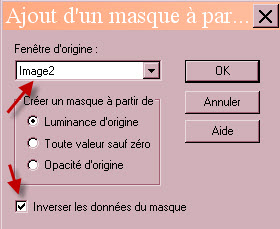
- Adjust / Sharpen / sharpen more .
- Layers / Merge group.
- I have set the mode of that layer on to Hard light and lowered its opacity at 85.
20- Add a new raster layer.
21- Flood fill that layer with a light colour of your choice.
- I have chosen a light blue bad5df.
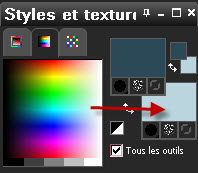
22- Open the mask "Celtic5" in your Psp and minimize it.
- Layers / New mask layer / from image / choose "Celtic5" and set as previously.
- Adjust / Sharpen / sharpen more .
- Layers / Merge group.
23- I have resized my celtic frame at 70% (Resize all the layers NOT checked !).
24- Selections / Load a selection / from disk / Chose "Fairymist_paimpollab" and set as below :
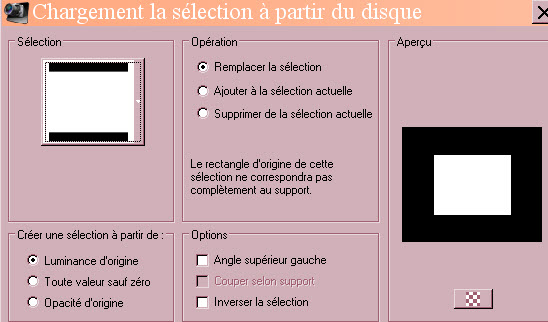
25- Activate layer Group raster 1 as shown below :
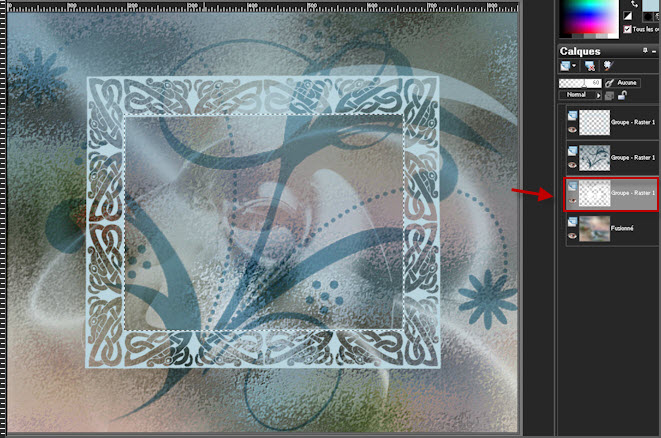
26- Adjust / Blur / Gaussian blur at 20. Keep selection !
27- Activate now the layer just above.
- Adjust / Blur / Gaussian blur at 20. Keep selection !
28- Copy your scenery tube, once more and paste it as a new layer on to your tag.
- See if your tube needs resizing !
- Mine is at the right size as it mainly fills my frame but leaves some spare gaps where we can see the background !
29- Selections / Invert.
- Hit the delete key of your keyboard..
- Selections / select none.
30- On the layer with your scenery tube :
- Effects / Plugins / FM tile tools / Blend emboss default.
31- Activate the layer on top of the pile (Layer with your celtic frame).
- Effects / plugins / Mura's seamless / Emboss at alpha default.
32- Open the tube "pêcheur d'étoiles" d'Odette or a tube of your choice and copy it.
- Paste it as a new layer on to your tag.
- With your eraser tool, erase the watermark.
- Image / Mirror.
- I have resized my tube at 75% (Resize all the layers NOT checked !).
- If necessary : Adjust / Sharpness / sharpen.
- Place it like me or to your liking.
33- Effects / 3d effects / drop shadow / - 4, -1, 40, 20, black.
34- Open the tube "bicyclette"or a tube of your choice and copy it.
- Paste it as a new layer on to your tag.
- Place it like me or to your liking.
35- Effects / 3d effects / drop shadow / - 4, -1, 40, 20, black.
36- Open the tube "seabirds"or a tube of your choice and copy it.
- Paste it as a new layer on to your tag.
- I have placed my tube like this :
- Effects / Image effects / Offset :
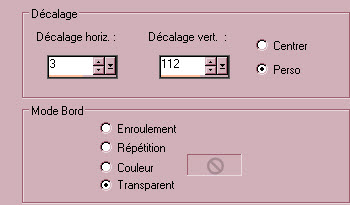
37- Effects / 3d effects / drop shadow / - 4, -1, 40, 20, black.
38- Open the tubes "Fairymist_Paimpollab_text1" et text2, copy them and paste them as new layers on to your tag.
- You may choose to use another text !
- Place to your liking.
39- Apply your signature.
40- Make sure everything is at the right place !
- Image / add some symmetrical borders of 2 pixels with your light background colour:
- bad5df for me.
41- Image / add some symmetrical borders of 48 pixels with a darker colour :
- 4b6773 for me.
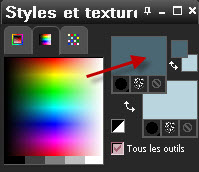
42-- Image / add some symmetrical borders of 1 pixel with your light background colour:
- bad5df for me.
43- Open the tube "jewel charm strand 1"or a tube of your choice and copy it.
- Paste it as a new layer on to your tag.
- It is at the right place and I have set the mode of that layer on to Overlay.
44- Merge all and save your work as a jpeg file
*************************
That's it !! You've done it !!
If you 've enjoyed doing my tutorial, it would be nice to write a few words in my guest book !
If you 've had the slightest problem, please, send me a mail so I can see to the problem
Tutorial translated on the 20th of October 2014
*************
You can find some versions of that tag in my gallery HERE
