
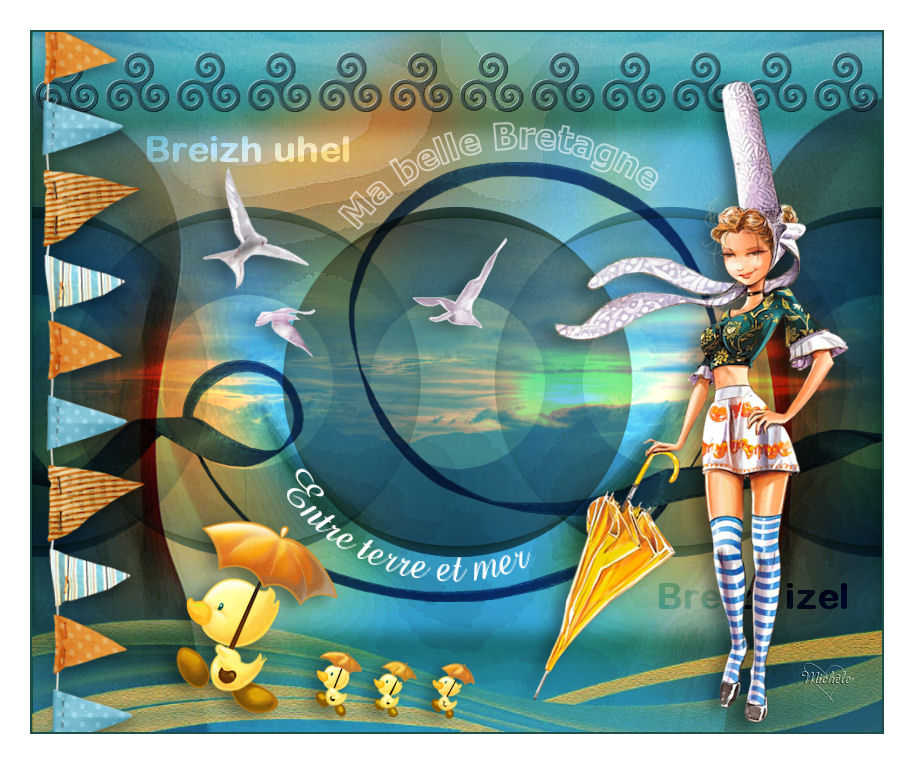
Thank you for putting a link to this tutorial, whenever you display your realization of that tag on a website, on a group or in a mail !
**************************
You'll find some versions of that tag in my gallery here
************************
To make that tag, you'll need the filters :
- Mirror Rave / Quadrant Flip
- Flaming Pear / Flexify 2
- Mura's Meister / Copies
and the material zip down below :

**************
*It is forbidden to suppress watermarks on the material provided , to alter, mist or rename the tubes in order to respect the work of the tubers
- The image "JHanna_361 background.jpg" is by Jhanna
You may join her sharing group here
- The tubes of the young girl and of the ducks are by Kikirou
- The tube of the scenery is by Guismo
You may find her tubes on Dakara's site
- The tube of the little flags are made from an element of a scrap kit by Calimero
- The lace is an element of the Manuella scrap by Scrap'Anges
- The other elements that I haven't created, have been found on the net.
******************
Preparation
To be on the safe side, duplicate your tubes and image in your Psp :
-
Window / Duplicate
- Close the originals and work with the copies !
- Place the selection files in the selection folder of your Psp files.
- Leave the file "Fairymist_o_ma_belle_flexify2.q2q" in your material folder.
*****************
Click here to print the tutorial
**********************
You can use my arrow to follow your work
Click on it and drag it all along the tutorial !

***************
Tutorial made with PSP XIII

Step 1 : The background of the tag
- If you have decided to use my colours, here is what you can do :
- Open the colour palette "Fairymist_Palette_o_ma_belle", in your Psp and using your dropper tool, pick out my colours to set your Material palette ( left click for your foreground / right click for your background )

1 - Open a new transparent image of 850 by 700 pixels.
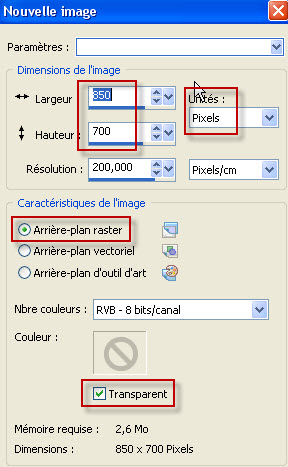
2 - Selections / Select all.
3- Open the image " JHanna_361 background.jpg" and copy it.
- If you wish to change the colour of that background so that it matches your tubes, I advise you to use the effect Hue map :
- Adjust / Hue and saturation / Hue map.
4- Paste that image (modified or not !) into the selection of your transparent image.
- Deselect all.
5- Set your Material palette with two colours out of your main tube.
- Be careful, the choice of these two colours is very important !
- My choice : Foreground : colour 5394d3
Background : colour fdfdfc
- Set your foreground with a linear gradient as below :
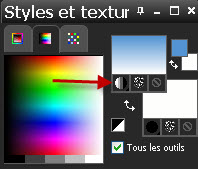
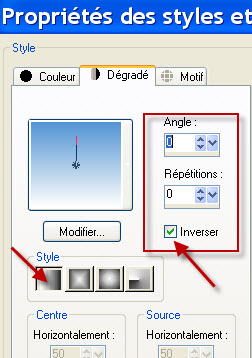
6 - ADD A NEW RASTER LAYER.
- Flood fill your transparent image with that foreground gradient.
7- Effects / Texture effects / Weave as below :

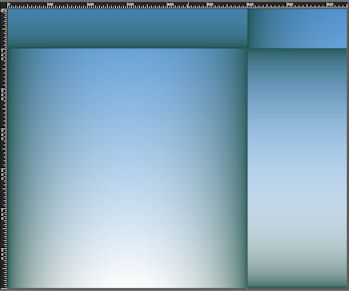
8- Effects / plugins / Mirror Rave / Quadrant Flip default :

9- I have set the mode of that layer on to Overlay. It is up to you to see which mode gives a better effect.
- If the colours you have chosen on point 5 dont look that nice, you may have to choose other colours !
10- Layers / Duplicate. I have set the mode of that layer on to Multiply.
- See which mode gives you the best effect.
11- Don't forget to save your work in case the use of the next effect makes your Psp freeze !
- Effects / plugins / Flaming Pear / Flexify 2 as below :
- If my preset doesn't work on your Psp, use my settings as shown below :
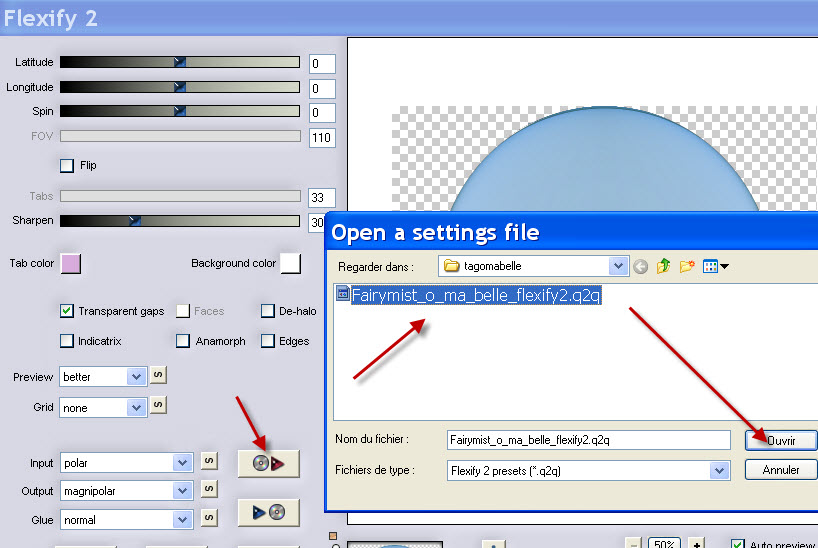
12- Layers / Duplicate.
13- Image / Resize at 50% (Resize all the layers NOT checked).
14- Selections / select all.
- Selections / Float.
- Selections / Defloat.
15- Hit the delete key of your keyboard. That layer is now empty !! Keep selection !
16- Activate the layer just below (the one with your big circle) and hit the delete key of your keyboard. Keep selection !
17- Activate the layer just below ( raster 2) and hit the delete key of your keyboard.
- Deselect all!!!
18- Activate the layer on top of the pile (the one which is empty) and delete it (Layers / Delete).
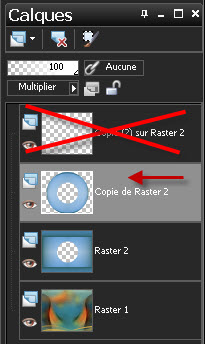
19- Make sure your top layer is now activated.
20- Effects / Image effects / Seamless tiling as below :

21- Image / Resize at 50% (Resize all the layers NOT checked).
22- Effects / Image effects / Seamless tiling as previously.
23- Activate layer Raster 2 :

- Selections / Load a selection / from Disk / Choose "Fairymist_o_ma_belle_1" and set as below :

24- Adjust / Blur / Gaussian blur at 10.
25- Selections / Load as selection / from disk / Choose "Fairymist_o_ma_belle_2" and set as previously.
26- Adjust / Blur / Gaussian blur at 10.
- Deselect all.

Step 2 : Scenery and decorations
- Stay on layer Raster 2 !
1- Open the tube "calguismist7112011.pspimage" and copy it.
2- Paste it as a new layer on to your tag.
- I have set the mode of that scenery tube on to Dodge. It is up to you to see which mode suits you better.
3- Activate the layer on top of the pile of layers (copy of raster 2).
- Open the tube "ScrapAnges_Collab_El06.pspimage"and copy it.
4- Paste it as a new layer on to your tag
5- I have placed my ribbon as below :
- Effects / Image effects / Offset as below :
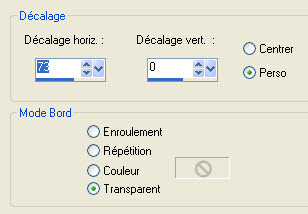
- You can colorize that ribbon or put it in a mode that gives it a nice tint to match with the rest.
6- Open the tube "Fairymist_o_ma_belle_triskel.pspimage"and copy it.
7- Paste it as a new layer on to your tag
- I have placed my triskel as below :
- Effects / Image effects / Offset as below :

- Don't forget to replace that "triskel" (a celtic symbol) by another tube or apply a brush on another layer, if you change the theme !!!
8- Effects / plugins / Mura's Meister / Copies as below :
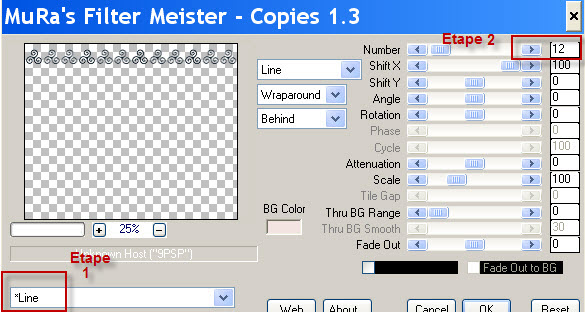
- I have lowered the opacity of that layer on to 65.
9- Open the tube "calimero_68-scrap_kit.pspimage" or a tube of your choice and copy it.
10- Paste it as a new layer on to your tag
- Place it on the left hand side of your tag.
11- For my tube "calimero_68-scrap_kit.pspimage" : Effects / 3d effects / drop shadow / 4, 4, 40, 20, black.
- If your tube is misted, no need to put a drop shadow.
12- Now, you can merge all your layers if you wish.
I must admit I prefer to keep all my layers until the end as it allows me to change the mode of them until the last minute !!

Step 3 : The texts
(If writing on a circle is a problem for you, I have included my texts in the material as well as the vectorial circle I have used !)
1- In your Material palette, set your foreground with white and close your background.
- Activate your Ellipse preset shape tool (Letter Q), set as below and draw a circle a little bigger than the circle of your ribbon as shown below :

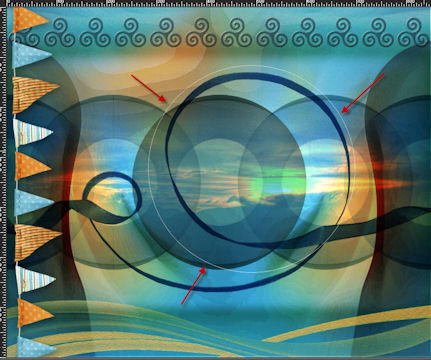
2-ADD A NEW RASTER LAYER.
- Activate your text tool, set as below and write down, on the circle, your first text ( "Ma belle Bretagne" for me) as shown below :

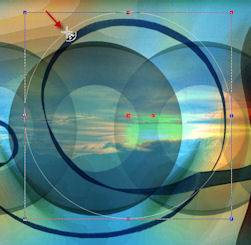
- Apply your changes and convert your vectorial layer into a raster one. (Layers / convert to raster layer).
- With your move tool, place your text to your liking.
3- Activate the layer where your vectorial circle is.
- Image / Flip.
- ADD A NEW RASTER LAYER.
- In your Material palette, set your background with white and close your foreground.
- Activate your text tool, set as belwo and write your second text at the bottom of your circle ( "Entre terre et mer " for me),

Apply your changes and convert your vectorial layer into a raster one.
- With your move tool, place your text to your liking.
4- Close the layer where your vectorial circle is or delete it.
5- I have added two Breton words that you will find included in my material and that you can copy and paste as new layers on to your tag.
- The layers of those words are in two different modes (Dodge and Burn).
- Place those texts to your liking or as on my tag.
For information : Breizh uhel = High Brittany / Breizh izel = Lower Britanny !
6- It is up to you to see which modes to use on these words.

Step 4 : The main tubes and the borders.
1- Open the tube "KikiRou58.pspimage" or a tube of your choice and copy it. I have copied the layer of the woman !
2- Paste it as a new layer on to your tag
- I have resized that tube at 75 % (Resize all the layers NOT checked).
3- Place the tube on the right hand side of your tag, like me.
4- Effects / 3d effets / drop shadow / 4, -10, 40, 20, black.
5- I have, then, copied, one by one the three layers of birds that are on Kikirou's tube and have pasted them as new layers on to my tag.
- I have resized these three tubes at 75% (Resize all the layers NOT checked).
- I have placed them to my liking and have added on each of them the same drop shadow as on point 4.
6- Open the tube "KikiRou85.pspimage" or a tube of your choice, copy it and paste it as a new layer on to your tag.
- I have resized that tube at 50 % (Resize all the layers NOT checked).
- Place the tube as on my tag or to your liking.
7- Effects / 3d effects / drop shadow / 4, -10, 40, 20, black.
8- Apply your signature
- Make sure everything is at the right place
9- Image / add some symmetrical borders of 2 pixels with a dark colour :
1e4e47 for me.
10- Image /add some symmetrical borders of 30 pixels with a colour of your choice :
White for me
- Save your work as a jpeg file.
***************
That's it !! You've done it !!
If you 've enjoyed doing my tutorial, it would be nice to write a few words in my guest book !
If you 've had the slightest problem, please, send me a mail so I can see to the problem.
Tutorial translated on the 16th of march 2013
*************
You'll find some versions of that tag in my gallery here
