

Thank you for putting a link to this tutorial, whenever you display your realization of that tag on a website, on a group or in a mail !
**************************
You'll find some versions of that tag in my gallery HERE
*****************
To realize that tag, you'll need the plugins :
- Mura's Meister / Clouds, Tone
- Flaming pear / flexify 2
- Mura's seamless / Emboss at alpha
AP Innovations / lines silverlining
and the material zip down below :

**************
*It is forbidden to suppress watermarks on the material provided , to alter, mist or rename the tubes in order to respect the work of the tubers
- The tube of the woman is by Mtfp
- The other elements have been found on the net
************************
Preparation
- Duplicate your tubes and masks. Close the originals and minimize the copies for now.
- Export your brush in your psp as a custom brush
- Place your selections in your selection folder
*****************
Click here to print the tutorial
*******************
You can use my arrow to follow your work

***************
1- Open a transparent image of 800 by 650 pixels
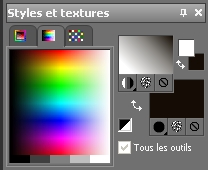
2- Set your colour palette with two colours matching your main tube
My choice : Foreground : colour white
Background : dark colour 160f07
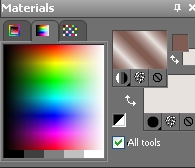
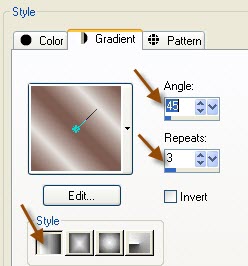
Set your foreground with a linear gradient as below :
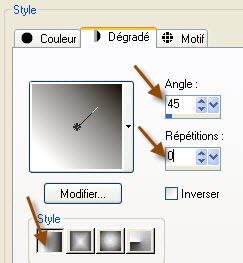
3- Flood fill your transparent layer with that gradient
4- Layers / Duplicate
5- Activate your duplicated layer ( copy of Raster 1) :
Effects / plugins / Murameister / tone / default as below :
6- Add a new raster layer and set your foreground with another colour out of your main tube; I have chosen the colour 964e49 as shown below :

7- Effects / plugins / Mura's Meister / Clouds as below
( if you can't see the colours of your palette, click on Reset Colors )
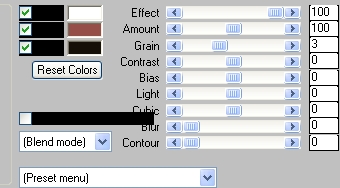
Set the mode of that layer to Overlay
Layers / merge down
8- Add a new raster layer and flood fill it with white
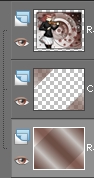
Layers / new mask layer / from image / choose " Narah_Abstract020.jpg" and only check Source Luminance
Adjust / sharpen / sharpen more
Layers / merge group
9- Activate now your first layer , the one on the bottom of the pile ( raster 1 )
Layers / arrange / Bring to top
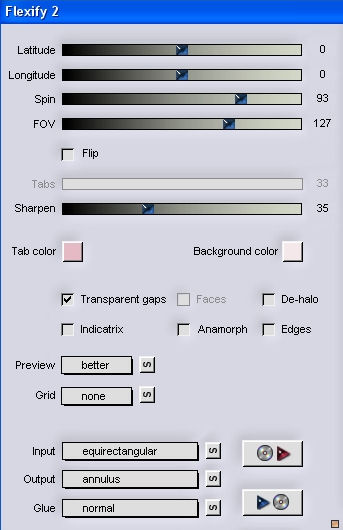
10- Effects / plugins / Flaming pear / Flexify 2 as below :
Set the mode of that layer to Screen
11- Layers / duplicate
Image / resize at 25 % ( Resize all the layers NOT checked )
12- Add a new raster layer
- Selections / load a selection from disk / choose " fairymist_music_1.PspSelection" / Check Source Luminance and Replace the selection
13- Flood fill that selection with your dark background colour
Select none
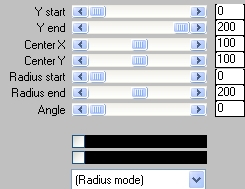
14- Effects / plugins / Mura's Meister / Pole transform default as below :
15- Layers / duplicate
Image / resize at 75% ( Resize all the layers NOT checked )
- Effects / image effets / Offset / Horiz : - 110 / vert : 0 / check custom and transparent
16- Repeat step 15 another time
17 - Make sure your top layer is activated !
Layers / merge down
18- Repeat step 17 so that all your fancy shapes layers are on the same layer !
19- Image / mirror
Image / resize at 120 % ( Resize all the layers NOT checked )
20- Effects / image effects / offset / Horiz : 50 / vert : 50 / check custom and transparent
21- I added an emboss effect on that layer :
Effects / plugins / Mura's Seamless / Emboss at alpha default
It is up to you to do it or not ( you may prefer to change the mode of that layer !
22- Activate the tube " texte_music_fairymist.pspimage", copy it and paste it as a new layer onto your tag ( it is at the right place !)
You may colorize that text or set the mode of the layer to Luminance legacy so that it matches your colours
You might prefer to write your own text , using a vectorial circle like me !
23- Add a new raster layer
Activate your brush tool , set as below , and apply the brush "fairymist_bulle" or a brush of your choice , several times in the top right hand side of your tag; just change colours and sizes like me

If you prefer , you may use my layer ( You can colorize the circles in different colours, using your free hand selection tool to choose the ones you want to be in a particular colour )
You might prefer to use another element of decoration !
24- Merge all your circle layers so they are all on one layer ( if you have drawn them on separate layers !)
I put an emboss effect on that layer as on step 21
You may prefer to change the mode of that layer !
25- Layers / duplicate
Image / mirror
Image / flip
26- Activate the tubes "modeles_fleurs_music_fairymist.pspimage", copy them, one by one, and paste them as new layers onto your tag
Duplicate them as many times as you wish and place them in the bottom right hand side of your tag
Merge all these layers with the flowers
I did : Effects / edge effects / Erode
Then I set the mode of that layer to Multiply
( You may use my layer " fleurs_music_fairymist.pspimage" if you don't feel like making all these flowers / it will be up to you to colorize the flowers or change the mode of my layer ! )
27- Layers / duplicate
Image / mirror
Image / flip
28- Activate the tube "mtfp_174_birthing_monsoons_by_elpinoy.pspimage" or a tube of your choice, copy it and paste it as a new layer onto your tag
I have resized the tube at 85% ( Adjust / sharpen )
Place as on my tag or to your liking
29- Effects / 3d effects / drop shadow / 0 / - 1 / 61 / 41,58 / black
30- Add a new raster layer and apply your signature
31- Make sure everything is in its place
Image / add some symmetrical borders of 2 pixels in black or in a colour of your choice
32- Layers / Promote Background layer
33- Image / resize at 90 °% (Resize all the layers NOT checked )
34- Effects / 3d effects / drop shadow / 0, 0, 100, 50, black
35- Add a new raster layer
Layers / arrange / move down
36- Set your colour palette with two colours matching your main tube
My choice : Foreground : 805c52
Background : e7e2de
Set your foreground with a linear gradient as follows :
37- Flood fill that transparent layer with that gradient and stay on that layer
38- Selections / load a selectlion from disl / choose " fairymist_music_2.PspSelection" / Check Source Luminance and Replace the selection
Selections / Promote selection to layer !!
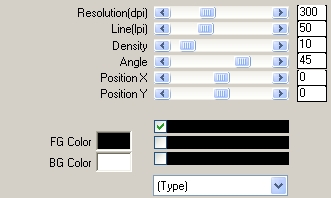
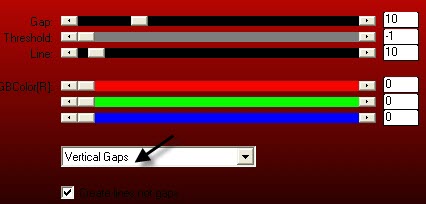
39- Effects / plugins / AP01(Innovations) / linesilverlining as below :
Select none
40- Layers / duplicate
Image / mirror
Image / flip
Layers / merge down
41- Activate your magic wand, set as below ,click in the center of your merged layer

42- Activate your bottom layer ( the layer you flood filled on step 27)
Effects / plugins / Murameister / tone as on step 5
Select none
43 - Image / add some symmetrical borders of 1 pixel in white or other colour of your choice
Image / add some symmetrical borders of 2 pixels in black or other colour of your choice
Image / add some symmetrical borders of 1 pixel in white or other colour of your choice
44- Save your work as a jpeg file and resize it if necessary
***************
That's it !! You've done it !!
If you 've enjoyed doing my tutorial, it would be nice to write a few words in my guest book ! If you 've had the slightest problem, please, send me a mail so I can see to the problem !
Tutorial translated on the 19th of june 2010
*****************
Other versions of that tag