Thank you for putting a link to this tutorial, whenever you display your realization of that tag on a website, on a group or in a mail !
**************************
You'll find some versions of that tag in my gallery HERE
***********************
To make that tag, you'll need the plugins :
- Deformation / Fluttering flag here
- Flaming pear / Flood here
and the material zip down below :

**************
*It is forbidden to suppress watermarks on the material provided , to alter, mist or rename the tubes in order to respect the work of the tubers
- The tube of the swan and of the poppies is by Guismo
You'll be able to find her tubes on Dakara' s site here
and you can join in her sharing group here
- The brush "Spring_Brushes_9.png" is by Coby17
- The background " Paperzigzag" is by Dilo
The other elements are of my creation or have been found on the net
******************
Preparation
- To be on the safe side, duplicate your tubes, mask and image in your Psp :
-
Window / Duplicate
- Close the originals and work with the copies !
- Place the two brush files in the brush folder of your Psp files.
*****************
Click here to print the tutorial
**********************
You can use my arrow to follow your work
Click on it and drag it all along the tutorial !

***************
Tutorial made with PSP XIII

Step 1 : The background of the tag
- If you use my colours, open the colour palette "Fairymist_Palette_Michounette", in your Psp and using your dropper tool, pick out my colours to set your Material palette ( left click for your foreground / right click for your background )

- Open a new transparent image of 800 by 650 pixels

Set your Materials palette with two contrasted colours out of your main tube
My choice : Foreground : light colour bebc9a
Background : Dark colour 242717
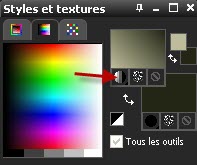
Set your foreground with a linear gradient as follows :
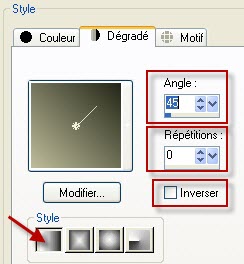
- Flood fill your transparent image with that gradient
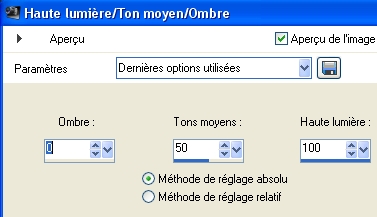
- Adjust / Brightness and contrast / High light / Mid tone / Shadow ...as below
That effect should enlighten your colour
If your colours are already quite bright, don't use that effect !
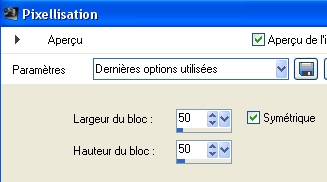
- Effects / Distortion Effects / Pixelate as below :
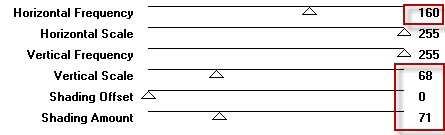
- Effects / Plugins / Deformation / Fluttering flag as below :
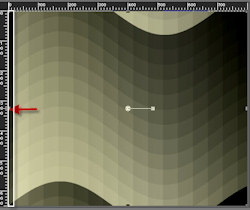
- Activate your Raster deform tool ( Letter D) and stretch to the left, the little square which you can see against the left hand side border of your tag. The aim is to get rid of the vertical black 20 pixels width band which you can see on the left
When you have finished it , click on another tool to get rid of your deform tool !
- Open the image "paperzigzag.jpg" in your Psp and copy it.
- Paste it as a new layer on to your tag.
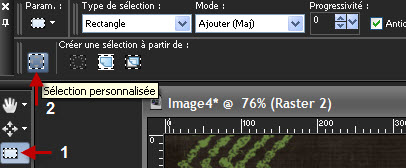
- Activate the selection tool ( Letter S ) as shown below ( n° 1) and click on Custom selection as shown below ( n°2)
- Set as below

- Selections / Invert
- Hit the delete key of your keyboard and Select none
- Set the mode of that layer on to Screen
- Activate your deform tool, once more and set it as shown below so that your vertical zig zag band becomes narrower


- Effects / Edge effects / Enhance
- Layers / Merge all
Step 2 : The water
- Activate your selection tool ( Letter S) and click on the custom selection as on step 1
- Set as below :
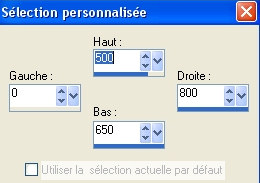
- Selections / Promote selection to layer
- Effects / plugins / Flaming pear / Flood set as below
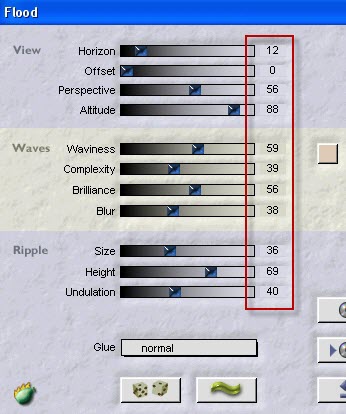
- Selections / Select none
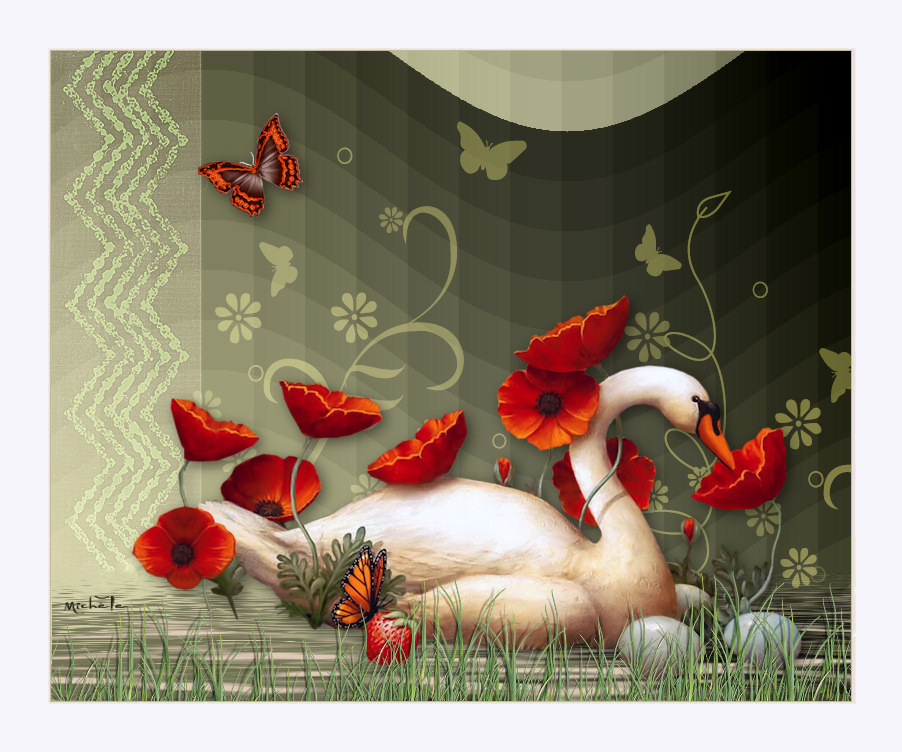
Step 3 : The main tube ( person, animal .....)
- Open the tube "calguisswanpoppies19311.pspimage" or a tube of your choice, in your Psp and copy it.
- Paste that tube as a new layer on to your tag
- I have resized my tube at 60%
- Place the tube at the right place ( on the water )
If necessary you may repeat step 2 on your main tube
- Effects / 3d effects / drop shadow of your choice / 4, 4, 40, 20, black for me .
Step 4 : The grass or the flowers
- Open the tube "Herbe_Michounette.pspimage"or a tube of your choice, in your Psp and copy it.
- Paste that tube as a new layer on to your tag
- Place it as on my tag
Step 5 : The fancy brush
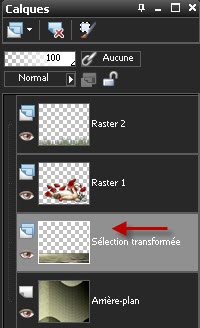
- In your layers palette, activate the layer where the water is as shown below :
- Add a new raster layer
- Activate your brush tool ( Letter b ), set it as below with the brush "Spring_Brushes_9.png_by coby 17.PspBrush" or a brush of your choice
- Apply that brush on your layer with your light foreground colour (the gradient has been cancelled ). Repeat on another layer !

- With your Eraser tool ( size approx. 60) delete the parts of your brushes that have come across the vertical zig zag band or the water.
- I have set the mode of my layer on to Hard light ; it is up to you to see which mode(s) suit you better. ( I have applied my brush twice but I have put them both on the same layer !)
Step 6 : Decoration : Butterfly or other ...
- Open the tube "Papillon_Michounette.pspimage"or a tube of your choice, in your Psp and copy it.
- Paste that tube as a new layer on to your tag
- Place it as on my tag or to your liking
- Apply your signature
Step 7 : The borders
- Make sure everything is at the right place !
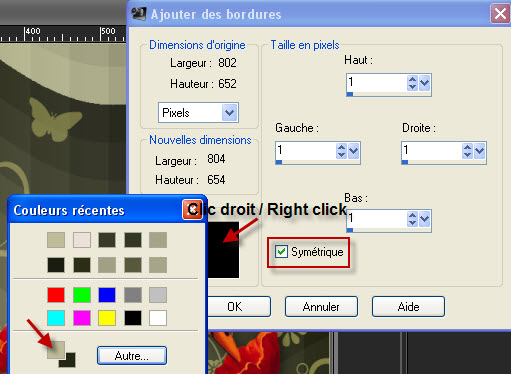
- Image / add some symmetrical borders of 1 pixel with a colour of your choice ( I have chosen my light foreground colour )
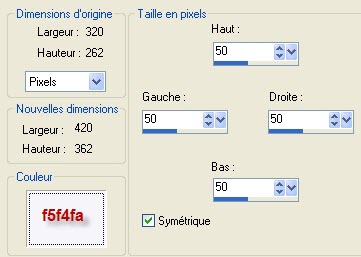
- Image / add some symmetrical borders of 50 pixels with a colour of your choice ( I have chosen a light colour out of my main tube f5f4fa )
- Save your work as a jpeg file and resize it if necessary
***************
That's it !! You've done it !!
If you 've enjoyed doing my tutorial, it would be nice to write a few words in my guest book ! If you 've had the slightest problem, please, send me a mail so I can see to the problem
Tutorial translated on the 7th of May 2011
*************
Other versions of that tag