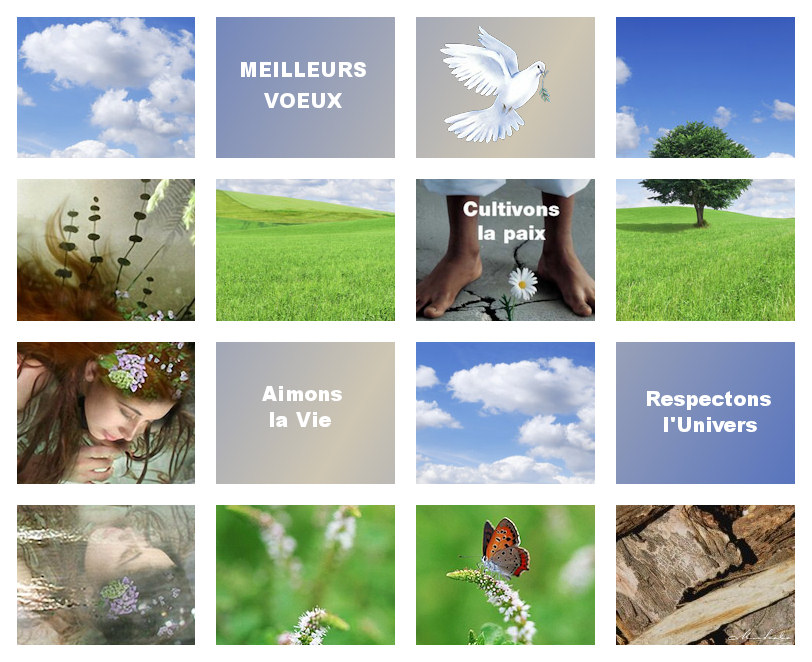

Thank you for putting a link to this tutorial, whenever you display your realization of that tag on a website, on a group or in a mail !
**************************
You'll find some versions of that tag in my gallery here
***********************
To realize that tag, you'll need some images or tubes of your choice
and the plugins :
- Richard Rosenman / grid generator ici
- Transparency ici
******************
Click here to print the tutorial
*******************
You can use my arrow to follow your work

***************
1- Open a new transparent image of 800 by 650 pixels
2- Add a new raster layer
With your flood fill tool , flood fill that layer with any colour
3- Effects / plugins / Richard Rosenman / grid generator as below :

4- Effects / plugins / Transparency / Eliminate White
5- Selections / select all
Selections / Float
Selections / Modify / Expand by 10 pixels
6- With your flood fill tool, set as below, flood fill your selection in white like me or with a colour of your choice

Selections / Select none
7- Activate your bottom layer ( layer raster 1)
Activate your first image, copy it and paste it as a new layer
If your picture is too big, resize the image to your liking ( 50 or 75% for example )
Place the image underneath the squares you want to put them in
8- Activate your top layer , the layer with your grid
With your magic wand , set as below, select some squares of your choice (Keep the shift keep pressed to select several squares at the same time )

Selections / Modify / Expand by 2 pixels
Selections / Invert
9- Activate the layer where your image is ( just underneath the grid )
Make sure your image is at the right place, otherwise move it with your Move tool
Hit the delete key to suppress the parts of your image which are outside the selected squares
Selections / Select none
A little note : I could have pasted my image in the selected squares but the problem is that the image is often distorted that way because the proportions of the image and of the selection aren't the same....So I much prefer work that way I have shown you !
10- Proceed in the same way with your other images !
11- I have left a few squares empty in order to write a few words in them
I have used the Arial font to write my words
12- In the end, activate your bottom layer ( raster 1) and choose one or two colours out of your pictures and flood fill your transparent bottom layer with it.
Here is my choice
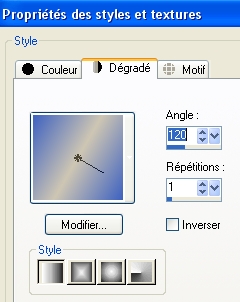
Foreground : colour 3e62c0
Background : colour cec6b3
I have made a linear gradient in my foreground :


It is up to you to see which sort of background you wish ( colour, texture, image ) to make your images come out nicely !
13- Add a new raster layer and apply your signature
14- Image / add some symmetrical borders of 6 pixels with the colour you have chosen on step 2
29- Save your work as a jpeg file and resize it if necessary
***************
That's it !! You've done it !!
If you 've enjoyed doing my tutorial, it would be nice to write a few words in my guest book ! If you 've had the slightest problem, please, send me a mail so I can see to the problem !
Tutorial translated on the 26th of december 2010
**********************
Autres versions de ce tag / Other versions of that tag
