Thank you for putting a link to this tutorial, whenever you display your realization of that tag on a website, on a group or in a mail !
**************************
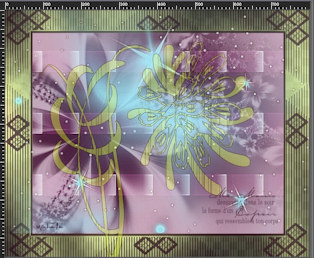
You'll find some versions of that tag in my gallery HERE
***********************
To realize that tag, you'll need the plugin :
- Graphic plus / Cross shadow and Panel stripes
and the material zip down below :

**************
*It is forbidden to suppress watermarks on the material provided , to alter, mist or rename the tubes in order to respect the work of the tubers
- The tube of the woman is by Alas
Muchas gracias Alas !
- The star brush is by LadyVictoire
The other elements are of my creation or have been found on the net
******************

Preparation
- To be on the safe side, duplicate your tubes and masks in your Psp :
-
Window / Duplicate
- Close the originals and work with the copies !
- Place the 6 brush files in the brush folder of your Psp files.
- Place the selection file "fairymist_meg_1.PspSelection" in the selection folder of your Psp files.
Place the preset file "RA_preset shape_ornamental corners.PspShape" in the preset shapes folder of your Psp files
- Double click on the font you want to use ( outside your Psp !) and minimize it.
*****************
Click here to print the tutorial
**********************
You can use my arrow to follow your work
Click on it and drag it all along the tutorial !

***************
Tutorial realized with PSP XIII
Step 1 : The frame of the tag
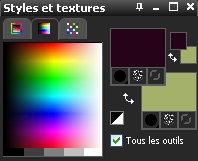
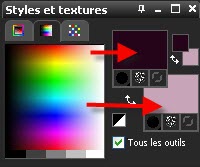
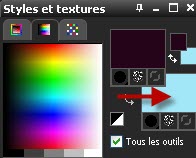
- If you use my colours, open the colour palette "Fairymist_Palette_Meg", in your Psp and using your dropper tool, pick out my colours to set your Material palette ( left click for your foreground / right click for your background )
The tube I have chosen shows two main colours ( pink and maroon ) and two secondary colours ( green and turquoise )
- Open a new transparent image of 800 by 650 pixels

- Set your Materials palette with two colours out of your main tube
My choice : Foreground : dark colour 28061c
Background : Light colour a4b16a
- Activate your flood fill tool and flood fill your transparent image with your light background colour ( Right click )
- Effects / Plugins / Graphic plus / Cross shadow default
- Add a new raster layer : Layers / New raster layer
- Flood fill that layer with your dark foreground colour ( Left click)
- Open your mask "Gertje9.jpg" in your Psp and minimize it.
- Layers / New mask layer / From image / choose "Gertje9.jpg" and set as below :

- Adjust / Sharpness / Sharpen more
- Layers / Merge group
- Selections / Load a selection / from disk and choose "fairymist_meg_1.PspSelection", set as below :
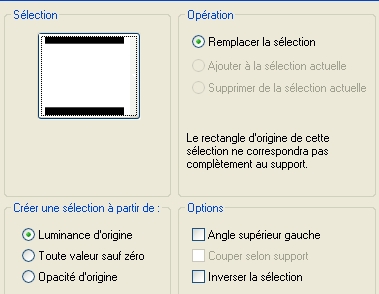
- Hit the delete key of your keyboard and remove the inside of your frame
- Keep the selection ! and activate the layer underneath ( raster 1)
Hit the delete key of your keyboard once more !
and keep the selection !
- In your layers palette , lower the opacity of layer raster 1 if necessary ( 85 for me )
- Keep the selection !
- In your layers palette, activate your top layer ( Group raster 2)
- Selections / Modify / Select Selection borders as below :
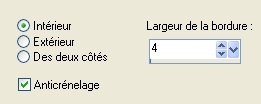
- On the same layer , flood fill the selected borders with your dark foreground colour
- Selections / select none
- In your layers palette , lower the opacity of that layer if necessary ( 80 for me )
Step 2 : The background of the tag
- With your magic wand , set as below , select the inside of your frame

- Selections / Modify / Expand by 4 pixels
KEEP THAT SELECTION UNTIL I TELL YOU TO DESELECT ALL
- Add a new raster layer
- In your materials palette , place another light colour out of your tube in your background ( pale pink : c9a3b7 for me )
- Flood fill that new transparent layer with your new light background colour
- Add a new raster layer
- Flood fill that new transparent layer with your dark foreground colour
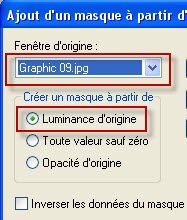
- Open the mask "Graphic 09.jpg" in your Psp and minimize it.
- Layers / New mask layer / from image / choose "Graphic 09.jpg" and set as below :
- Layers / Merge group
- Effects / Plugins / Graphic plus / Panel stripes default ( 31, 132, 70)
- Effects / Edge effects / Enhance more
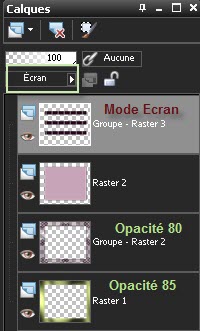
- In your layers palette, set the mode of that layer on to Screen
- If the result is too pale, you may duplicate that layer !
- Your selection is still active !!
My layers palette at that stage :
Step 3 : The brush Fantastic 7
- Add a new raster layer
- Activate your brush tool, set as below and choose the brush "fantastic_7.PspBrush"

- Apply that brush, with your dark foreground colour. Place the tip of the brush as shown below !
Because of the selection, the brush won't go on your frame !
- If you Psp doesn't allow you to use such a big brush, you can use my layer "Brush_meg_1.pspimage" included in the zip : copy it and paste it into the selection of your new layer and colorize it to your liking !
NOW DESELECT ALL !!!!!!!!!!!
- In my layers palette, I have set the mode of that layer on to Hard light , it is up to you to see which mode suits your colours better !
- Layers / Arrange / Move down
Step 4 : The brush Lady Victoire
- In your Materials palette , place another light colour out of your tube, in your background : turquoise 9ee8f7 for me
- Activate your top layer
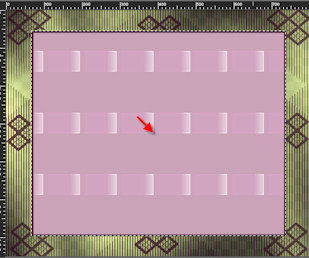
- With your brush, set as below, choose the brush "LadyVictoire_Stars_4_1.jpg.PspBrush"

Apply that brush , with your light background colour. Place the tip of your brush in the middle of your tag ( approx)
- If you Psp doesn't allow you to use such a big brush, you can use my layer "Brush_meg_2.pspimage" included in the zip : copy it and paste it as a new layer and colorize it to your liking !
Step 5 : The preset shape RA ornamental
- Set your Materials palette as on step 1
- Activate your Preset shape ( letter P), set as below and choose the shape " RA ornamental corners 3" or a shape of your choice

- Apply the shape to your liking or like on my tag
- Layers / Convert to raster layer
- I did : Image / Mirror
- If you have a problem using the preset shape tool, you may use my layer "forme_meg.pspimage", copy it and paste it as a new layer onto your tag and colorize it to your liking
- Place the shape to your liking or as on my tag
Step 6 : The brush Text
- Add a new raster layer
- Activate your brush tool, set as below and apply the brush "texte mes mains.PspBrush" or a brush of your choice with your dark foreground colour, in the bottom right hand side corner of your tag

Here is my result :
Step 7 : The woman
- Open the tube "Alas_12.pspimage" or a tube of your choice in your Psp, copy it and paste it as a new layer on to your tag
- I have resized the tube of the woman to 85%
- Place at the right place
- Effects / 3d effects / Drop shadow of your choice / 4, 4, 50, 20, black for me
Step 8 : Final
- Apply your signature on a new layer
- Add a title to your tag, if you feel like it :
You can either copy my title and paste it as a new layer on to your tag and then colorize it
Or you can write down your own title with a font of your choice or with the one I have put in my zip
- Make sure everything is at the right place
- Image / add some symmetrical borders of 4 pixels with the dark colour you have chosen for your frame or with a colour of your choice :
3c2d2f for me
Save your work as a jpeg file and resize it if necessary
***************
That's it !! You've done it !!
If you 've enjoyed doing my tutorial, it would be nice to write a few words in my guest book ! If you 've had the slightest problem, please, send me a mail so I can see to the problem
Tutorial translated on the 23rd of April 2011
*************
Other versions of that tag