
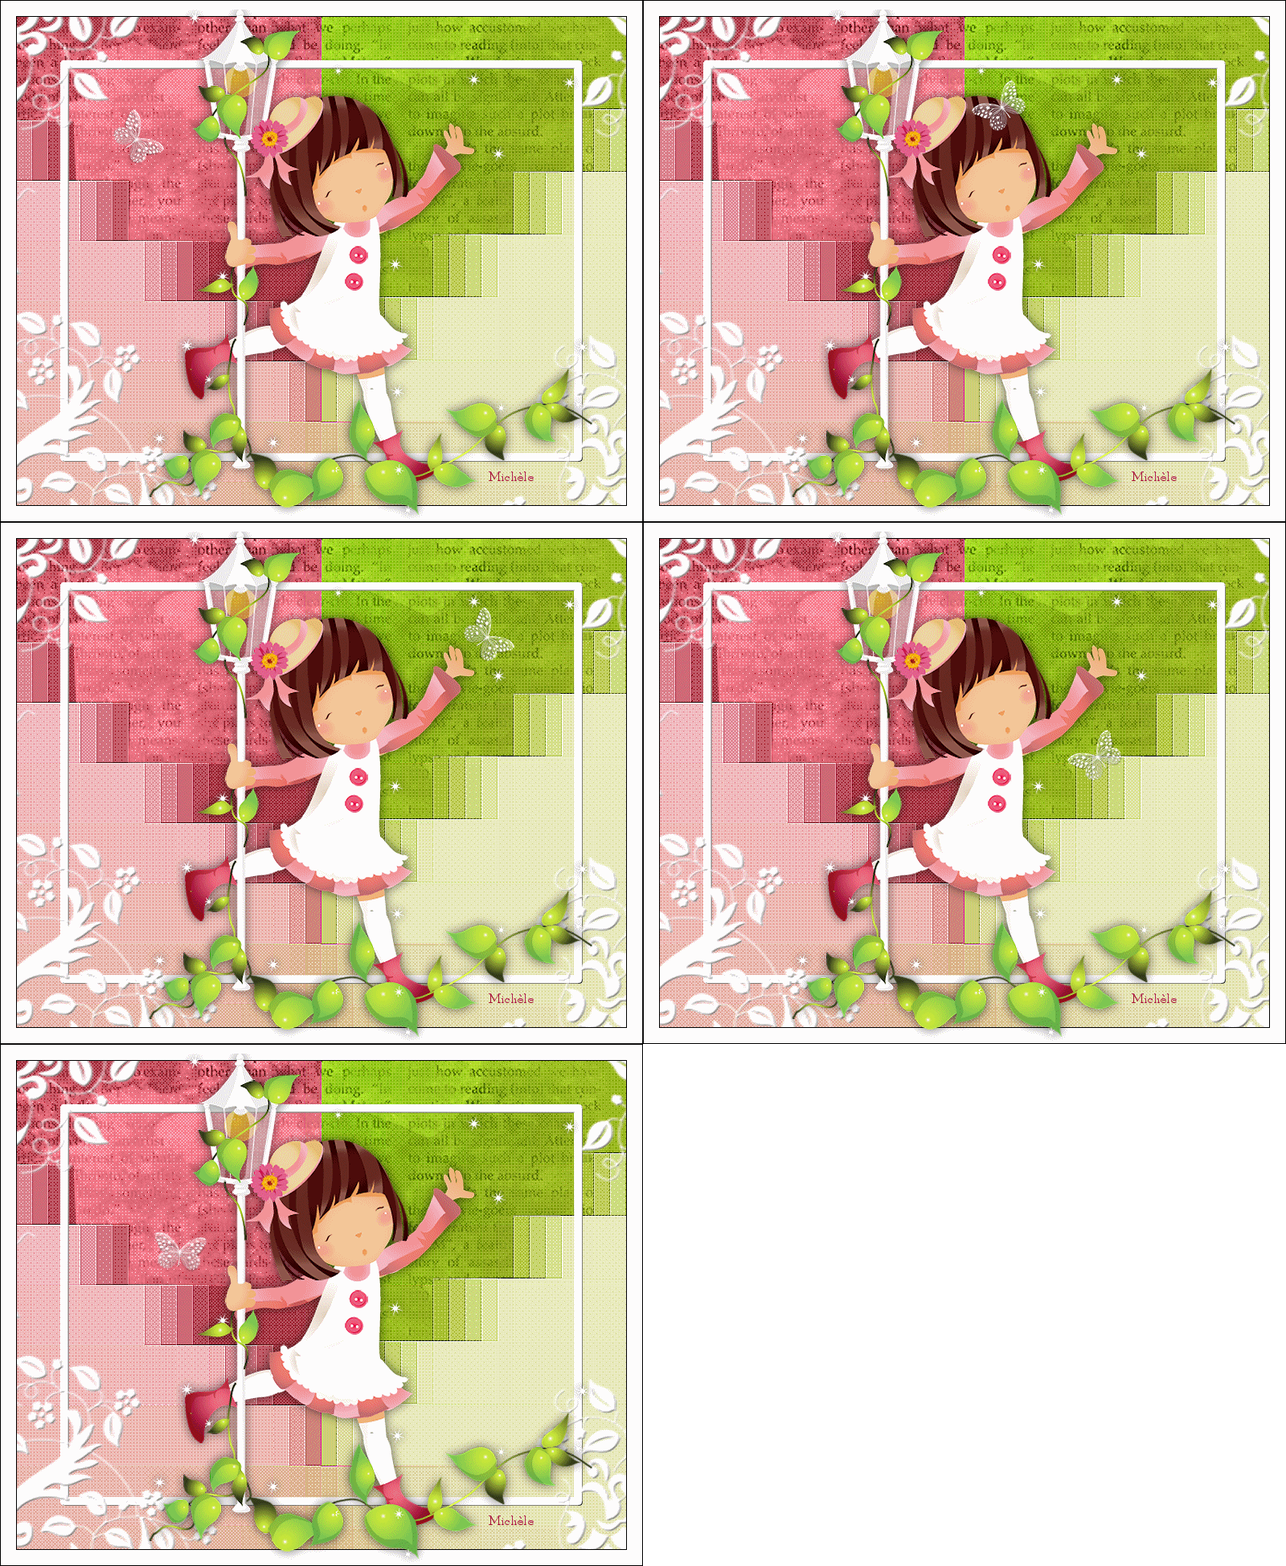
Thank you for putting a link to this tutorial, whenever you display your realization of that tag on a website, on a group or in a mail !
**************************
You'll find some versions of that tag in my gallery HERE
*********************
To realize that tag, you'll need the plugins
Mura's seamless here
AAA Frames here
and the material zip down below :

**************
*It is forbidden to suppress watermarks on the material provided , to alter, mist or rename the tubes in order to respect the work of the tubers
- The tubes of the girl and the element Coraline are from Katussia
- The tube " JD element 31" is part of a scrap kit by Jaelop
******************
Preparation
Duplicate your tubes. Close the originals and minimize the copies for now.
*****************
Click here to print the tutorial
*******************
You can use my arrow to follow your work

***************
1- Open a transparent image of 800 by 650 pixels
2- Select all
Open the image "fond_marion_fairymist", copy it and paste it into the selection
Select none
3- My background matches the colours of my main tube
If you want to change the two colours of that background so that it matches your main tube, you can do this :
- Selections / load a selection / from disk / choose "selection1_marion_fairymist.PspSelection"/ check Source Luminance and replace the selection
- Adjust / Hue and saturation / colorize to your liking ( colour 1)
- Selection / Invert
- Adjust / Hue and saturation / colorize to your liking ( colour 2)
Select none
4- Adjust / One step Photo Fix ( optionnal )
5- Open the text tube "JD element 31_marion.pspimage" or a text tube of your choice ( or a text brush of your choice on a new layer ) copy it and paste it as a new layer
Place that text against the top side of your tag
Set the mode of that layer to Luminance legacy
6- Seections / load a selection / from disk / choose "selection2_marion_fairymist.PspSelection"/ check Source Luminance and replace the selection
Make sure the layer with your text tube is activated
Hit the delete key
Select none
7- Merge all
8- Copy your tag and paste it as new image
9- On that new image :
Image / decrease color depth / 2 colour palette as below :
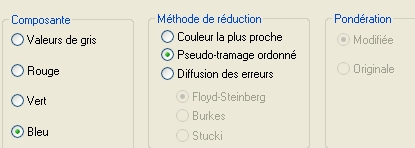
10- Image / increase color depth / 16 color palette
11- Copy that new modified image and paste it as a new layer on your first tag
Set the mode of that layer to soft light
12- Add a new raster layer and select all
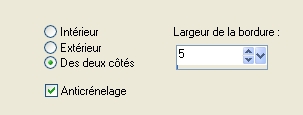
13- Selections / modify / contract by 80 pixels
Selections / modify / select selection borders as below :
14- With your flood fill tool, flood fill your selection with a colour of your choice (I have chosen white )
Deselect all
15- Effects / plugins / Mura's Seamless / Emboss at alpha default
16-Add a new raster layer and select all
Open the tube " kTs_Coraline_element15.pspimage" or a fancy corner tube of your choice , copy it and paste it into the selection
Deselect all
You may prefer to use a brush of your own on a new layer
17- Now, we're going to paint this tube with the same colour as your frame :
- Select all ( you must be on the corner tube layer )
- Selections / float
- Selections / Defloat
- Add a new raster layer and flood fill that selection by clicking several times to cover all the details ( I used white )
- Select none
- Suppress the original pink corners tube
18- Effects / plugins / Mura's Seamless / Emboss at alpha default
19- Merge all
Layers / Promote Background layer
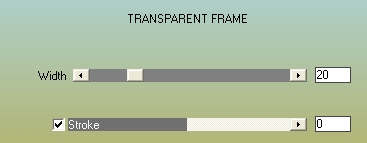
20- Effects / plugins / AAA Frames / Transparent frame as below :
21- Open the tube " kTs_HanMaker15.pspimage" or a tube of your choice, copy it and paste it as a new layer
i have resized the tube at 90%
Place that tube to your liking
22- Effects / 3d effects / drop shadow of your choice
I have chosen : 0, 0, 60, 20, black
23- Add a new raster layer
Layers / arrange / send to bottom
24- Flood fill that layer with the same colour as your frame and corners tube
( In white for me )
25- Add a new raster layer and apply your signature
26- Merge all
If you don't feel like doing the animation, you can save your tag in a jpeg file now.
ANIMATION
1- Open the tube butterfly 1 or a tube of your choice, copy it and paste it as a new layer
Place it to your liking or like me
2- Open all the tubes butterflies 2, 3, 4, 5, copy them and paste them as new layers
Place to your liking or as on my tag
3- Close all the layers with butterfly tubes except Butterfly 1 ( as shown below )
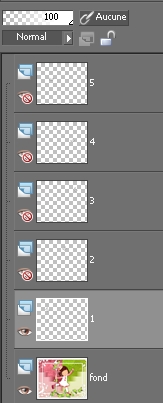
4- Edit / copy special / copy merged
5- Open your Animation shop :
Edit / paste as a new animation
6- Go back to your Psp
Close butterfly 1, activate butterfly 2 and open it ( open eye )
Edit / copy special / copy merged
7- In Animation shop :
Edit / paste after current frame
8- Go back to your Psp
Close butterfly 2, activate and open butterfly 3
Edit / copy special / copy merged
9- In Animation shop :
Edit / paste after current frame
10- Repeat steps 8 to 9 twice
11- In Animation shop : Edit / select all
12- Animation / frame properties / 75
13- Click on frame 2 ( the layer where the butterfly is on the girl's head ) in order to select that frame :
Animation / frame properties / 100
( the butterfly will then stay a little longer in that place !)
14- Edit select all
Check your animation, in your animation shop, by clicking here

Stop the animation by clicking at the same place
15- If you like your animation, all you have to do is save your work as a gif file , in your animation shop !
16- You may resize your file in your Animation shop :
Animation / Resize animation / choose the right size in pixels
***************
That's it !! You've done it !!
If you 've enjoyed doing my tutorial, it would be nice to write a few words in my guest book ! If you 've had the slightest problem, please, send me a mail so I can see to the problem !
Tutorial translated on the 17th of april 2010
*************
You'll find some versions of that tag in my gallery HERE
