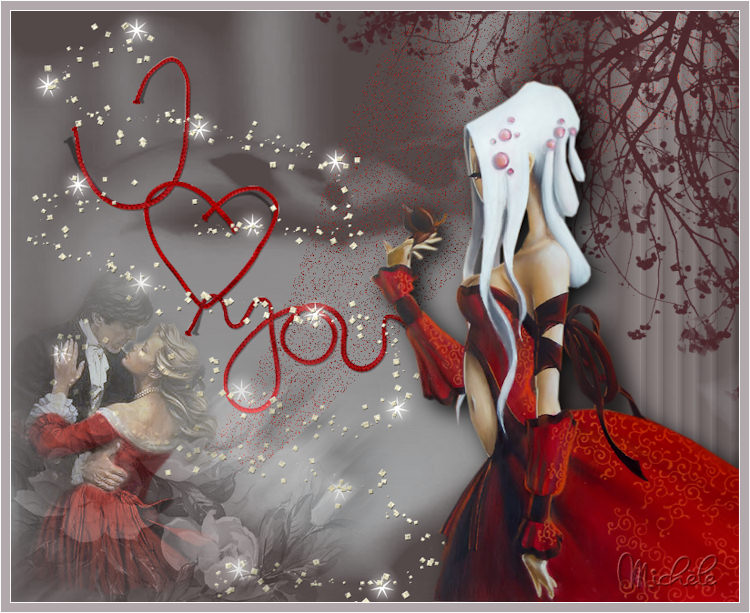

Thank you for putting a link to this tutorial, whenever you display your realization of that tag on a website, on a group or in a mail !
******************
You'll find some versions of that tag in my gallery HERE
***************************

To réalize that tag, you'll need the plugin Alien Skin Eye Candy5 / Impact
and the materiel zip down below :

Thank you to Annemarie for her lovely script ( click on the small green tag above to see it )
*****************
*It is forbidden to suppress watermarks on the material provided , to alter, mist or rename the tubes in order to respect the work of the tubers
- The tube of the woman is by Guismo
You'll be able to find her tubes on Dakara' s site here
and you can join in her sharing group here
- Le tube of the flowers is by Kara, you can join in her sharing group ici
- The scrap elements come from Ditab and Miss Erins' scraps
The other elements have been found on the net
******************
Preparation
Duplicate your tubes, close the originals and minimize the copies for now. Place your masks in your masks file . Export your brush in your PSP as a custom brush
*****************
Click here to print the tutorial
*******************
1- Open a new transparent image of 800 by 650 pixels
2- Flood fill that layer with a dark colour which goes with your tube ; I've chosen the colour 534949 
3- Add a new raster layer and flood fill it with a light colour out of your tube ; I've chosen the colour e3edef 
4- Layers / loadmask / load mask from disk / choose Ivy_hearts1-msk / check the 3 squares: Source luminance , Fit to canvas and Hide all mask
Merge the group
5- Add a new raster layer
Selections / load selection from Disk / choose the selection selectiloveyou1fairymist / check the squares source luminance and replace selection
6- Flood fill that selection with a third colour out of your tube; I've chosen red a62812 
!!!!!!! Select none !!!!!!
7- Effects / texture effects / blinds / width 3, opacity 60, colour 231e21 / check Light from left / top
8- Effects / distortion effects / warp as below :

9-Set the mode of that layer to Dissolve and lower the opacity at approx. 10
10- Open the tube decofairymistIloveyou, copy it and paste it as a new layer
Move the tube against the hand right border of your tag
11- Open the tube flowers KaraT3087 or a tube of your choice , copy it and paste it as a new layer
Place the tube, on the bottom left hand right of your tag
Set the mode of that layer to Luminance ( legacy) and lower the opacity between 40 and 50
12- Open the tube text ditab wa3bpng, copy it and paste it as a new layer
Place it as shown on my tag
13- Open the tube stars (étoiles ) LIITa_23, copy it and paste it as a new layer
Place it as shown on my tag
14- Open the tube coupleinred, copy it and paste it as a new layer
Place it on the bottom left hand corner of your tag
Lower the opacity of that layer to 62
15- Set your foreground with the colour 4c292d 
Add a new layer
16- Apply the brush provided in the zip or a brush of your choice, in the top right hand corner of your tag; set the brush tool as below :

Be careful ! : Rotation at 90 !
17- Open the tube Cal-guis-16_10_ 2008, copy it and paste it as a new layer
Place the tube in the bottom hand right corner of your tag
18- Effects / plugins / Alien skin Eye candy5 / impact / Perspective shadow / drop shadow blurry default
19- Add a new layer and apply your signature
20- Image / add some symmetrical borders of 1 pixel in white
21- Image / add some symmetrical borders of 10 pixels colour B0A5A9 
22- Image / add some symmetrical borders of 1 pixel in white
23- Save as a jpeg file
**********************
That's it !! You've done it !!
If you 've enjoyed doing my tutorial, it would be nice to write a few words in my guest book ! If you 've had the slightest problem, please, send me a mail so I can see to the problem !
Tutorial translated on the 26th of february 2009
*******************
Thank you to my friend Elusive for checking my translation
******************
You'll find some versions of that tag in my gallery HERE
