
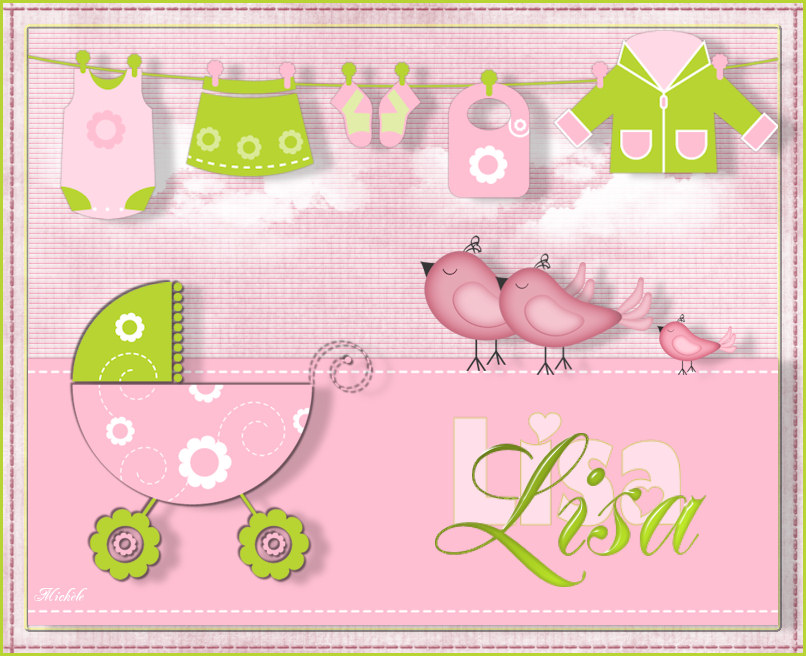
Thank you for putting a link to this tutorial, whenever you display your realization of that tag on a website, on a group or in a mail !
**************************
You'll find some versions of that tag in my gallery HERE
***************
To realize that tag, you'll need the plugin :
- Eye Candy 4000 / Glass
and the material zip down below :

**************
*It is forbidden to suppress watermarks on the material provided , to alter, mist or rename the tubes in order to respect the work of the tubers
The elements of the kit I have been using are from the kit Baby by Katussia
The other elements have been found on the net
******************
Preparation
Duplicate your tubes and images. Close the originals and minimize the copies for now.
*****************
Click here to print the tutorial
*******************
You can use my arrow to follow your work

***************
1- Activate the image "paper.jpg"
2- Add a new raster layer
Selections / Select all
Selections / Modify / Contract by 25 pixels
3- Preparer material palette with two colours out of your main tube
My choice : Foreground : colour b7d433
Background : colour white
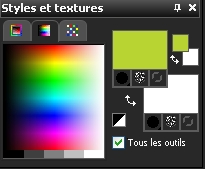
4- Flood fill your transparent layer with your white colour
( Right Click on your mouse )
Keep selection
5- Effects / texture effects / Blinds as below ( with the colour fe8eb0 for me )

Effects / edge effects / enhance
I have lowered the opacity of that layer to 50
6- Selections / Modify / Select selection borders as below :

7- With your flood fill tool, flood fill that selection with your foreground colour
Selections / Select none
8- Activate the tube "nuages.pspimage", copy it and paste it as a new layer
Effects / image effects / Offset as below :

9- Activate the tube "baby03.png or a tube of your choice, copy it and paste it as a new layer
You will find similar elements of different colours on Katussia's site

Leave your tube where it is
Image / Resize at 80% (Resize all the layers NOT checked )
You may colorize your tube ( Adjust / Hue and saturation / Hue map / play with the different settings / this effect will allow you to keep several colours !
10- Effects /3d effects / Thin drop shadow as below the colour 5d2b3a or another dark colour

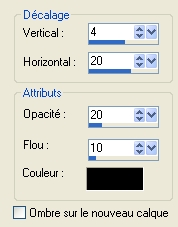
11- Effects / 3d effects / drop shadow as below :
12- Selections / select all
Selections / Modify / contract by 25
Selections / Invert
Hit the delete key of your keyboard
Selections / Select none
13- Activate the tube "baby02.png"or a tube of your choice, copy it and paste it as a new layer
I have resized that tube at 50% (Resize all the layers NOT checked )
Place the tube as on my tag or to your liking
14- Effects / 3d effects / thin drop shadow of your choice
My choice :
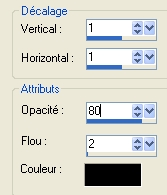
I repeated the same drop shadow but with - 1 vertical and horizontal
15- Effects / 3d effects / drop shadow as on step 11
16- Activate the tubes "dad_bird.pspimage", "mum_bird.pspimage", "baby_bird.pspimage" or tubes of your choice, copy them and paste them, one by one, as new layers onto your tag
Place those tubes to your liking
17- Add a new raster layer
Your material palette should be set as on step 3
Activate your text tool and write down the first name of the child with the font Hole Hearted, size 140
I have lowered the opacity of that layer to 50
18- Add a new raster layer
Your material palette is set as on step 3 but with your colours inverted and your foreground closed
Activate your text tool and write down the first name of the child with the font Jacobab, size 165
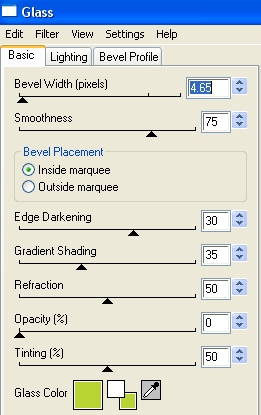
19- Effets / plugins / Eye Candy 4000/ Glass as below
20- Add a new raster layer and apply your signature
21- Add some symmetrical borders of 3 pixels with your background colour : b7d433 for me
22- Save your work as a jpeg file and resize it if necessary
***************
That's it !! You've done it !!
If you 've enjoyed doing my tutorial, it would be nice to write a few words in my guest book ! If you 've had the slightest problem, please, send me a mail so I can see to the problem !
Tutorial translated on the 8th of january 2011
*************
Other versions of that tag
