
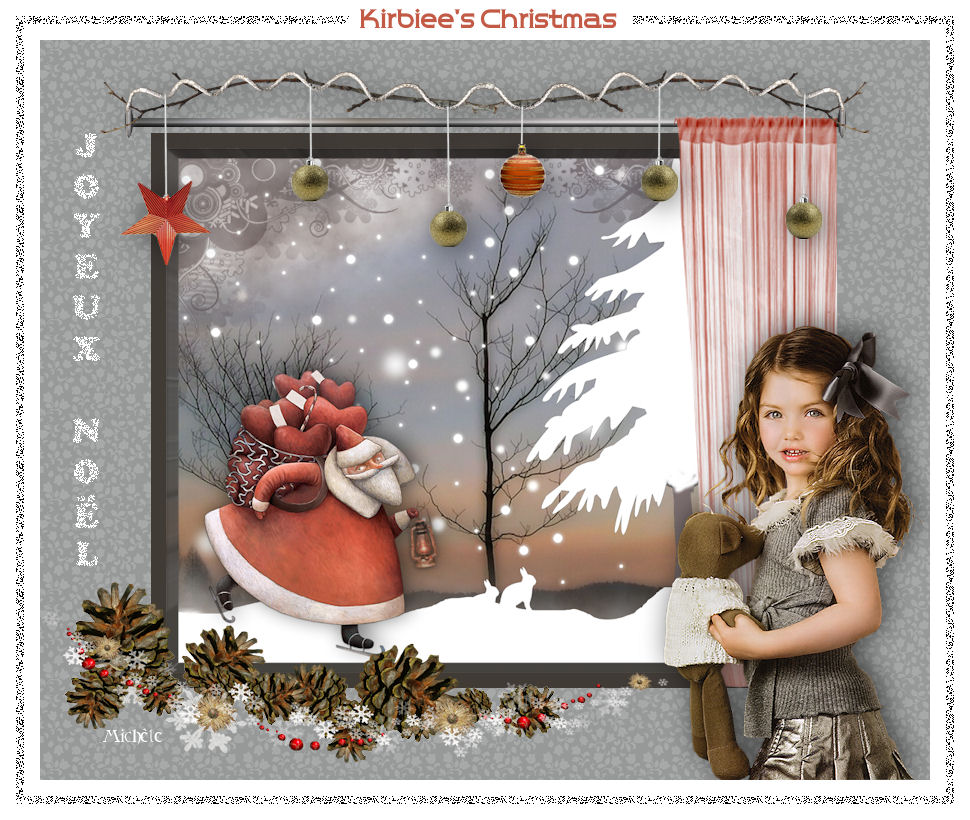
Thank you for putting a link to this tutorial, whenever you display your realization of that tag on a website, on a group or in a mail !
**************************
You'll find some versions of that tag in my gallery HERE
************************
To realize that tag, you'll need the plugins :
- Photo aging kit / Dirt & dust.
- Alien skin eye candy 5 / Textures / Texture noise.
- Alien Skin Eye Candy 5 / Impact / Extrude.
and the material zip down below :

**************
*It is forbidden to suppress watermarks on the material provided , to alter, mist or rename the tubes in order to respect the work of the tubers.
- The tubes ot the little girl and of Santa Claus are by Jhanna
You can join her sharing group here
- The scenery tubes are by Guismo
You'll be able to find her tubes on Dakara' s site here
and you can join in her sharing group here
- The other elements that I haven't created, have been found on the net.
******************
Preparation
To be on the safe side, duplicate your tubes and image in your Psp :
-
Window / Duplicate
- Close the originals and work with the copies !
- Place the "Floral 1" pattern in the pattern folder of your Psp files (unless it is already there !).
- Place the 2 brush files in the brush folder of your Psp files.
*****************
Click here to print the tutorial
**********************
You can use my arrow to follow your work
Click on it and drag it all along the tutorial !

***************
Tutorial realized with PSP XIII

Step 1 : The background of the tag
- If you have decided to use my colours, here is what you can do :
- Open the colour palette "Fairymist_Palette_Kirbiee", in your Psp and using your dropper tool, pick out my colours to set your Material palette ( left click for your foreground / right click for your background )

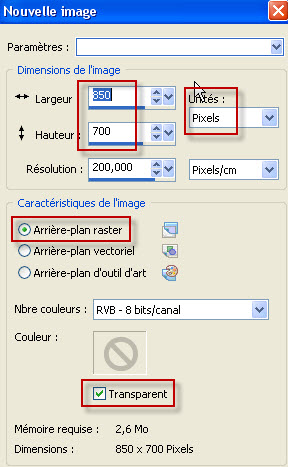
1 - Open a new transparent image of 850 by 700 pixels.
2 - Set your Material palette with two colours of your scenery tube.
- My choice : Foreground : colour b58765
Background : colour 7e7070
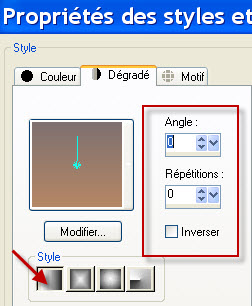
- Set your foreground with a linear gradient as below :

3 - Flood fill your transparent image with your foreground gradient.
4- Effects / plugins / Photo aging kit / Dirt & dust / 128, 128.
(My Photo aging kit plugin has been installed in Filters Unlimited)
5- Layers / Duplicate.
6- Effects / Plugins / Alien skin eye candy 5 / Textures / Texture noise / cloud cover as shown below :
- You may swap the grey colour with a colour that goes better with your own colours.

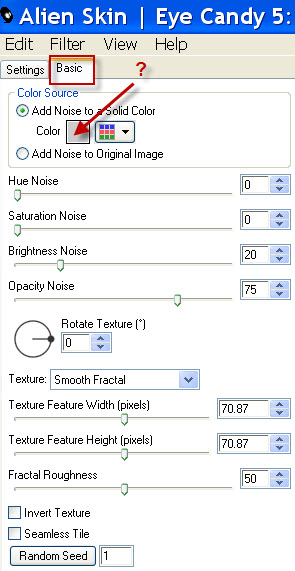
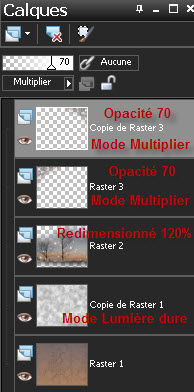
- I have set the mode of the clouds layer on to Hard light . It is up to you to see which mode suits you better !
7- Open the tube "calguismistedwinter24112011.pspimage" or a large scenery tube of your choice and copy it.
8- Paste that tube as a new layer on to your tag.
- I have resized that tag at 120% (resize all the layers NOT checked).
9- ADD A NEW RASTER LAYER.
- Activate your brush tool, set as below and apply the brush "Winter020b" or a brush of your choice, in the middle of your tag, with a colour of your choice that will match your background.
- I have chosen my background colour.

- Move that brush in the top left hand side corner of your tag. Here is what I did :

- I have set the mode of that layer on to Multiply and lowered its opacity at 70.
10- Layers / Duplicate.
- Image / Mirror.

Step 2 : The snowy scenery
1- Open the tube "Décor neigeux" (which is part of one of Guismo's tubes that is included in my zip) and copy it.
- If you prefer to use another snowy scenery that is coloured, you can "whiten" it, this way : Adjust / Brightness and Contrast / 255, 100.
2- Paste your snowy scenery as a new layer on to your tag.
3 - I have moved the tube that way :
- Effects / Image effects / Offset as below :

4- Open the tube "JHanna_548_tube.pspimage" or a tube of your choice and copy it.
5- Paste that tube as a new layer on to your tag.
- I did : Image / Mirror.
- I have resized the tube at 75% (resize all the layers NOT checked).
- Place the tube as on my tag or to your liking. (Don't place the feet too near the bottom side of your tag, otherwise they will be cut off when we add a border !)
6- Effects / 3d effects / drop shadow of your choice / - 4, 4, 60, 40, black for me.
7- Image / add some symmetrical borders of 20 pixels with a colour out of your tag.
- I have chosen the colour 413b36.

8- With your magic wand, set as below, select that border :

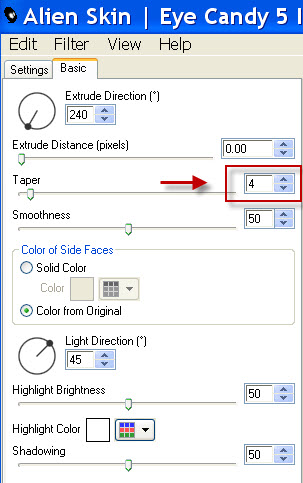
9- Effects / plugins / Alien Skin Eye Candy 5 / Impact / Extrude / Centered, Small Taper as below :

- Deselect all.

Step 3 : The inside of the house
1- Layers / Promote background layer.
2- Image / Resize at 75% (resize all the layers NOT checked).
3-ADD A NEW RASTER LAYER.
4- Layers / Move down.
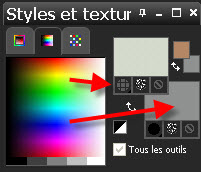
5- Set your Material palette as below :
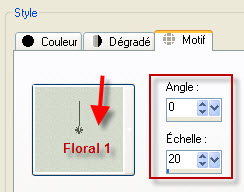
- Set your foreground with a nice pattern that will be used to cover the background wall.
- Set your background with a colour that will give a tint to the chosen pattern !
- I have chosen the Floral 1 pattern and the colour 8f9190.
6- Flood fill your new layer with your background colour (Right click).
7-ADD A NEW RASTER LAYER.
8- Flood fill your new layer with your foreground pattern.
- I have sllightly darkened this layer that way :
- Adust / Brightness and Contrast as below :

- Set the mode of that layer on to Luminance legacy.
9- Open the tube "Fairymist_kirbiee_tringle" and copy it.
10- Paste that tube as a new layer on to your tag.
- Place the tube above the window as on my tag.
11- Open the tube "rideau" and copy it.
12- Paste it as a new layer and place it as on my tag.
13- I have colorized the curtains as follows :
- Adjust / Hue and saturation / colorize as below :

- Colorize to match the colours of your tag !
- Adjust / Brightness and contrast as below :
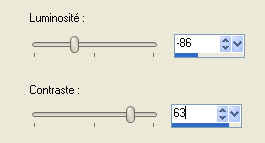
14- Open the tube "JHanna_62a.pspimage" or a tube of your choice and copy it.
15- Paste that tube as a new layer on to your tag.
- I did : Image / Mirror, on that tube.
- Then, I resized the tube at 60% (resize all the layers NOT checked).
16- Effects / 3d effects / drop shadow of your choice / - 4, 4, 60, 40, black for me.
17- Open the tube "deco_pommes_de_pin.pspimage" or a tube of your choice and copy it.
18- Paste that tube as a new layer on to your tag.
- Place as on my tag or to your liking.
19- Open the tube "guirlande" or a tube of your choice and copy it.
20- Paste that tube as a new layer on to your tag.
- Place as on my tag or to your liking.
21- Optionnal : Effects / 3d effects / drop shadow of your choice / 4, 4, 50, 40, black for me.

Step 4 : The borders
- Make sure everything is at the right place.
1 - Image / add some symmetrical borders of 40 pixels with a colour of your choice (white for me).
2- Selections / select all.
- Selections / modify / contract by 16 pixels.
3 -ADD A NEW RASTER LAYER.
- Flood fill the selection with a dark colour of your choice (or a light colour if your frame is light).
- I have chosen black.
4- Selections / modify / contract by 8 pixels.
- Hit the delete key of your keyboard and deselect all.
5- Set the mode of that layer on to Dissolve and lower its opacity (at 25 for me).
6- Apply your signature
7- Activate your Text tool and write down the text "Kirbiee's Christmas" or a text of your choice, with the colour and the font of your choice.
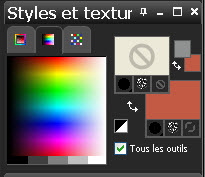
- I have used the orange colour c25a45 in the background and have shut my foreground. I have used the font Chrome Yellow.

8- Place the text as on my tag.
9- Activate the layer on which you have the dissolved frame and with your eraser tool or your selection tool, erase the part of your frame that is underneath the text.
10- With your text tool, set as below, write down in VERTICAL "Joyeux Noël" or a text of your choice, with the font and the colour of your choice.
- I have set my background with white and shut my foreground.
- I have used the font Copper black, size 36. To make the E in capital letters with the 2 dots above, you must type : e + alt + 0203 !

- If you use another font, you may have to change the Kerning (- 200 for example)
- Place the text as on my tag or to your liking.
11- I have set the mode of my vertical text layer on to Dissolve and lowered its opacity at 63.
12- Layers / Merge all.
13 - Save your work as a jpeg file.
***************
That's it !! You've done it !!
If you 've enjoyed doing my tutorial, it would be nice to write a few words in my guest book ! If you 've had the slightest problem, please, send me a mail so I can see to the problem
Tutorial translated on the 8th of December 2012
*************
Vous trouverez d'autres versions de ce tag dans la galerie ICI
