Thank you for putting a link to this tutorial, whenever you display your realization of that tag on a website, on a group or in a mail !
**********************
You'll find some versions of that tag in my gallery HERE
******************************
To realize that tag, you'll need the plugin
- Murameister here
and the material zip down below :

**************
*It is forbidden to suppress watermarks on the material provided , to alter, mist or rename the tubes in order to respect the work of the tubers
- The tubes of the girl, the flower and the book are by Kikirou
You'll be able to get her tubes by joining in her sharing group here
The tube of the net curtain is an element of a scrap kit Tendre Rêverie by Yaya
- The image " JHanna_276 background.jpg" is by Jhanna
You'll be able to get her tubes by joining in her sharing group here
******************
Preparation
Duplicate your tubes and image. Close the originals and minimize the copies for now.
Put the selections in the selection folder of your Psp
*****************
Click here to print the tutorial
*******************
You can use my arrow to follow your work

***************
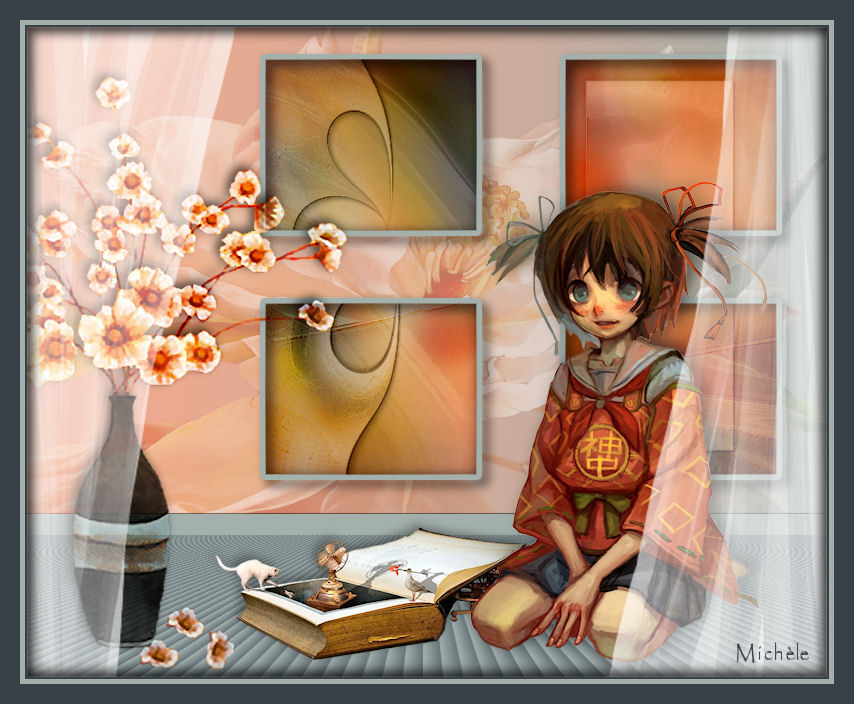
1- Open a transparent image of 800 by 650 pixels
2- Set your colour palette with two colours matching your main tube
My choice : Foreground : colour eda98f
Background : colour a3b0ac
Set your foreground with a linear gradient as below :


3- Flood fill your transparent layer with that gradient
4- Add a new raster layer
Selections / load a selection / from disk / choose "fairymist_kikirou1.PspSelection" / check Source Luminance and Replace the selection
5- Flood fill that selection with your background colour
Keep selection !
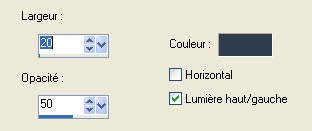
6- Effects / texture effects / blinds as below with a dark colour ( for me : 394047 )
Keep selection !
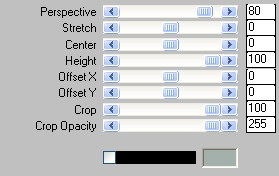
7- Effects / plugins / Murameister / perspective tiling as below :
Keep selection !
8- Selections / Invert
Add a new raster layer
Open the tube "kikirou966_magnolias.pspimage" or a tube of your choice matching your colours, copy it and paste it into the selection
Select none
Set the mode of that layer to Soft light ( lower its opacity if necessary )
9-Add a new raster layer
Selections / load a selection / from disk / choose "fairymist_kikirou2.PspSelection" / check Source Luminance and Replace the selection
10- Flood fill that selection with your background colour
Keep selection !
11- Effects / 3d effects / drop shadow / 2, 0, 50, 0, black
Effects / 3d effects / drop shadow / - 1, - 1, 50, 1, black
Select none
12-Add a new raster layer
Selections / load a selection / from disk / choose "fairymist_kikirou3.PspSelection" / check Source Luminance and Replace the selection
13- Flood fill the 4 selected frames with your background colour
Select none
14- With your magic wand, set as below , select the inner part of your four frames while keeping the shift key pressed ( we're going to put a picture inside these frames )

Selections / Modify / expand by 2 pixels
15-Add a new raster layer
Layers / arrange / move down
Keep selection !
16- Open the 'image "JHanna_276 background.jpg" or an image of your choice matching your colours , copy it and paste it into the selection
Keep selection !
17- Add a new raster layer
Effects / 3d effects / Cutout as below :

Select none
18- Activate your top layer
Effects / 3d effects / drop shadow / 6, 6, 70, 15, black
19- Open the tube "kikirou949_fantasy.pspimage" or a tube of your choice, copy it and paste it as a new layer onto your tag
I did : Image / mirror and have resized the tube at 40% ( Adjust / sharpen )
Place the tube at the right place
20- Effects / 3d effects / drop shadow / - 4, - 4, 40, 15, black
21- Open the tube "kikirou1197_vase.pspimage"or a tube of your choice, copy it and paste it as a new layer onto your tag
Place the tube at the right place
Step 22 wil allow you to modify the colour of the flowers without modifying the colour of the vase !
22- With your rectangle selection tool, set as below, draw a rectangle around your flowers as shown below :


Selections / Promote selection to layer
Activate your first flower layer and hit the delete key
Select none
*** Small supplement : with my freehand selection tool , I have selected one flower, I have copied it ( deselect then ) , pasted it as a new layer and placed it near the vase; I have duplicated that layer twice and put a slight free rotation on two of these flowers !
23- Activate your top layer ( the promoted selection layer ) and set the mode of that layer to a mode that suits you ( Hard light for me !)
24- Effects / 3d effects / drop shadow / - 4, - 4, 40, 15, black
Apply the same drop shadow on the vase and on the fallen flowers
25- Open the tube " kikirou1267_Kamichu_yurie_by_Joysuke.pspimage"or a tube of your choice, copy it and paste it as a new layer onto your tag
I have resized that tube by 75 % ( Adjust / sharpen )
Place the tube at the right place
26- Effects / 3d effects / drop shadow of your choice / - 4, - 4, 40, 15, black for me
27- Open the tube "elements kit tendre reverie by yaya (36).pspimage"or a tube of curtains of your choice, copy it and paste it as a new layer onto your tag
Place the net curtain on the right hand side of your tag
28- Layers / duplicate
Image / mirror
Then, I did : Image / flip so it isn't too much symmetric ! Place the second net curtain to your liking
29- Add a new raster layer and apply your signature
30- Make sure everything is in the right place !
Image / add some symmetrical borders of 2 pixels with a dark colour of your choice ( 394047 for me )
Image / add some symmetrical borders of 5 pixels with your light background colour
Image / add some symmetrical borders of 20 pixels with a dark colour of your choice ( 394047 for me )
31- With your magic wand, set as on step 14, select your 20 pixels width border
Selections / modify / expand by 7 pixels
32- Effects / 3d effects / drop shadow / 6, 6, 70, 15, black
Repeat with - 6 horizontal and vertical
Select none
33- Save your work as a jpeg file and resize it if necessary
***************
That's it !! You've done it !!
If you 've enjoyed doing my tutorial, it would be nice to write a few words in my guest book ! If you 've had the slightest problem, please, send me a mail so I can see to the problem !
Tutorial translated on the 22nd of may 2010
*************
Other versions of that tag
