
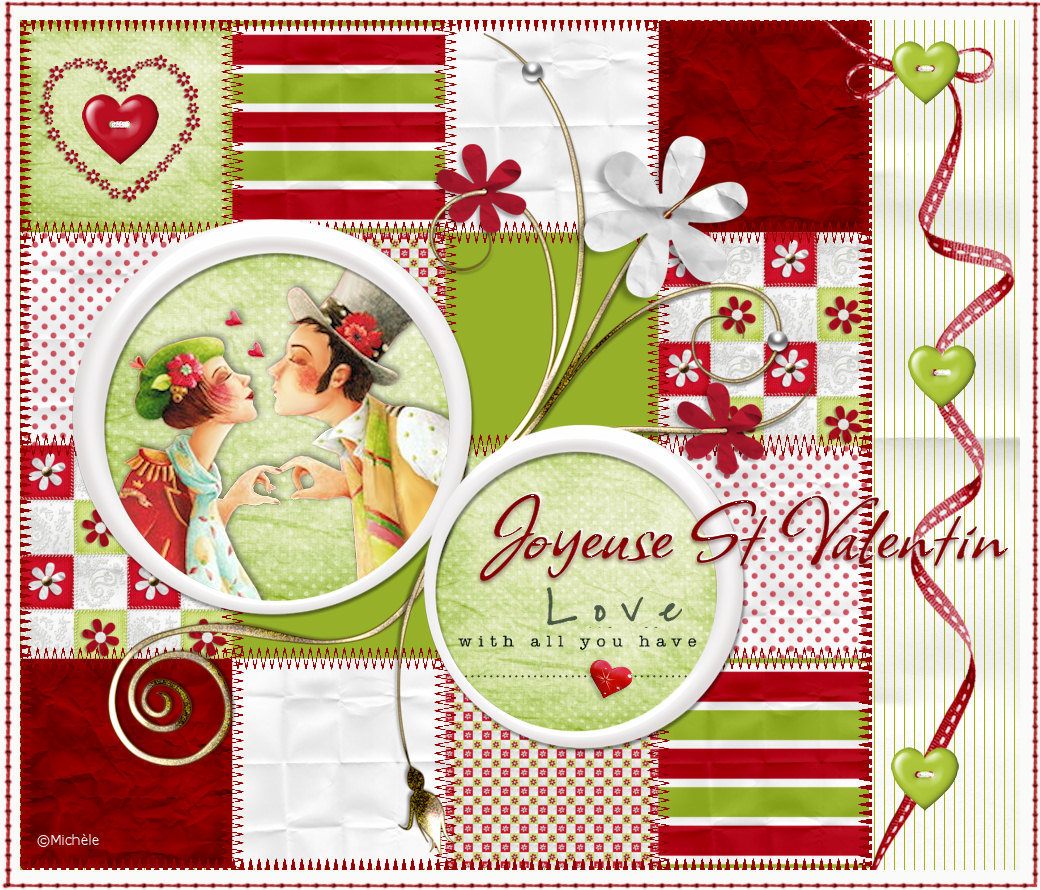
Thank you for putting a link to this tutorial, whenever you display your realization of that tag on a website, on a group or in a mail !
**************************
You will find some other version of that tag in the gallery here
***********************
To make that tag, you'll need the filters :
- Richard Rosenman / Grid generator.
- Transparency / Eliminate black.
- AP lines / Silver lining.
- Alien skin eye candy 5 / Impact
and the material zip down below :

**************
*It is forbidden to suppress watermarks on the material provided , to alter, mist or rename the tubes in order to respect the work of the tubers
- The tube of the couple is by Odette
You may join her sharing group here
- The elements of scrap I have used come from the kit Love and Hope from Jaelop Designs
- The font used to write the title is Cupid de locke.
- The other elements that I haven't created, have been found on the net.
******************
Preparation
To be on the safe side, duplicate your tubes and image in your Psp :
-
Window / Duplicate
- Close the originals and work with the copies !
- Place the selection in the selection folder of your Psp files.
Open the font outside your Psp if you have Windows Xp or place it in the Font folder of Windows if you have Win7.
- Double-click on my Alien skin preset, it will install itself automatically.
*****************
Click here to print the tutorial
**********************
You can use my arrow to follow your work
Click on it and drag it all along the tutorial !

***************
Tutorial made with PSP XIII
********************
1 - Open a new transparent image of 850 par 850 pixels (New size!).
2 - Flood fill your transparent image with any colour of your choice (it won't stay !).
3- Effects / Plugins / Richard Rosenman / Grid generator as below :
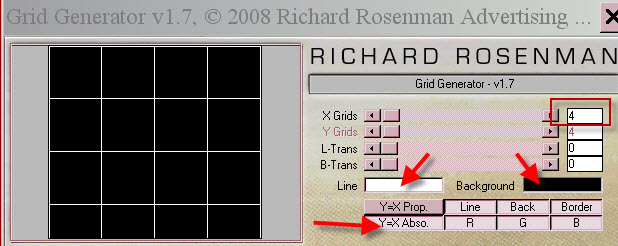
4- We're going to fill that grid with squares of different colours and textures that will match in colours your main tube.
- Here is my choice of colours and textures (3 colours only).
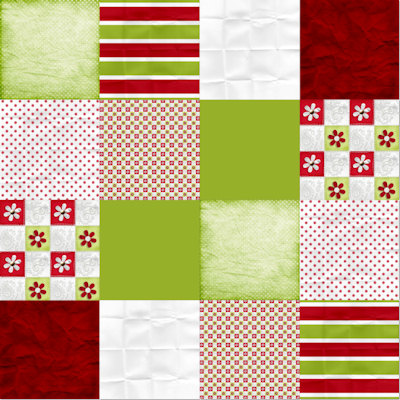
- You can find lots of different textures in other scrap kits.
- Jaelop Designs 'site contains lots of nice ones that are free to use.
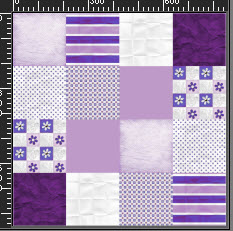
- You may change the colours of my squares (Adjust / Hue and saturation / Hue map).
- Here are a couple of possibilities :

5- ADD A NEW RASTER LAYER.
- All the squares of that patchwork must be on that new layer !
and NOT ON THE GRID ITSELF !!!!!
6- Activate your magic wand, set as below :

- In your layers palette, activate the grid layer. With your magic wand, click on the first square of that grid.
7- Open your first fantasy paper ( "J D paper 5" for me), in your PSP and copy it.
8- In you layers palette, activate your transparent layer.
- Paste into the selection (on that new layer).

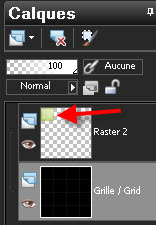
- No need to deselect that squaere, the next selection will take it off.
9- Repeat steps 6 to 8 with your other chosen fancy squares.
10- On my "patchwork" the two squares in the center have been flood filled in bright green 96b02a.
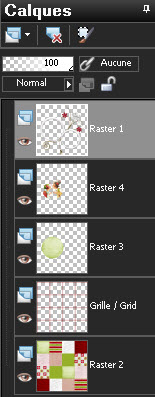
11- When all the squares of your grid are full, here is what your layers palette looks like :
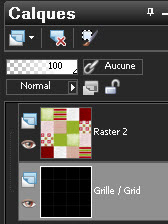
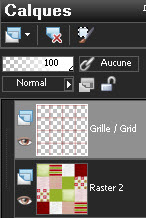
12- Activate now your bottom layer (Grid).
- Layers / Arrange / Place to the top of the pile.
13- Effects / Plugins / Transparency / Eliminate black.
14- With your magic wand, set as previously, select all your grid.
- Don't hesitate to zoom a lot and click in the middle of an intersection of the grid.
- If you have problems selecting your grid, you may load my selection that you will find in the material !
( Selections / Load a selection from disk / Choose "Fairymist_joyeusestvalentin")
15- Selections / modify / Expand by 2 pixels.
16- With you flood fill tool, flood fill your selection with a colour of your choice.
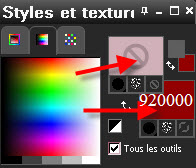
- I have chosen red 920000.
- Selections / select none.
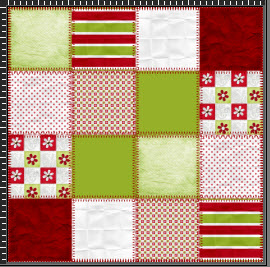
17- Effects / distortion effects / waves as below :

- Here is what I get :
18- Open the tube "JD element 34" in your PSP and copy it.
19- Paste it as a new layer on to your tag.
20- With your magic wand, set as previously, click inside the left hand circle of that frame.
21- Selections / Modify / Expand by 10 pixels.
22- ADD A NEW RASTER LAYER.
- Layers / arrange / Move down.
23- Open the image "JD paper 5" or another plain paper in your PSP and copy it.
24- On that new layer, paste into the selection.
25-Open the tube "ils s'aiment en couleurs" or a tube of your choice, in your PSP and copy it.
26- Paste it as a new layer on to your tag.
- Your tube is pasted underneath the frame but on top of the background that fills that frame !
27- I have resized the tube at 70% (Resize all the layers NOT checked).
- Adjust /Sharpness / Sharpen.
- Place the part of the tube that you like in the center of your frame
- Beware not to touch to the selection !
28- Selection / Invert.
- Hit the delete key of your keyboard.
- Selections / Select none.
29- Effects /3d effects / drop shadow of your choice / - 1, 1, 60, 10, black for me.
30- Activate the layer on top of the pile (the frame):
31- With you magic wand, set as previously, click inside the right hand side circle.
31- Selections / Modify / Expand by 10 pixels.
32- ADD A NEW RASTER LAYER.
- Layers / arrange / move down.
33- Open the image "JD paper 5" or another plain paper or an image or a scenery tube, in your PSP and copy it.
34- On your new layer, paste into the selection.
- Selections / Select none.
35- Open the tube "wordart"or a tube of your choice, in your PSP and copy it.
36- Activate the layer on top of the pile (the frame):
Paste it as a new layer on to your tag.
- Place the tube at the bottom of your hand right side circle.
37- Add a few other decorative elements if you wish.
- I have copied and pasted the two tubes "coeur fleurs" and"coeur rouge" in the left hand side corner of my tag.
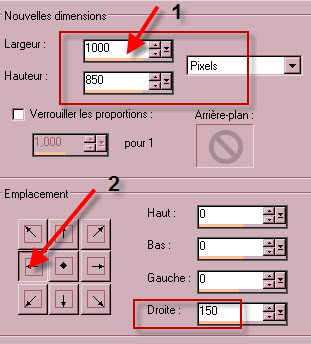
38- Image / Canvas size as below :
39- ADD A NEW RASTER LAYER.
40- Layers / arrange / Move to the bottom of the pile.
41- Selections / select all.
42- Open the image "JD paper 2" or another paper, in your PSP and copy it.
43- On the new layer, paste into the selection.
- Deselect all t.
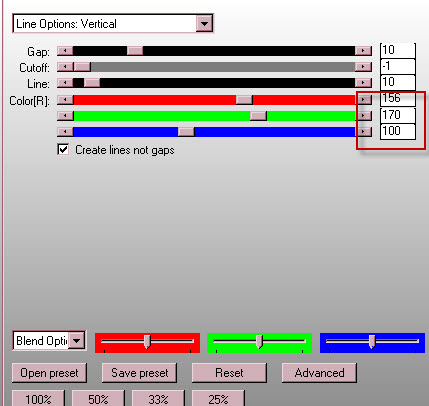
44- Effects / Plugins / AP lines / Silver lining as below :
45- Open the tube "JD element 38"or a tube of your choice, in your PSP and copy it.
46- Activate the layer on top of the pile.
- Paste your tube as a new layer on to your tag.
- Place it in the right hand side of your tag (like me or to your liking).
47- Open the tube "coeur vert"or a tube of your choice, in your PSP and copy it.
48- Paste it as a new layer on to your tag.
49- Layers / Duplicate (do that twice) you will then have 3 green hearts.
- Place those hearts like me or to your liking.
50- Activate your text tool with a font of your choice.
- Here is my choice :

- Write down "Joyeuse St-Valentin" or a text of your choice.
51- I have added a glass effect on my text (you may prefer another effect) :
- Effects / Alien skin eye candy 5 / Impact / glass.
- Click on my preset.
52- Here is another (optionnal) effect (to make my text lighter):
- Adjust / One step photo Fix.
- You may add a light drop shadow on your text or on your other tubes.
53 - Apply your signature.
- Make sure everything is at the right place.
54 - Image / add some symmetrical borders of 20 pixels with the colour of your choice (white for me).
55- Open the tube "JD element 45" in your PSP and copy it.
56- ADD A NEW RASTER LAYER.
- Selections / select all.
57- Paste into the selection.
- Select none.
- If necessary you may colorize that frame.
58 - Merge all and save your work as a jpg file.
***************
That's it, you have done it !
If you have the slightest problem, don't hesitate to get in touch with me !
Tuto translated on the 8th of february 2016
*******************
You will find some other version of that tag in the gallery here
*************
