Thank you for putting a link to this tutorial, whenever you display your realization of that tag on a website, on a group or in a mail !
**************************
You'll find some versions of that tag in my gallery Here
***********************
To make that tag, you'll need the filter
- Unlimited 2.0.
and the material down below :

**************
"It is forbidden to suppress watermarks on the material provided, to alter, mist or rename the tubes, in order to respect the work of the tubers.
- The tube of the girl is by Thafsuth.
- The elements of scrap I have used come from a freebie from Molemina and from Laguna Azur.
- The frame is by Sihirperisi.
- The other elements that I haven't created have been found on the net.
******************
Preparation
To be on the safe side, duplicate your tubes and image in your Psp :
-
Window / Duplicate
- Close the originals and work with the copies .
*****************
Click here to print the tutorial.
**********************
You can use my arrow to follow your work
Click on it and drag it all along the tutorial !

***************
Tutorial made with PSP X8
*************
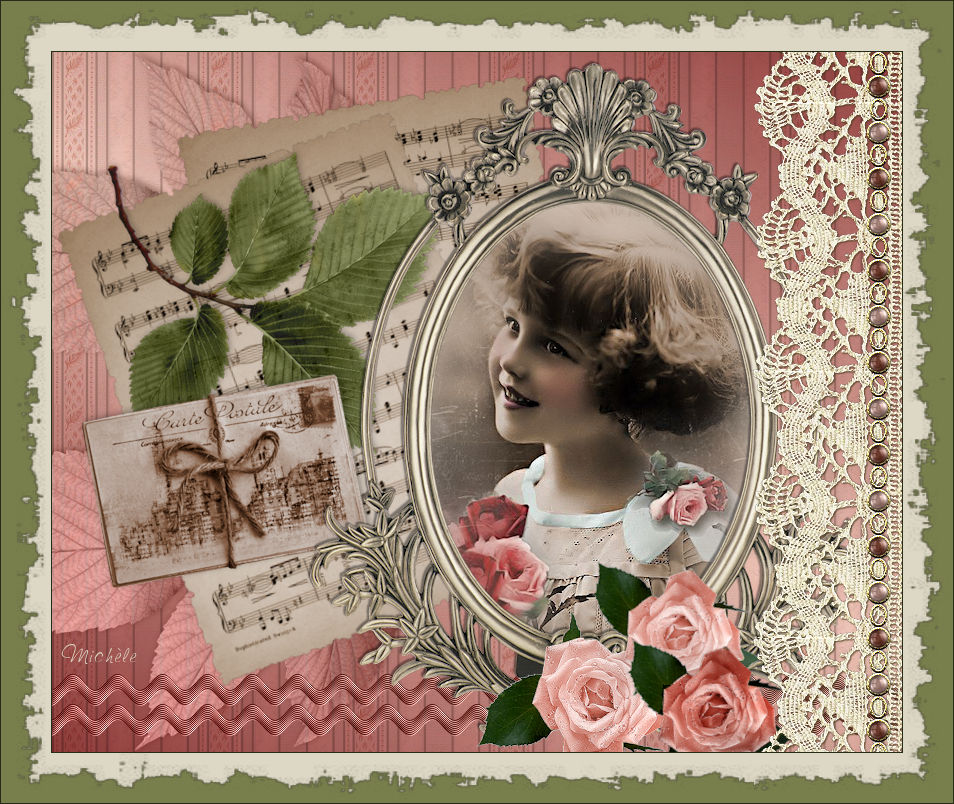
1 - Open the image "Paper2_Laguna_Azul" or a similar paper of the same size (850 by 700 pixels).
- My background may be colorised of course.
2 - Open the tube "molemina_scrap_old_time_el (27)"in your Psp and copy it.
3 - Paste it as a new layer on to your background.
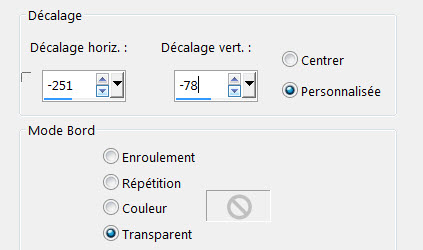
4- Place that tube as below :
- Effects / Image effects / Offset :
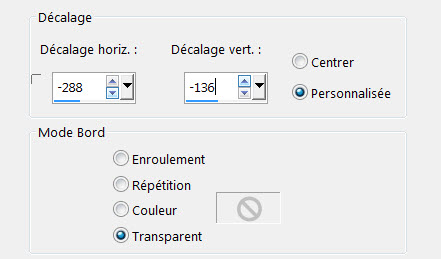
- I have set the mode of that layer on to Luminance Legacy.
5- Layers / Duplicate.
- Image / Mirror Vertical.
6- Open the tube "Partition" in your Psp and copy it.
7- Paste it as a new layer on to your tag.
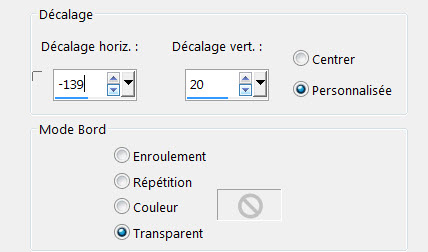
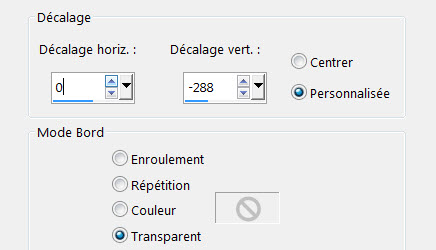
8- Place that tube as below :
- Effects / Image effects / Offset :
9- Open the tube "Feuille2" in your Psp and copy it.
10- Paste it as a new layer on to your tag.
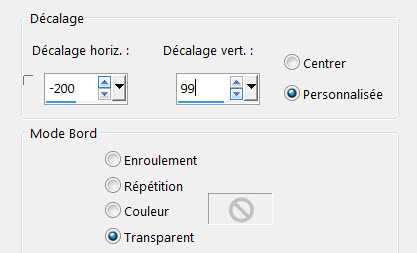
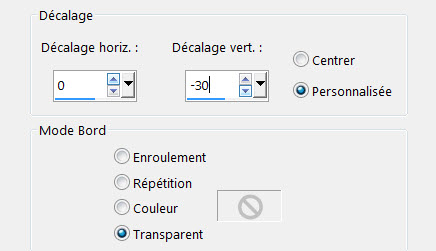
11- Place that tube as below :
- Effects / Image effects / Offset :
12- Open the tube "molemina_scrap_old_time_el (4) "in your Psp and copy it.
13- Paste it as a new layer on to your tag.
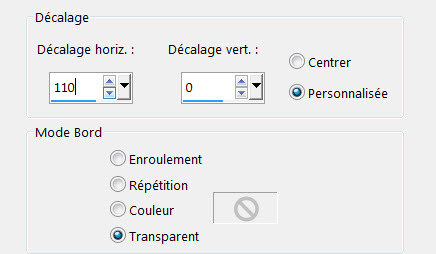
14- Place that tube as below :
- Effects / Image effects / Offset :
15- Open the tube "Ribbon wave hell_Laguna_Azul" in your Psp and copy it.
16- Paste it as a new layer on to your tag.
17- Place that tube as below :
- Effects / Image effects / Offset :
- I have set the mode of that layer on to Luminance Legacy.
18- Layers / Duplicate.
19- Place that tube as below :
- Effects / Image effects / Offset :
20- Open the tube "Cadre Vera 3 (9)" in your Psp and copy it.
21- Paste it as a new layer on to your tag.
22- Place that tube as below :
- Effects / Image effects / Offset :
23- Open the tube "misted_fillette_vintage_tubed_by_thafs" and duplicate it :
- (Window / Duplicate). Close the original.
- Activate the layer with the portrait and merge it with the layer just below (the background).
- Copy that merged layer that is now an image.
24- Paste it as a new layer on to your tag.
- Layers / Arrange / Move down (your image is now just underneath the frame).
- I have resized my image at 78% (Resize all the layers NOT checked).
- With your move tool, place your image in the center of your frame (the border of my image must be outside the frame !).
25- Activate the layer where the frame is and select the center of that frame with your magic wand.
- Selections / Modifyr / Expand by 10 pixels.
- Selections / Invert.
26- Activate now your image layer and hit the delete key of your keyboard in order to suppress parts of the image that are outside the frame.
- I have chosen NOT to paster my image into the selection of my frame so that it doesn't get distorted.
- Selections / Select none.
27- Activate, once more, the layer of the frame.
- Effects / 3d effects / Drop shadow of your choice / - 2, - 2, 42, 2, noir for me.
- Layers / Merge down.
28- Open the tube "Rose_gro_Laguna_Azur"in your Psp and copy it.
29- Paste it as a new layer on to your tag.
- I have resized that tube at 50% (Resize all the layers NOT checked).
- Place it, like me underneath your frame.
30- Layers / Duplicate twice.
- Place the other two roses like me :
- I have used the effect Free rotation on these two other roses so they look different.
- I have duplicated on the the roses and changed the mode of that other rose on to multiply.
Then, I have duplicated it again, set the layer on to the Normal mode and lowered its opacity to make this rose look darker !
Not easy to explain this !
31- Open the tube "Dentelle"in your Psp and copy it.
32- Paste it as a new layer on to your tag.
- Place it against the right hand side border of your tag, like me .
33- Open the tube "Kette_Laguna_Azur"in your Psp and copy it.
34- Paste it as a new layer on to your tag.
- Place it, like me, above the lace border..
35- Apply your signature.
- Make sure everything is at the right place.
- Image / add some symmetrical borders of 1 pixel with a dark colour of your tag :
Dark green for me.
36- Image / Add some symmetrical borders of 50 pixels with a light colour of your tag :
ddd8c5 for me.
37- In your layers palette, double click on the layer of the merged layer / click on ok.
- Your background layer has now been changed into a raster layer !
38- Effects / Plugins / IC.Net Software / Filters Unlimited 2.0 / Edges, Square / Square Edge 04.
39- Add a new raster layer.
- Layers / Arrange / Move down.
40- Flood fill that new layer with a nice contrasting colour that matches other colours in your tag.
41- Layers / Merge all.
42 - Save your work as a jpg file.
***************
That's it, you have done it !
If you have the slightest problem, don't hesitate to get in touch with me !
Tuto translated on the 7th of March 2017
*************
You'll find some versions of that tag in my gallery Here