Thank you for putting a link to this tutorial, whenever you display your realization of that tag on a website, on a group or in a mail !
**************************
You'll find some versions of that tag in my gallery HERE
***********************
To realize that tag, you'll need the plugins :
- Filter Factory Gallery D / Legolator, Shouting, Infini tiles
- Transparency / Eliminate white
- Filters Unlimited 2.0
and the material zip down below :

**************
*It is forbidden to suppress watermarks on the material provided , to alter, mist or rename the tubes in order to respect the work of the tubers
- The tubes of the woman and of the poppies are by Guismo
You'll be able to find her tubes on Dakara' s site here
and you can join in her sharing group here
- The brush "Celestial_Forms_Brushes_Ps is by Coby17
The other elements have been found on the net
******************
Preparation
- Duplicate your tubes and image. Close the originals and minimize the copies for now.
Export your brush in your Psp as a custom brush
*****************
Click here to print the tutorial
*******************
You can use my arrow to follow your work

***************
1- Open a new transparent image of 800 by 650 pixels and select all .
2- Activate the image "coquelicots-bleuets-364290.jpg" or a picture assorted to the colours of your tubes, copy it and paste it into the selection
Select none
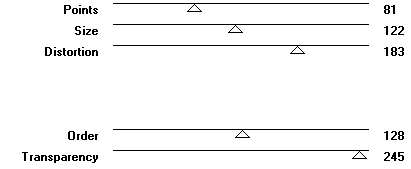
3- Adjust / Blur / radial blur as below :

4- Effects / edge effects / enhance more
5- Layers / duplicate
6- Effects / plugins / Filter Factory Gallery D / Legolator default
7- Effects / plugins / Filter Factory Gallery D /Shouting default

8- Effects / plugins / Transparency / Eliminate white
9- Effects /plugins / Filter Factory Gallery D / Infini tiles default
( 6, 2, 0, 0 )
10- Image / mirror
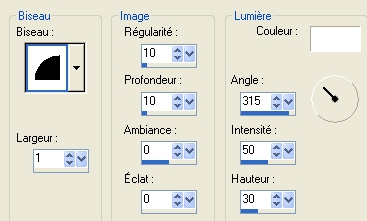
11- Effects / 3d effects / Inner bevel as below :
12- Effects / 3d effects / drop shadow as follows with a dark colour of your background (green 5d5d30 for me)

13- Activate your background layer which is at the bottom of your pile of layers
Effects / Filters Unlimited 2.0 / Paper textures / Canvas fine / 156, 87
14- Add a new raster layer
Set your foreground with a light colour from one of your tubes
I have chosen the cream colour : fbf4d1 
15- Activate your brush tool, set as below and choose the brush "Celestial_Forms_Brushes_Ps.PspBrush" or a brush of your choice

Apply that brush in the center of your tag with your light colour ( left clic )
16- Edit / copy
Edit / Paste as a new layer
Your brush is now right in the center of your tag !
Delete your previous layer where you applied the brush in the first instance !!
17- Effects / image effects / seamless tiling default
I have set the mode of that layer to Dodge and lowered its opacity to 50
( It is up to you to see , what looks better, according to the colours you have chosen !)
18- Activate your top layer
Add a new raster layer
Activate your text tool, set as below and choose the font Automatica BRK or a font of your choice


Set your foreground with a colour assorted to your tag and close your background
I have chosen the contrasting colour : purple 4c4365 
Write down the word GUISMO or a word of your choice , in capital letters, in the top right hand side corner of your tag
Select none
19- Activate your bottom layer ( your background )
Edit / copy
20- Go back to your top layer ( where you have written your word )
With your magic wand , set as below , select the inner part of each of your letters of your word, while keeping the shift key pressed

21- Add a new raster layer
Edit / paste into the selection ( the copy of your background which is still in memory )
Select none
22- Layers / arrange / move down
23- Activate the top layer
Layers / merge down
24- Repeat steps 11 and 12 on the layer where your word is ( Guismo for me )
Place the word to your liking
25- Add a new raster layer
Close your foreground and set your background with a light colour out of your tag
I have chosen the colour : EFCC94 
With your text tool , set as previously but with the font Satisfaction, size 72 or a fancy font of your choice, write down , in small letters, the word "séverine" or a word of your choice
Select none
Place the word to your liking
* STEPS 26 AND 27 ARE OPTIONNAL! *
26- Ajouter un nouveau calque
With your text tool , set as previously but with the font Mistral, taille 36 and the same background colour , write down "Gentils coquelicots" or a sentence of your choice
Select none
Place the word to your liking
I have set the mode of that layer on Overlay
It is up to you to choose what goes better with your colours
27- Add a new raster layer
With your text tool , set as previously but with the fontArial Black , taille 24 and the same background colour , write down "Nouveaux"or a sentence of your choice
Select none
Place to your liking
I have set the mode of that layer to Exclusion
It is up to you to choose what goes better with your colours
28- Activate the tube "calguiscoquelicot2210.pspimage" or a tube of your choice, copy it and paste it as a new layer
Place the tube as shown on my tag or to your liking
29- Effects /3d effects / drop shadow of your choice / 4, 15, 40, 20, black for me
30- Activate the tube " calguisdamechampetre22610.pspimage"or a tube of your choice, copy it and paste it as a new layer
Place the tube as shown on my tag or to your liking
31- Effects / 3d effects / drop shadow of your choice / 4, 15, 40, 20, black for me
32- Add a new raster layer and apply your signature
33- Make sure everything is in the right place
Image / add some symmetrical borders of 1 pixel with a colour of your choice
My choice : dark colour 372710 
34- Layers / Promote Background layer
35- Image / resize at 90 °% (Resize all the layers NOT checked )
36- Effects / 3d effects / drop shadow / 0, 0, 100, 40, black
37- Add a new raster layer and select all
Layers / arrange / move down
38- Activate your image ( step 2) , copy it and paste it into the selection
Select none
39- Adjust / Blur / gaussien blur at 40
40- Effects / plugins / Filter Factory Gallery D / Infini tiles default
( 6, 2, 0, 0 )
41- Effects /edge effects / enhance
42- Add a new raster layer
Apply in the center of that layer , the brush used on step 15 ( same settings ), with white or a light colour
43- Adjust / Blur / radial blur as on step 3
44- Effects / image effects / seamless tiling default
Set the mode of that layer to Dodge ( opacity at 100 for me )
It is up to you to see which mode and which opacity look better with your colours
45- Effects / edge effects / enhance more
46- Image / add some symmetrical borders of 1 pixel with a colour of your choice
My choice : dark colour 372710
47- Save your work as a jpeg file and resize it if necessary
***************
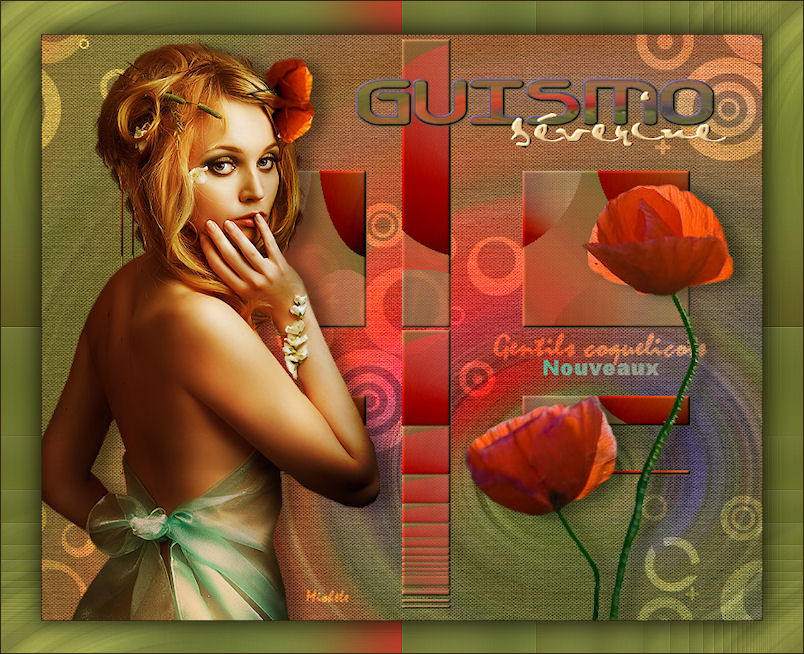
That's it !! You've done it !!
If you 've enjoyed doing my tutorial, it would be nice to write a few words in my guest book ! If you 've had the slightest problem, please, send me a mail so I can see to the problem !
Tutorial translated on the 2nd of july 2010
****************
Other versions of that tag