
Thank you for putting a link to this tutorial, whenever you display your realization of that tag on a website, on a group or in a mail !
**************************
You'll find some versions of that tag in my gallery HERE
***********************
To realize that tag, you'll need the plugin :
- Mura's seamless
and the material zip down below :

**************
*It is forbidden to suppress watermarks on the material provided , to alter, mist or rename the tubes in order to respect the work of the tubers
- The tube of the horses is by Guismo
You'll be able to find her tubes on Dakara' s site here
and you can join in her sharing group here
- The tube of the bird is by Luzcristina
you can join in her sharing group here
- The element of floral decoration is by Katussia
- The two masks are by Kordula
The other elements have been found on the net
******************
Preparation
Duplicate your tubes and masks. Close the originals and minimize the copies for now.
*****************
Click here to print the tutorial
*******************
You can use my arrow to follow your work

***************
1- Open a transparent image of 800 by 650 pixels
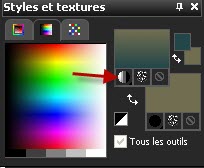
2- Set your colour palette with two colours matching your main tube
My choice : Foreground : colour d6e0d5
Background : colour 97bdd2
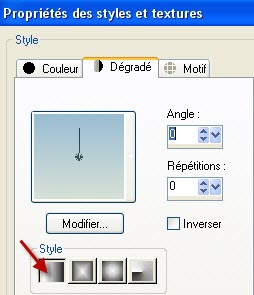
Set your foreground with a linear gradient as below :
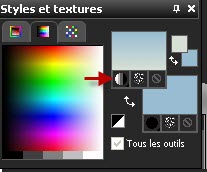
3- Flood fill your transparent layer with that gradient
4- Set now your palette with the same foreground colour and with a darker colour for your background as below :
My background colour : 234749

5- Add a new raster layer
Flood fill that new layer with your background colour
6- Layers / New mask layer / from image / choose the mask "jillmaskflower.jpg" / Only check Source Luminance.
Layers / Merge group
7-Add a new raster layer
Flood fill that new layer with your light foreground colour
8- Layers / New mask layer / from image / choose the mask "maskejillblue8.jpg" / Only check Source Luminance.
Layers / Merge group
9- Selections / select all
Selections / modify / contract by 30 pixels
Hit the delete key of your key board
Selections / Select none
10- Effects /geometric effects / Perspective - horizontal / 45 and check Transparent
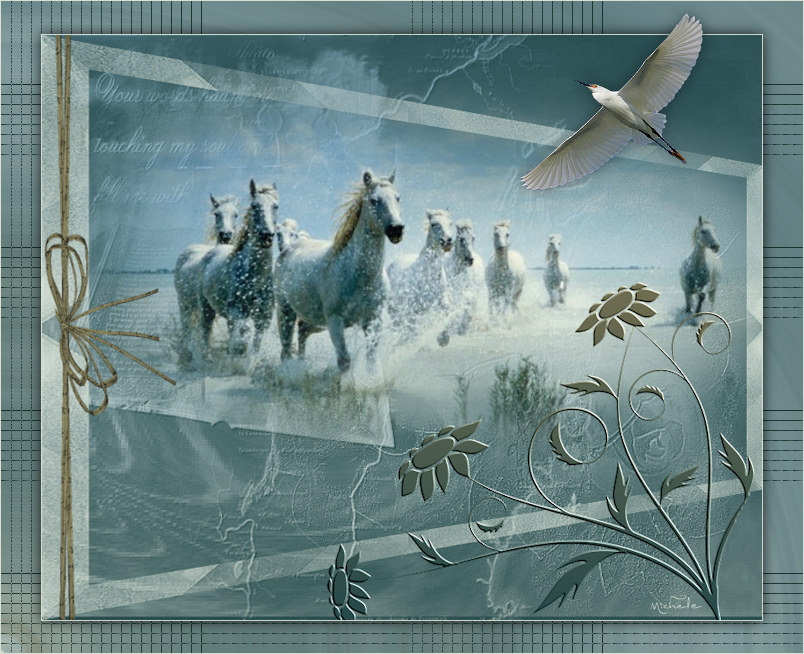
11- Activate the tube "calguismistedhorse14610.pspimage" or a misted tube of your choice,copy it and paste it as a new layer
I have resized that tube at 75%
Leave it where it is !
Adjust / Sharpness / sharpen ..... if necessary
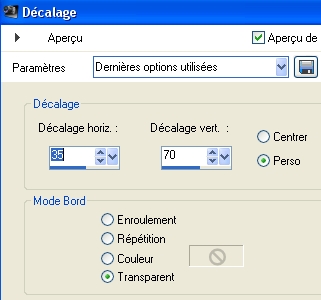
12- Effects / image effects / Offset as below :
13- Activate the tube "kTs_Mahonia26.pspimage"or a tube of your choice,copy it and paste it as a new layer
I have resized that tube at 75% and then at 90%
Image / mirror
Place that tube in the bottom right hand side of your tag like me or to your liking
14- Selections / select all
Selections / float
Selections / Defloat
15- Add a new raster layer
Set your layer palette as below :
Put your background colour in your foreground and put another colour in your background ( 706d50 for me )
Set your foreground with the same sort of gradient as on step 2
Flood fill your selection with that gradient
Selections / Select none
16- Effects / plugins / Mura's seamless / Emboss at alpha default
Suppress the layer which is underneath ( we don't need it any more )
17- In your layer palette, activate your top layer
Activate the tube "Bow.pspimage"or a tube of your choice,copy it and paste it as a new layer
Place it on the left hand side of your tag like me
18- Adjust / Hue and saturation / Colorize / 38, 43 for me
19- Effects / 3d effects / drop shadow / 1, 1, 100, 2, white
20- Add a new raster layer and apply your signature
21- Make sure everything is at the right place
Image / add some symmetrical borders of 1 pixel with your light colour
22- Layers / Promote background layer
23- Layers / Duplicate
24- Image / resize at 90 °% ( Resize all the layers NOT checked ! )
25- Effects / 3d effects / drop shadow / 0, 0, 80, 20, black
26- In your layer palette, activate your bottom layer
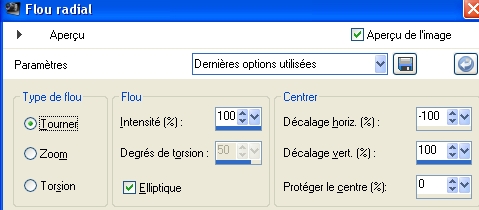
27- Adjust / Blur / Radial blur as below t :
28- Effects /plugins / Mura's Seamless / Check with Gradation as below
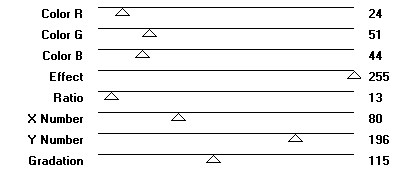
You may prefer other settings , it all depends on the colours you have chosen !
29- Activate the tube "198-luzcristina.pspimage" or a tube of your choice,copy it and paste it as a new layer
I have resized that tube at 75%
Place as on my tag or to your liking
30- Effects / 3d effects / drop shadow / 0, 0, 40, 20, black
31- Image / add some symmetrical borders of 1 pixel with your light colour
32- Save your work as a jpeg file and resize it if necessary
***************
That's it !! You've done it !!
If you 've enjoyed doing my tutorial, it would be nice to write a few words in my guest book ! If you 've had the slightest problem, please, send me a mail so I can see to the problem !
Tutorial translated on the 8th of january 2011
*************
Other versions of that tag