Thank you for putting a link to this tutorial, whenever you display your realization of that tag on a website, on a group or in a mail !
**************************
You'll find some versions of that tag in my gallery HERE
***********************
To make that tag, you'll need the filters :
- Tramage / At the atomic level (installed in Filters Unlimited for me).
- Filters unlimited 2.0 / Paper textures
and the material zip down below :

**************
*It is forbidden to suppress watermarks on the material provided , to alter, mist or rename the tubes in order to respect the work of the tubers
- The tube of the woman is by Kikirou. Thank you dear Kikirou !
-The mask I have used has been offered to me by my American friend Adriana.
- The other elements that I haven't created, have been found on the net.
******************
Preparation
To be on the safe side, duplicate your tubes and image in your Psp :
-
Window / Duplicate
- Close the originals and work with the copies !
*****************
Click here to print the tutorial
**********************
You can use my arrow to follow your work
Click on it and drag it all along the tutorial !

***************
Tutorial made with PSP XIII
Step 1 : The background of the tag
1- Open a new transparent image of 850 by 700 pixels.
2 - Set your Material palette with two colours out of your main tube.
My choice : Foreground : colour d5a34e
Background : colour 600000

3 - Flood fill your new transparent image with your foreground colour.
4- ADD A NEW RASTER LAYER.
- Flood fill your new transparent image with your background colour (right click).
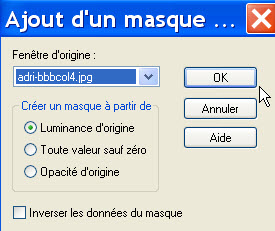
5- Open the mask "adri-bbbcol4.jpg" in your Psp.
- On your tag :
- Layers / New mask layer / from image / set it as below :
- Adjust / Sharpness / Sharpen more.
- Layers / Merge group..
6- The mask being slightly distored, I have straightened it that way :
- Activate your deformation tool (letter D)
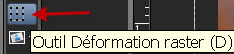
- If you can't see that tool in your tool bar, do this :
- View / Customize / Tools / Deform :
- Left click on the took, keep your left click pressed and drag the tool to your tool bar.
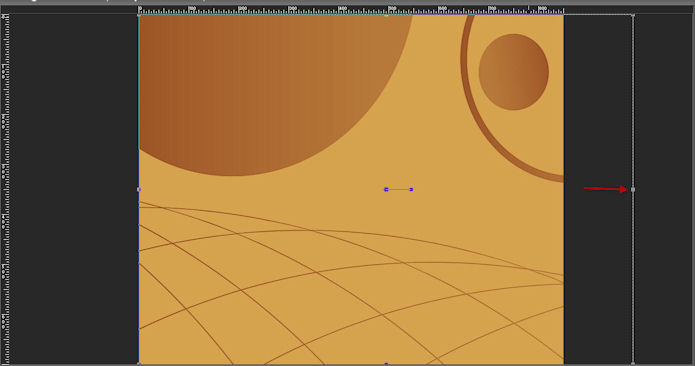
6- Make sure your Deform tool is set as below (on scale) :

- Stretch the frame towards the right hand side as shown below :
(The circles are rounder after that and the small circle has disappeared !)
- Click on the move tool or any other tool, to get rid of your Deform tool !
7- Activate your erase tool, set as below and erase the full circle that is on the right hand side :

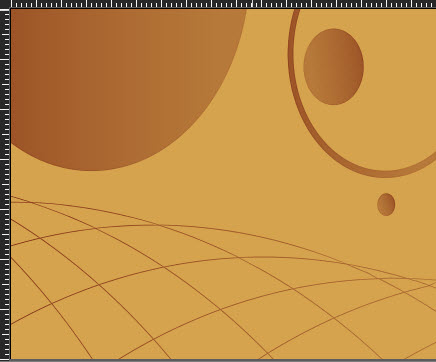
8- In the layers palette, I have set the mode of that layer on to Burn.
- It is up to you to see which mode and opacity give the best effect with your colours.
- Here is what I get :
9- Layers / Duplicate.
- I have set the mode of that layer on to Overlay.
- It is up to you to see which mode and opacity give the best effect with your colours.
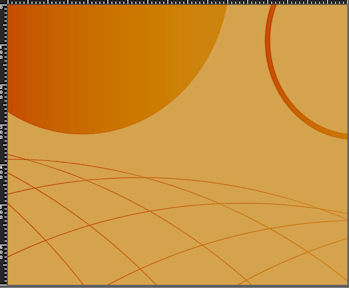
10- Effects / Plugins / Filters Unlimited 2.0 / Tramage / At the atomic level default.
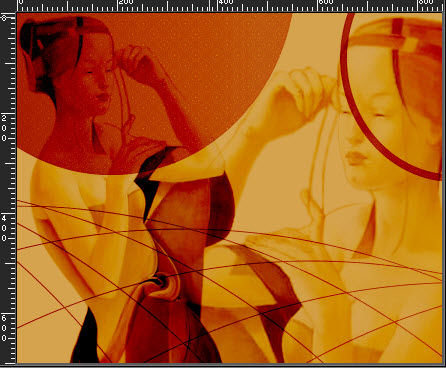
Step 2 : The main tube
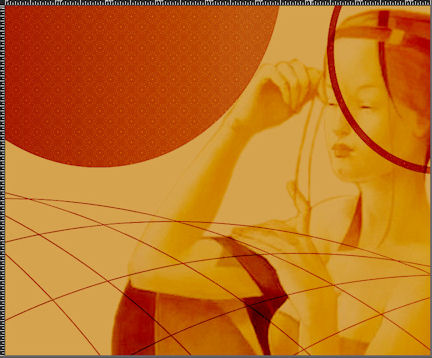
1- Open the tube "kikirou27.pspimage" or a tube of your choice in your Psp and copy it.
2- Paste it as a new layer on to your tag.
3- I have resized that tube at 210 % (Resize all the layers NOT checked).
- Adjust / Sharpness / Sharpen more.
- I have set the mode of that layer on to Burn and lowered its opacity at 80 .
- It is up to you to see which mode and opacity give the best effect with your colours.
- Place the tube as on my tag.
4- Paste (the copy of your tube) as a new layer on to your tag.
- If you prefer to use another tube, you will have to copy it beforehand !
- I did Image / Mirror on my tube.
- I have resized that tube at 120% (Resize all the layers NOT checked).
- Adjust / Sharpness / Sharpen.
- I have set the mode of that layer on to Burn and lowered its opacity at 80 .
- It is up to you to see which mode and opacity give the best effect with your colours.
- Place the tube as on my tag. Place it for good as you won't be able to move once you have done the effects of step 3 !
Step 3 : Texture effects.
1- In your layers palette, activate the layer that is at the bottom of the pile (raster 1).
- Layers / Duplicate.
2- Effects / Plugins / Filters unlimited 2.0 / Paper textures / Canvas fine default
- That texture effect shows up on all your layers !
We're goint to take that texture effect off the mask and off the main tube.
3- Activate your top layer (where your main tube is).
- Selections / select all.
- Sélections / Float.
- Sélections / Defloat.
4- Activate layer Copy of raster 1 and hit the delete key of your keyboard.
- KEEP SELECTION !
5- Activate the layer Group Raster 2 as shown below :
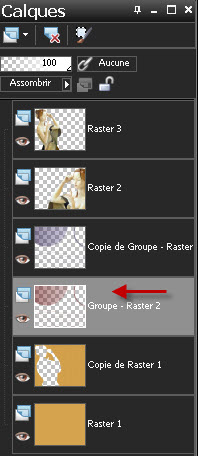
- Hit the delete key of your keyboard.
- KEEP SELECTION !
6- Activate the layer Copy of Group Raster 2 which is just above.
- Hit the delete key of your keyboard.
- That will delete the Tramage effect on your main tube !
7- Stay on that layer (NO need to deselect !).
- Selections / select all.
- Sélections / Float.
- Sélections / Defloat.
8- Activate the layer Copy of Raster 1.
- Hit the delete key of your keyboard. That deletes the texture effect on the mask !
- Deselect all.
9- Activate the layer on top of the pile (the main tube which is on the left hand side)
- Effects / 3d effects / drop shadow of your choice / 1, 1, 40, 10, black for me.
10 - Apply your signature
Step 4: The borders and the text
1- Make sure everything is at the right place.
- Image / add some symmetrical borders of 1 pixel with your dark colour.:
600000 for me.i
- Image / add some symmetrical borders of 50 pixels with a colour of your choice (the same colour you will use to write your text, later on)
White for me.
2- Set your background with the colour you wish to use to write your text and close your foreground.
I have set my background with white.
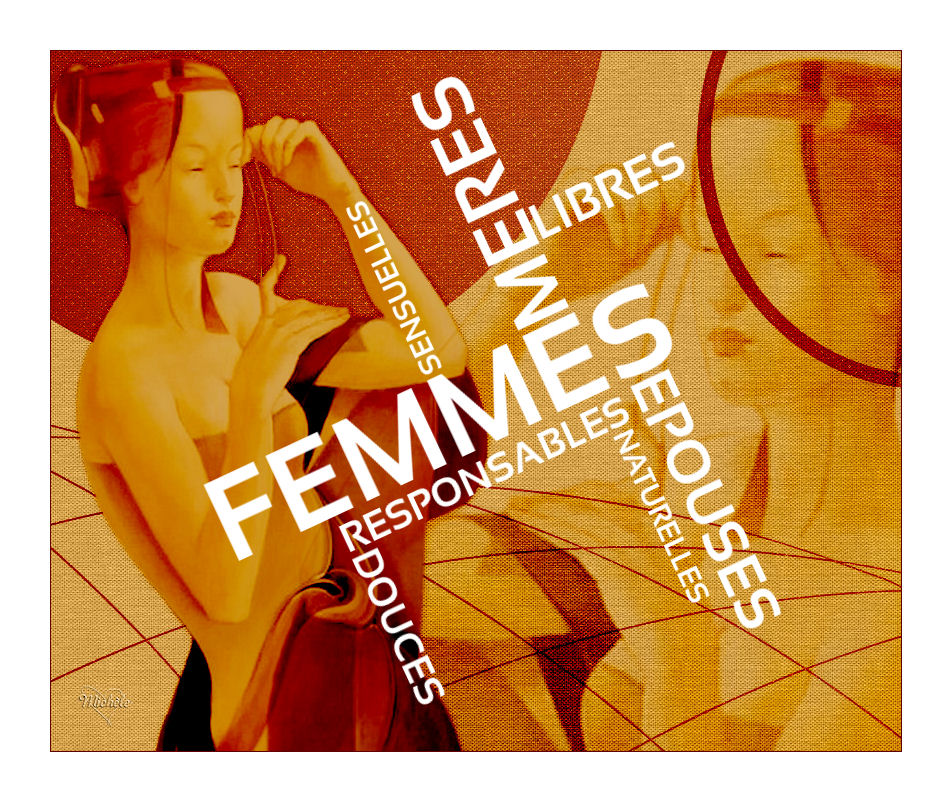
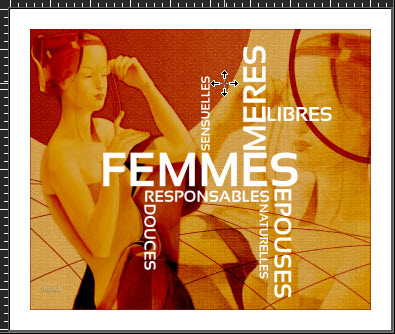
3- Activate your text tool, set as below and write down, in capital letters, your first work in the center of your tag (FEMMES for me).
- It is up to you to choose a font and a size that suit you. Here is my choice :

- If that first word isn't well centered, copy it and paste it as a new layer (Delete the initial word).
4- Write down other words and use different sizes of the same font.
- Here are the different sizes I have used : Size 80 : MERES / Size 60 : EPOUSES / Size 50 : LIBRES / Size 40 : RESPONSABLES,
DOUCES / Size 30 : SENSUELLES, NATURELLES.
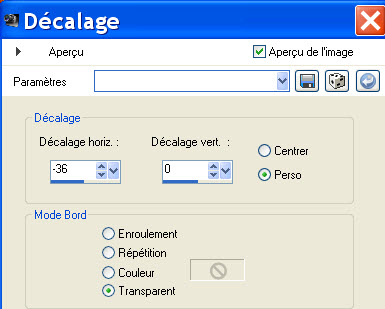
5- To place the words in vertical position all you have to do is this :
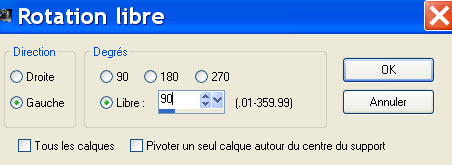
Image / Free rotation / 90° / Left or Right according to the effect you wish to get.
- It is up to you to choose the words that mean something to you and to place them to your liking !
- Here is my result :
6- Activate the layer at the bottom of the pile (Background / your image).
- Close that layer for the moment by clicking on the eye in your Layers palette.
7- Activate one of the other layers where your writing is.
- Layers / Merge visible.
- Now, you can open the layer where your image is.
7- Your top layer is activated :
- I have chosen to make a free rotation towards the left, that way :
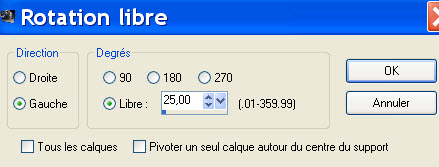
- It is up to you to decide whether you prefer to have your text slightly tilted on the left or on the right !
8- You may add an emboss effect or a slight drop shadow on your text if you wish.
(I have left it as it is.)
9- I have mode my text that way :
10- Layers / Merge all.
11 - Save your work as a jpeg file.
***************
That's it !! You've done it !!
If you 've enjoyed doing my tutorial, it would be nice to write a few words in my guest book ! If you 've had the slightest problem, please, send me a mail so I can see to the problem
Tutorial translated on the 2nd of March 2013.
*************
You'll find some versions of that tag in my gallery HERE