
Thank you for putting a link to this tutorial, whenever you display your realization of that tag on a website, on a group or in a mail !
**************************
You'll find some versions of that tag in my gallery HERE
************************
To realize that tag, you'll need the plugins :
- Simple / Diamonds.
- Enki' filters / Wallpaper de luxe (included in the zip).
- Mura Meister / Copies
and the material zip down below :

**************
*It is forbidden to suppress watermarks on the material provided , to alter, mist or rename the tubes in order to respect the work of the tubers.
- The mask "Abstract_271" is by Narah.
- The other elements that I haven't created, have been found on the net.
******************
Preparation
To be on the safe side, duplicate your tubes and image in your Psp :
-
Window / Duplicate
- Close the originals and work with the copies !
- Place the selection in the selection folder of your Psp files.
*****************
Click here to print the tutorial
**********************
You can use my arrow to follow your work
Click on it and drag it all along the tutorial !

***************
Tutorial realized with PSP XIII

Step 1 : The background of the tag
- If you have decided to use my colours, here is what you can do :
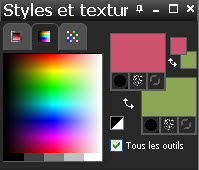
- Open the colour palette "Fairymist_Palette_Vero", in your Psp and using your dropper tool, pick out my colours to set your Material palette ( left click for your foreground / right click for your background )

1 - Open a new transparent image of 950 by 700 pixels.
- Be careful, the width of that image is larger than usual !!
2 - Set your Material palette with two colours out of your main tube.
- My choice : Foreground : colour cd536d
- Background : Dark colour 675b90
- Set your foreground with a linear gradient as below :
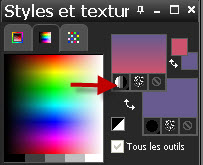
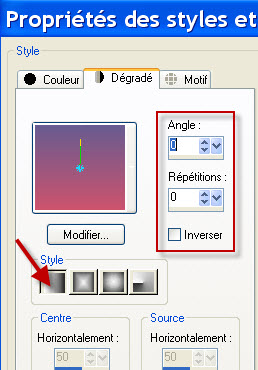
3 - Flood fill your transparent image with that foreground gradient.
4- Effects / Plugins / Simple / Diamonds.
5- Effects / Plugins / Enki's filters / Wallpaper de luxe / default : 0 everywhere except "AControl" at 66.
6- Activate your rectangular selection tool, click on Custom selection and set as shown below :
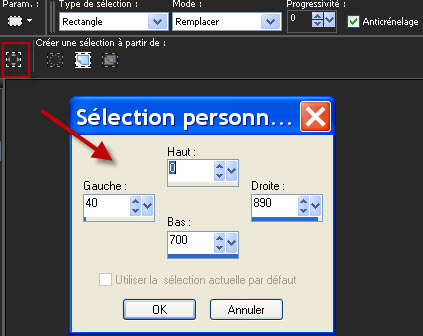
7- Image / Crop to selection. That will allow us to get an image of 850 by 700 pixels with a certain type of pattern !
Step 2 : The fantasy vertical band
- We are now going to create a pattern with dots so we can paint the vertical band with it :

- I have chosen a pattern with dots to match the dots that are on my main tube but you might prefer to make another pattern to match your own tube. In that case, you can use a pattern of your Corel file or select a part of your main tube with your square selection tool; Copy that selection and paste it as new image; add a seamless effect on that square and use it as a new pattern !!!
- Here is what I did to create my pattern with dots :
1- Open a new transparent image of 300 by 300 pixels.
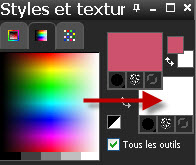
2- Flood fill that new image with your foreground colour (pink for me).
3- In your Material palette,set your background with a colour of your choice (white for me) :
4- ADD A NEW RASTER LAYER.
5- Open the image "Grunge" in your Psp.
- File / export / Custom brush as shown below :
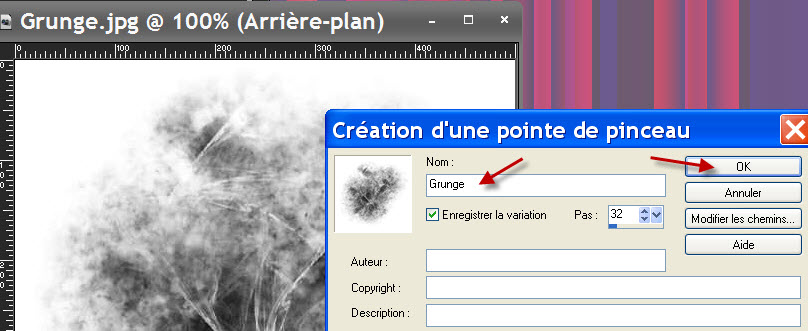
- The jpeg file is then changed into a brush that you will be able to find in your brush folder when you activate your brush tool !
6- Choose your brush "Grunge" and set your tool as below :

7- Apply that brush in the center of your layer with your background colour (right click).
- I have set the mode of that layer on to Soft light .
- Effects / Edge effects / enhance.
- Steps 3 to 7 are optionnal ! I just thought it would be nice to have a little grungy effect on my background !
8- Activate now your Shape tool Ellipse (letter Q) and proceed as explained below :
- Activate the circle shape as shown below (1)
- Draw a circle in the middle of your 300 by 300 pixels square (never mind about the size of your circle).
- Ajust the size and the position of your circle by using the given numbers that you can see below (2).
- Click on "Apply" (3).
- Layers / Convert to raster layer.

- Effects / Image effects / Seamless tiling / default.
- Layers / Merge all.
- You may create the same sort of tile, using another shape( heart etc ...).
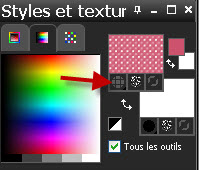
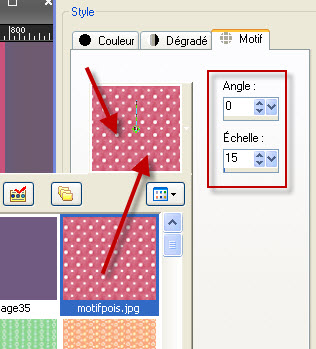
9- Prepare your Material palette as below :
- Activate your foreground PATTERN tab and choose the pattern that you wish to use with the settings as shown below :
10- Let's go back to the tag you started making on step 1.
- ADD A NEW RASTER LAYER.
11- Selections / Load a selection / from Disk / choose "fairymist_felizaniversario" and set as below :
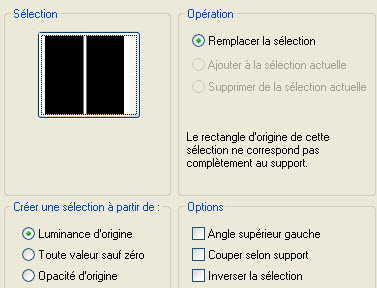
12- Flood fill that selection, on your new layer, with your foreground pattern.
- Deselect all.
Step 3 : The Narah mask
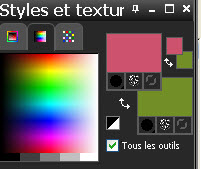
1- Set your Material palette as below :
- Set your background with a colour of your choice that will be used to apply Narah's mask.
- My choice : colour 8da555
2- ADD A NEW RASTER LAYER.
- Flood fill that new layer with your background colour (Right clic).
3- Layers / New mask layer / From image / choose "Narah_mask_Abstract271.jpg" and set as below :
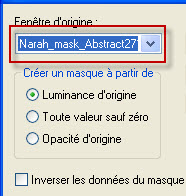
- Adust / Sharpness / sharpen more.
- Merge group.
- I have set the mode of that layer on to Dodge and lowered its opacity at 85.
4- Layers / Duplicate.
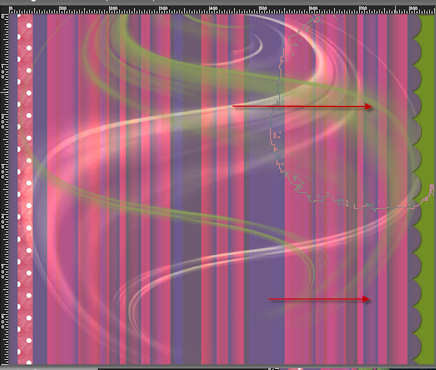
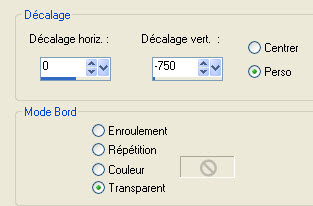
5- Effects / Image effects / Offset as below :
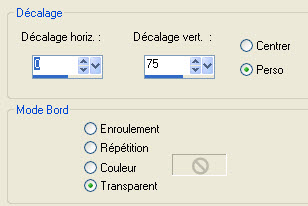
6- Image / Mirror.
- I have left the mode of that layer on to Normal but lowered its opacity at 85.
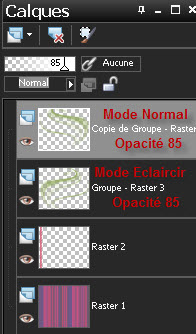
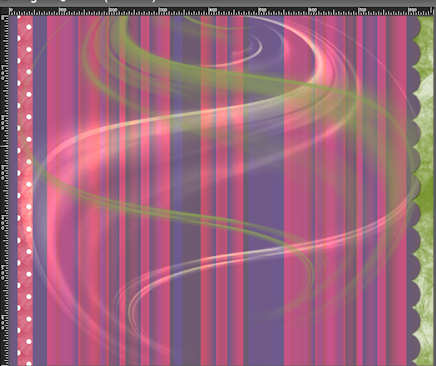
7- Layers / Merge visible.
Step 4 : The fairymist mask
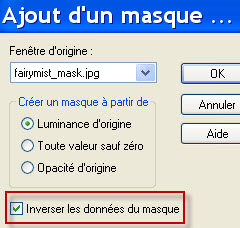
1- Layers / New mask layer / From image / choose the mask "fairymist_felizaniversario_mask.jpg" and set as below :
- Merge group.
2- Effects / 3d effects / drop shadow / 1, 1, 60, 2, noir.
3 --ADD A NEW RASTER LAYER.
4- Layers / arrange / move down.
5- Set your Material palette as below :
- Set your background with a brighter shade of your previous colour .
- My choice : 728f27.
6- Flood fill that new layer with your background colour (Right click).
7- ADD A NEW RASTER LAYER.
8- Activate the brush tool and apply the brush grunge,twice, with a colour of your choice (white for me) as shown below :
- Lower the opacity of that layer to your liking (45 for me).
- Effects /Edge effects / Enhance.
9- Merge all.
Step 5 : The main tube
1- Open the tube "étoiles" or a tube of your choice and copy it.
2- Paste it as a new layer on to your tag.
3- Open the tube "SW_Girlfriends 12 sm 2006_8-05~pjs.pspimage"or a tube of your choice and copy it.
4- Paste it as a new layer on to your tag.
- I have resized that tube at 120%.(Resize all the layers NOT checked)
- Place as on my tag or to your liking.
5- Effects / 3d effects / drop shadow of your choice / 4, 4, 40, 20, black for me.
Step 6: The borders
1- Image / add some symmetrical borders of 1 pixel with a colour of your choice (5e4c72 for mei).
2- Layers / Promote background layer.
3-ADD A NEW RASTER LAYER.
4- Layers / arrange / move down.
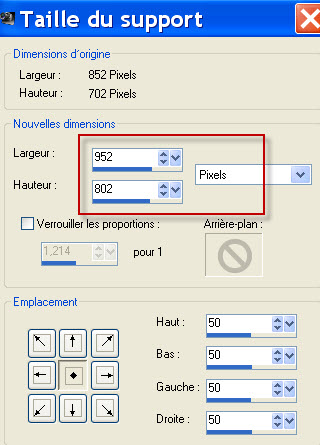
5- Image / canvas size / as below :
6- Flood fill that layer with a colour of your choice (white for me).
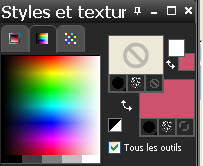
7- Set your Material palette as below (colour of your text in your background / foreground closed).
- I have used the same pink as on step 1.
8- Activate your text tool, set as below and write down your message ( Feliz Aniversario for me) in the top left hand side of your tag.
- I have chosen the fonts Broadway but you may use another one !

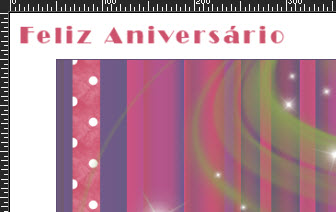
- Don't forget to convert your vector layer on to a raster one !
9- Effects / Plugins / Murameister / copies as below :
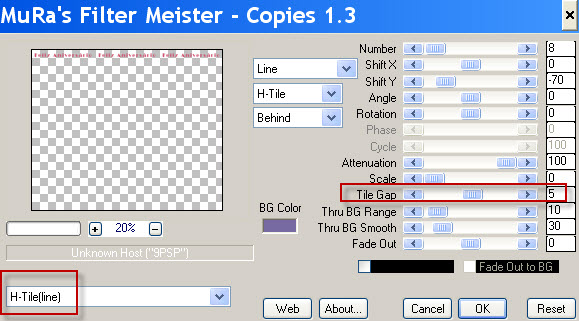
- If you write another message, you may have to change the size of your Fonts and the number of the "Tile Gap" in the Mura meister filter !
10- Layers / Duplicate.
11- Effects / Image effects / Offset as below :
- If you use another font, you will probably have to move your text diffently.
12- Activate the layer on top of the pile.
- Apply your signature
13 - Merge all.
14 - Save your work as a jpeg file.
***************
That's it !! You've done it !!
If you 've enjoyed doing my tutorial, it would be nice to write a few words in my guest book ! If you 've had the slightest problem, please, send me a mail so I can see to the problem
Tutorial translated on the 24th of november 2012
*************
You'll find some versions of that tag in my gallery HERE