
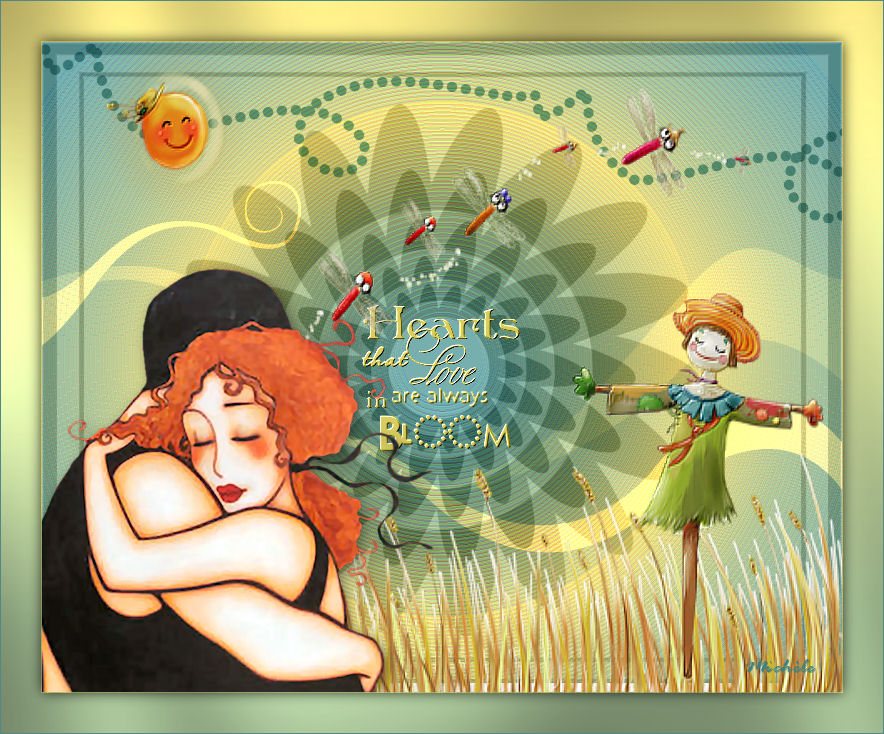
Thank you for putting a link to this tutorial, whenever you display your realization of that tag on a website, on a group or in a mail !
**************************
You'll find some versions of that tag in my gallery HERE
***************************
To realize that tag, you'll need the plugins :
- AAA Filters / AAA multifilters here
- FM Tools / Blend Emboss
- Graphic plus / Cross shadow
and the material zip down below :

**************
*It is forbidden to suppress watermarks on the material provided , to alter, mist or rename the tubes in order to respect the work of the tubers
- The tube of the couple is by Kikirou
You can join in her sharing group here
- The brush " Dashed Lines_aless_24.png " is by Ales1984
- The brush "Popurry_Flowers_Brushes_by_Coby17.cs_1.png.PspBrush" is by Coby17
- The other elements have been found on the net
******************
Preparation
- Duplicate your tubes. Close the originals and minimize the copies for now.
- Export your brushes in your Psp as custom brushes
- Place the selection in your selection folder
- Place the file preset shapes in your preset shape folder
*****************
Click here to print the tutorial
*******************
You can use my arrow to follow your work

***************
1- Open a transparent image of 800 by 650 pixels
2- Set your colour palette with two colours matching your main tube
My choice : Foreground : colour 77afae
Background : Bright or light colour : eddf85
If you use a dark colour, put it in your foreground !!
Set your foreground with a sunburst gradient as below :

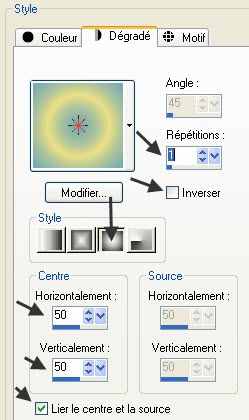
3- Flood fill your transparent layer with that gradient
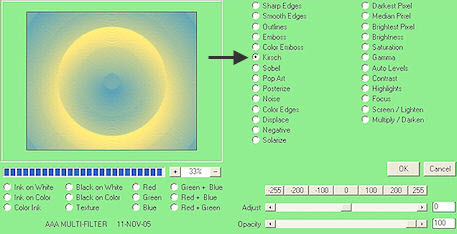
4- Effects / plugins / AAA filters / AAA multifilter / Kirsch set as below :
5- Effects / edge effects / enhance
6- Add a new raster layer
Set your background with white and close your foreground
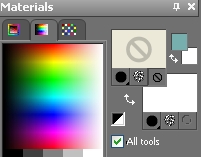
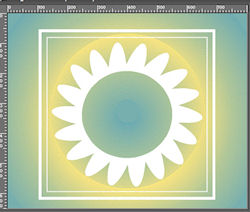
7- Activate your preset shape tool, set as below and choose the shape flower "d" ( line style solid )

If you are not able to use that shape, I have put my layer with that shape in the zip ! Just copy it and paste it as a new layer onto your tag
Draw that shape inside your tag , as below :
8- Edit / cut
9- Selections / select all
Edit / paste into the selection
Select none
Your shape should now be right against the sides of your tag !
10- I have set the mode of that layer to Difference and have lowered its opacity to 15
It is up to you to see which mode and opacity looks nicer with your colours !
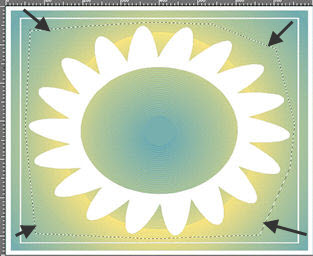
10- The flower which is now in the center of your tag is a bit distorted, we're now going to put it right !
With your free hand selection tool, set as below , select the flower

11- Edit / cut
Keep selection !
12- Add a new raster layer
Selections /load a selection / from disk / choose "fairymist_ felicity.PspSelection" / check Source Luminance and Replace the selection
This new selection has replaced the previous one !
13- Edit / paste into the selection ( the flower is still in memory !)
Select none
14- Step the mode and the opacity of that layer as on step 10
15- Layers / Duplicate
Image / resize at 75% ( Resize all the layers NOT checked )
16- Repeat step 15, three other times in order to get 5 layers with flowers ( or more if you wish !!!)
17- Activate the tube "deco1_popurry_fairymist.pspimage", copy it and paste it as a new layer ( The mode of that layer is on Dodge , opacity 60, ( it's up to you to see if that suits your colours !!) You'll find in the zip the brush I have used to make that layer !
18- Activate the layer "text_felicity_fairymist.pspimage", copy it and paste it as a new layer . You can colorize it if necessary !
19- Activate the layer "deco2_felicity_fairymist.pspimage", copy it and paste it as a new layer . ( The mode of that layer is on Multiply ( it's up to you to see if that suits your colours !!) You'll find in the zip the brush I have used to make that layer !
Place that decorative tube as shown on my tag or to your liking
20- Add a new raster layer and select all !!
Activate the tube " Spring_02-02.pspimage"
Image / mirror
Copy your tube and paste it into the selection
Select none
- Effects / plugins / Fm tools / Blend emboss default
That tube includes quite a few elements, you may replace it with several tubes !! ( grass, flowers, birds ......) or several brushes of your choice
21- Activate the tube " kikirou1565_carmina_by_corinne_reignier.pspimage" or a tube of your choice, copy it and paste it as a new layer into your tag
I have resized my tag at 75% ( Adjust / sharpen )
Place as shown on my tag or to your liking
22- Effects / 3d effects / drop shadow of your choice / 4, 4, 40, 20, noir for me
23- Add a new raster layer and apply your signature
24- Make sure everything is in place
Image / add some symmetrical borders of 1 pixel with a colour of your choice
(Yellow ffef88 for me )
25- Image / add some symmetrical borders of 40 pixels with a contrasting colour
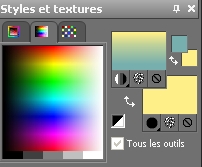
26- Set your colour palette with two colours assorted to your tag
My choice : Foreground : aac69a
Background : ffef88
Set your foreground with a linear gradient as below :
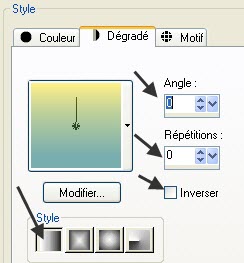
27- Select that 40 pixels width border with your magic wand set as below :

28- Flood fill your selection with your foreground gradient
Keep selection !
29- Effects / plugins / Graphic plus / cross shadow ( everything at 50 except Brightness at 128 )
30- Selections / invert
Effects / 3d effects / drop shadow / 0, 0, 80, 20, black
Select none
31- Image / add some symmetrical borders of 1 pixel with a colour of your choice
(colour 599490 for me )
32- Save your work as a jpeg file and resize it if necessary
***************
That's it !! You've done it !!
If you 've enjoyed doing my tutorial, it would be nice to write a few words in my guest book ! If you 've had the slightest problem, please, send me a mail so I can see to the problem !
Tutorial translated on the 26th of june 2010
*************
Other versions of that tag
