
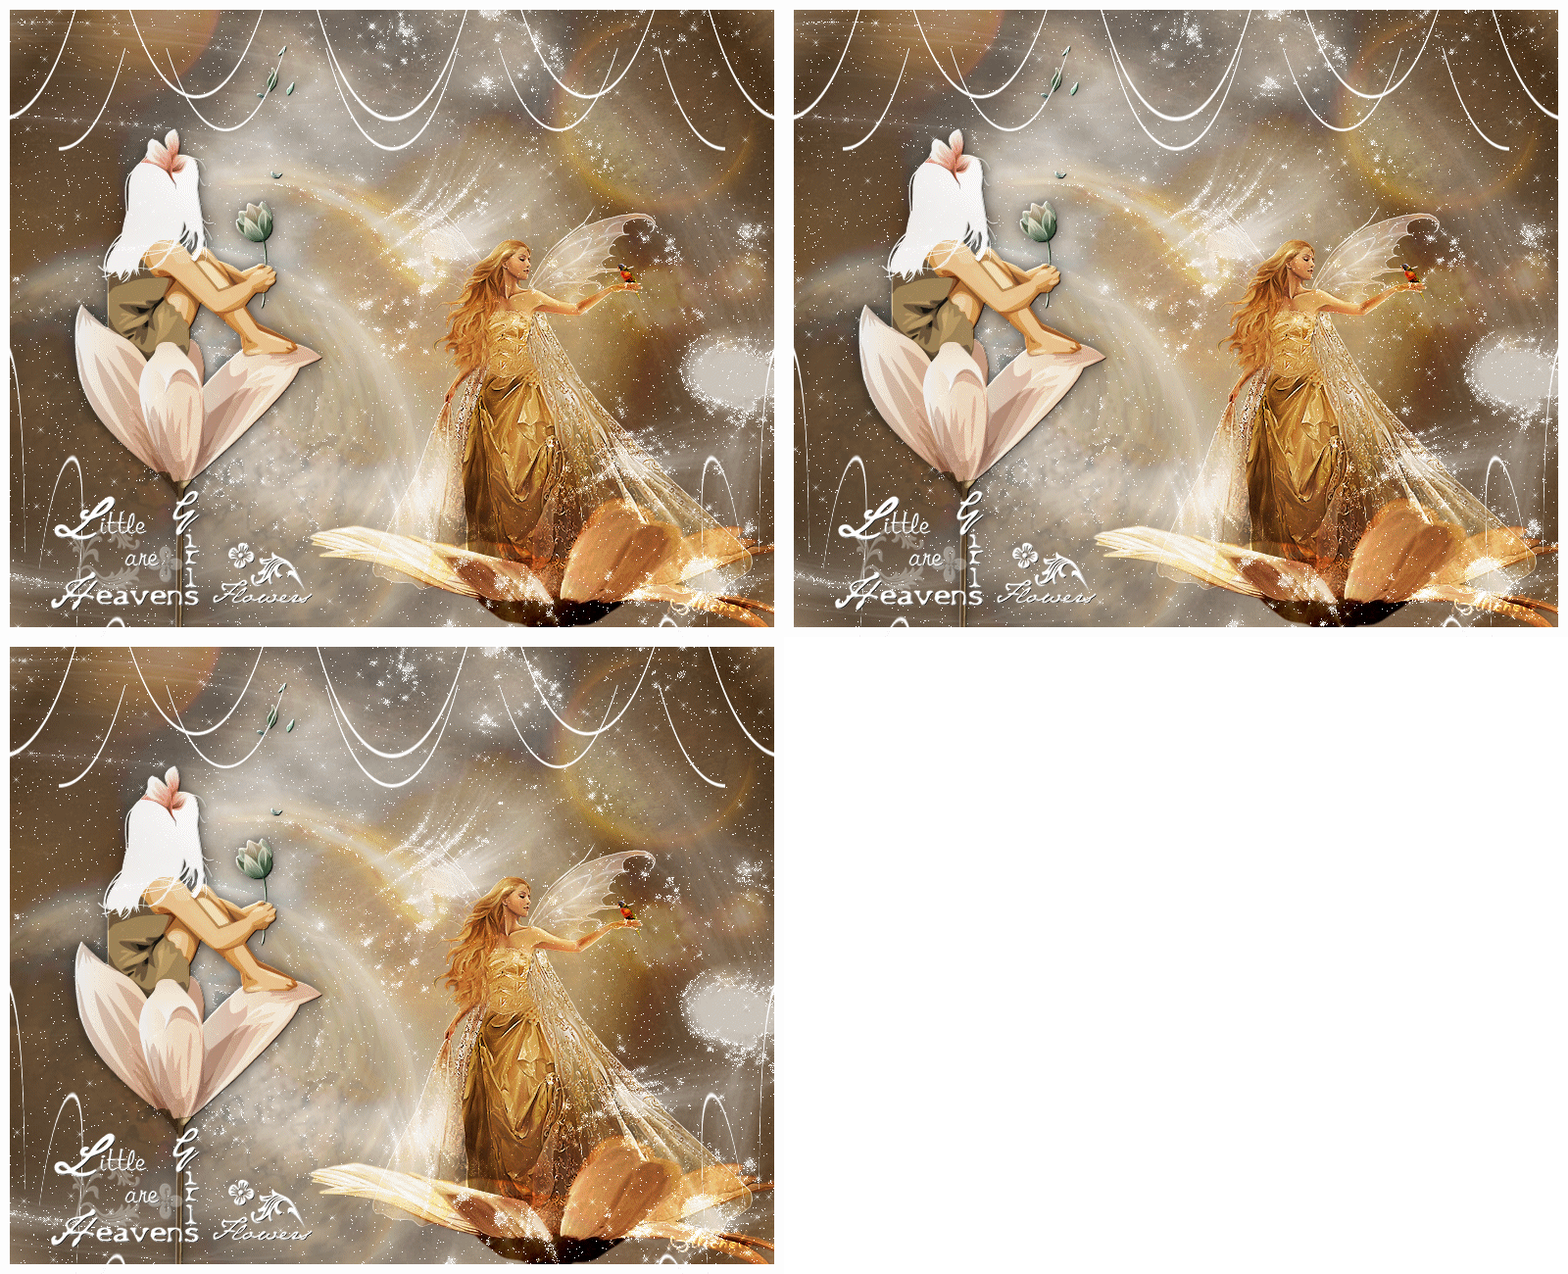
Thank you for putting a link to this tutorial, whenever you display your realization of that tag on a website, on a group or in a mail !
**************************
You'll find some versions of that tag in my gallery HERE
************************
To realize that tag, you'll need the plugins Unlimited 2.0, Alien skin Xenofex 2, Mura's seamless
and the material zip here
**************
*It is forbidden to suppress watermarks on the material provided , to alter, mist or rename the tubes in order to respect the work of the tubers
- The tube of the girl and of the flower are by Dini
- The tube of the fairy is by Sonia
- The mask is by Rêverie
The other elements have been found on the net
******************
Preparation
Duplicate your tubes, mask and image. Close the originals and minimize the copies for now.
Export your brush in your Psp as a custom brush
Place the gradient in your gradients folder
*****************
Click here to print the tutorial
*******************
You can use my arrow to follow your work

***************
1- Open a new transparent image of 800 by 650 pixels
2- Set your foreground with a sunburst gradient, Duotoon Bruine, set as below :
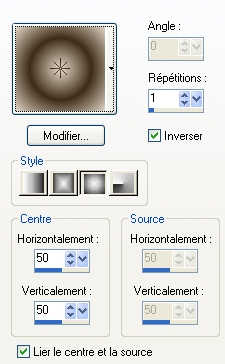
According to your choice of tubes and colours, you may choose another gradient but with the settings above
3- Flood fill your transparent layer with that gradient
4- Layers / duplicate
5- Effects / plugins / Unlimited 2.0 / Render / Smoke / it's up to you to choose the right figures !
Set the mode of that layer to Overlay
6- Activate the layer which is below ( Layer raster 1)
Effects / plugins / Unlimited 2.0 / Tile & Mirror / Radial tile / 88, 169
7- Stay on that layer
Add a new raster layer and select all
8- Open a background picture , I have chosen the picture Planètes which is quite contrasted but it's up to you to decide what you like ( you'll have to make a few tries !)
Copy your picture and paste it into the selection
Select none
I have lowered the opacity of that layer to 30
9- Activate now your top layer
Add a new raster layer and flood fill it with white ( or a colour of your choice )
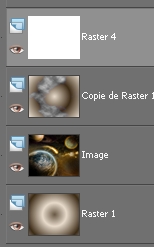
You should get this :
10- Layers / new mask layer / from image / choose the mask Reveries / check Source Luminance
Adjust / sharpness / sharpen more
Merge group
I have lowered the opacity of that layer to 68
11- Open the tube of the flower Dini-Bloemen-07-09-10 or another tube of flower, copy it and paste it as a new layer
Place that tube in the bottom right hand side of your tag
I have set the mode of that layer to Overlay (It's up to you to see what mode you prefer )
12-Open the tube of the fairy Sonja tuben or a tube of your choice, copy it and paste it as a new layer
I have resized my tube at 90 %
Place your tube above the flower
I have set that layer on Hard light (see what is best for you )
It will be easier for you to hide that layer with the fairy, temporarly while you do the step 11 (close the eye in your layers palette )
13- Activate the layer with your flower:
With your free hand tool , set as below, select the parts of the flower behind which your fairy will be

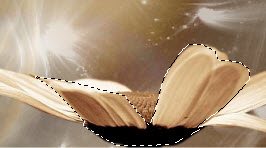
Keep selection !!
14- Activate now the top layer where your fairy is
Hit delete
Select none
15- Open the tube Dini-cutie-09-05-15 or a tube of your choice, copy it and paste it as a new layer
Place the tube at the right place
16- Effects /3d effects / drop shadow of your choice ( mine : 0, 0, 70, 20, noir)
I have slightly lowered the opacity of the layer to 90
17- Add a new raster layer and select all
18- Flood fill that layer in white or with a colour of your choice
Selections / modify / contract by 10 pixels / Hit delete
Keep the selection !
19- Add a new raster layer
Selections / modify/ contract by 50 pixels
Flood fill the selection with the same colour ( white for me )
20- Selections / modify / contract by 2 pixels / hit delete
Select none
21- Effects /distortion effects / Polar coordinates / check Polar to rectangular
22- Image / flip
23- Layers / duplicate
Image / resize at 85% ( Resize all the layers NOT checked !)
24- Layers / duplicate
25- Effects / distortion effects / Polar coordinates / check Polar to rectangular
26- Add a new raster layer !
Activate your brush tool set as below and apply the brush "text Little girls" or a brush of your choice with a colour of your choice ( white for me )

Place the text in the bottom left hand corner of your tag
I have added an emboss effect on my text ( Filtre Mura's seamless / emboss at alpha default )
27- Add a new raster layer and apply your signature
28- We're now going to prepare the animation
If you are not interested, merge all, save your work in a jpeg file and resize it if necessary
***************
ANIMATION
1- In your Psp : all your layers are activated but we are going to desactivate them all :
Layers / View / none
In your layers palette, activate now the four bottom layers, by clicking on the eyes ( raster 1, your picture ,copy of raster 1 and the layer of the mask: they are the 4 layers shown on step 7 )
Layers / merge visible in order to get one layer on which the animation will be
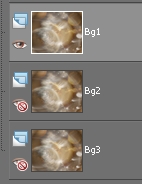
2- Layers / duplicate twice ( you' ll have, then, 3 layers of that background!)
Name those 3 backgrounds : Bg 1, the one of top / Bg2 / / Bg3 the one at the bottom
Then :
!! Layers / VIEW / ALL !!
3- Close Bg2 et Bg3 ( close the eyes in your layers palette ! )
4- Activate Bg1 as below :
Effects / plugins / Alien skin Xenofex 2 / Constellation as below :

5- Edit / copy special / copy merged
6- Open your ANIMATION SHOP
In animation shop / right click : paste as a new animation
or Edit / paste as a new animation
7- Come back to your Psp :
Close Bg1
Activate Bg2 ( you are on that layer )
8- Effects / plugins / Alien skin Xenofex 2 / Constellation :
Click on the button Random seed to obtain new settings
9- Edit / copy special / copy merged
10- In your Animation shop : right click ( or Edit) : paste after current frame
11- Come back to your Psp :
Close Bg2
Activate Bg3 , make sure you are on it
12- Effects / plugins / Alien skin Xenofex 2 / Constellation :
Click on the button Random seed to obtain new settings
13- Edit / copy special / copy merged
14- In your Animation shop : right click ( or Edit ) : paste after current frame
15- In your Animation shop :
Edit / Select all
16- Check your animation, in your animation shop, by clicking here

Stop the animation by clicking at the same place
17- You can change the speed of the animation that way :
Animation / Frame property / the bigger the number is, the slower the animation will be !!!
18- If you like it , all you have to do is save your work in a gif file , in your animation shop !
You may resize your file in your Animation shop :
Animation / Resize animation / choose the right size in pixels
*****************
That's it !! You've done it !!
If you 've enjoyed doing my tutorial, it would be nice to write a few words in my guest book ! If you 've had the slightest problem, please, send me a mail so I can see to the problem !
Tutorial translated on the 9th of october 2009
***************
You'll find some versions of that tag in my gallery HERE
