Thank you for putting a link to this tutorial, whenever you display your realization of that tag on a website, on a group or in a mail !
**************************
You'll find some versions of that tag in my gallery HERE
***********************
To realize that tag, you'll need the plugins :
- Artistic / Palette knife
- FM tile tools / Blend Emboss
- Filters Unlimited 2.0 / Paper texture
- Mura's Meister / Copies
- Filter Factory Gallery N / Wee scratches
and the material zip down below :

**************
*It is forbidden to suppress watermarks on the material provided , to alter, mist or rename the tubes in order to respect the work of the tubers
- The tube of the woman is by Jhanna
You can get Johanna's tubes by joining in her sharing group here
The tube "calguisdecorvector21311.pspimage" is by Guismo
You'll be able to find her tubes on Dakara' s site here
and you can join in her sharing group here
- The mask I have used is by Cameron
The other elements have been found on the net
******************
Preparation
Duplicate your tubes, mask and images. Close the originals and minimize the copies for now.
- Place the selections in the selection folder of your Psp files
- Double click on the preset Alien skin Eye candy 5 so that it can be installed in the proper folder
If that doesn't work, place that preset in your plugins folder : Alien skin/ Eye candy 5 impact / Settings/ Shadow
Back to your Psp : Effects/ Plugins/ Alien skin Eye candy 5 impact
/Perspective shadow, click on Manage / Import / look for your preset / Ok.
*****************
Click here to print the tutorial
*******************
You can use my arrow to follow your work
Click on it and drag it along the tutorial !

***************
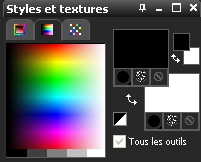
Set your Materials palette with two colours out of your main tube
My choice : Foreground : Dark colour : black for me
Background : Light colour : White for me
Step 1
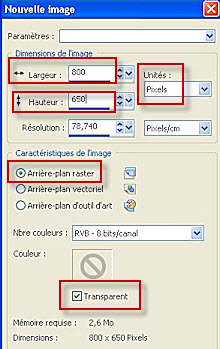
- Open a transparent image of 800 by 650 pixels
- Activate your main tube ("JHanna_473 tube.pspimage" for me ) and copy it :
Edit / Copy
- Paste that tube as a new layer onto your tag :
Edit / Paste as a new layer
- Effects / Image effects / Seamless tiling default as below :
- Layers / Merge all
- Adjust / Blur / Radial blur as below :
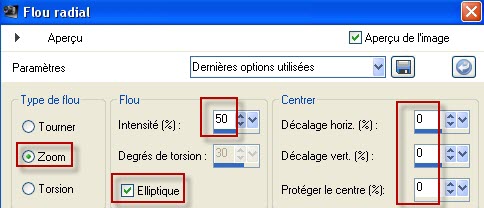
Step 2
- Add a new raster layer and select all
- Activate the image "bg_dominique.jpg" and copy it
- Paste that image into the selection
- Sélections / Select none
- Effects / Plugins / Artistic / Palette knife / 25, 3, 0
- Effects / Plugins / FM tile tools / Blend Emboss default :
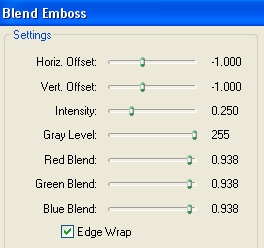
Apply that effect twice !
- Effects / Plugins / Filters Unlimited 2.0 / Paper texture / Striped paper fine / 74, 87
- In your layers palette, set the mode of that layer to Luminance Legacy
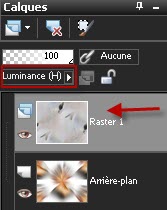
- Layers / Merge All
- Window / Duplicate
Save that new image as"fond" and as a jpeg file and set aside ( we'll use it on step 10)
Step 3
- Activate the tube "MiracleForEver02.pspimage" and copy it
- Paste that tube as a new layer on to your tag
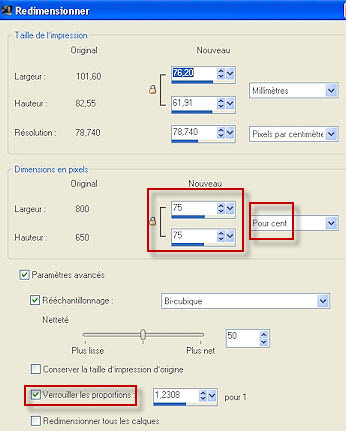
- Image / Resize by 75% ( Resize all the layers NOT checked
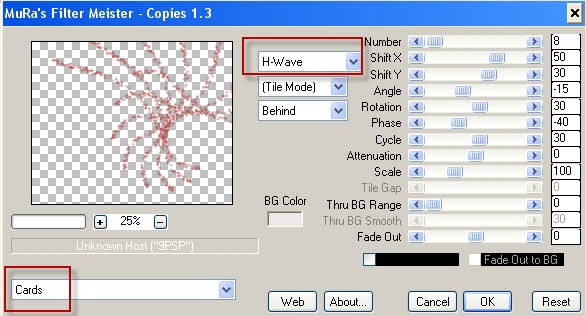
- Effects / Plugins / Mura's Meister / Copies as below :
- Image / Mirror !!!!!!!!!!!!!!!!!!
- In your layers palette, set the mode of that layer to Luminance Legacy

Step 4
- Activate the tube "gribouillage" or a text tube of your choice and copy it
- Paste that tube as a new layer on to your tag
- With your move tool ( letter M), move that tube in the bottom left hand side of your tag
- I have duplicated that layer and moved it in the bottom right hand side of my tag
- I have set the mode of that layer to Luminance Legacy ( It is up to you to see which mode suits you better )

Step 5
- Add a new raster layer
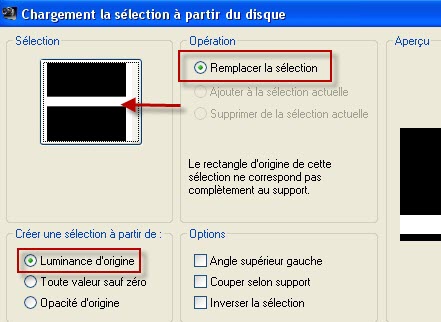
- Selections / Load a selection / from disk / Choose "fairymist_dominique.PspSelection" as below :
- With your flood fill tool, flood fill your selection with your light background colour ( right click ) : white for me
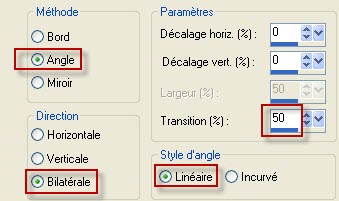
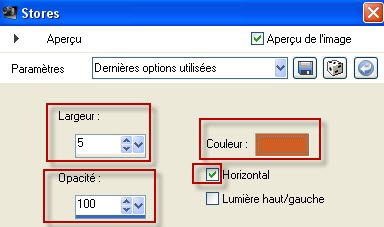
- Effects / texture effects / Blinds as below :
Choose a bright colour out of your main tube ( orange :d55c23 for me )
- Selections / Select none
- Effects / Plugins / Filter Factory Gallery N / Wee scratches / 255
- Your may change the mode of that layer if you think it will look better ( I have left mine to Normal )
Step 6
- Add a new raster layer
- With your flood fill tool, flood fill your new layer with your light background colour ( right click ) : white for me
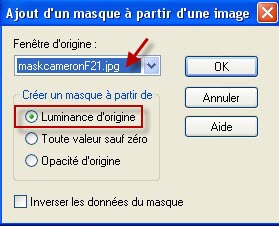
- Layers / New mask layer / from image / Choose the mask "maskcameronF21.jpg" as below
- Layers / Merge group
- Effects / 3d effects / Drop shadow of your choice / My choice : 1, 1, 100, 5, black
- Effects / Plugins / FM tile tools / Blend Emboss default
Step 7
- With your magic wand, set as below , select the inside of your first frame, press the shift key, keep that key pressed and click on the other two frames so that the three little frames are all selected

- Selections / Modify / Expand by 10 pixels
- Add a new raster layer
- Layers / Arrange / Move down
- Activate the image "Image_fleurs.jpg" or an image of your choice
- Edit / copy
- Edit / Paste that image into the selection
- Selections / Select none
- This is optionnal !! :
Effects / Plugins / Artistic / Palette knife / 25, 3, 0
and I have set the mode of my layer to Luminance Legacy
Step 8
- In your layers palette, active the layer which is on top of the pile !
- Add a new raster layer
- Selections / Load a selection / from disk / Choose "fairymist_dominique.PspSelection-2" , same setting as on the previous selection
NB: This selection has been made out of Guismo's beautiful tube that I have included in my zip !
- With your flood fill tool, flood fill that selection with your dark foreground colour
- Selections / select none
- You may lower the opacity of that layer if it seems better for you
Step 9
- Activate your main tube "JHanna_473 tube.pspimage" for me, and copy it
- Paste that tube as a new layer on to your tag
- Place at the right place
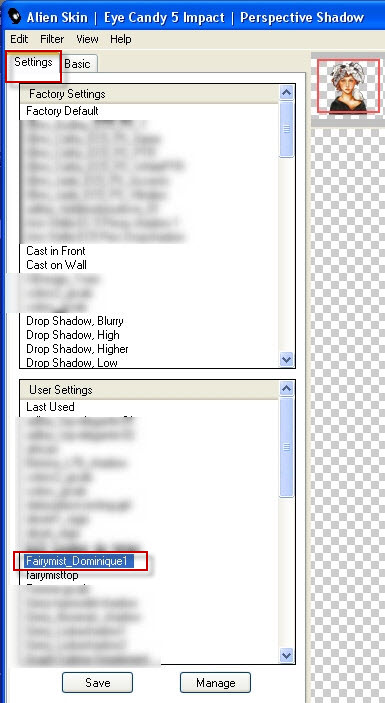
- Effects / plugins / Alien skin Eye candy 5 / Impact / Perspective shadow as below :
Step 10
- Add a new raster layer and apply your signature
- Make sure everything is at the right place
- Image / add some symmetrical borders of 2 pixels with a colour of your choice ( white for me )
- Layers / Promote Background layer
- Image / resize at 90% ( Resize all the layers NOT checked )
- Effects / 3d effects / Drop shadow / 0, 0, 100, 20, black
Step 11
-- Add a new raster layer and select all
- Layers / Arrange / Move down
- Activate the image "fond", saved at the end of step 2 and copy it
- Paste that image into the selection
- Selections / Select none
- Adjust / Blur / Gaussian blur / 20
Image / add some symmetrical borders of 2 pixels with a colour of your choice ( white for me )
- Save your work as a jpeg file and resize it if necessary
***************
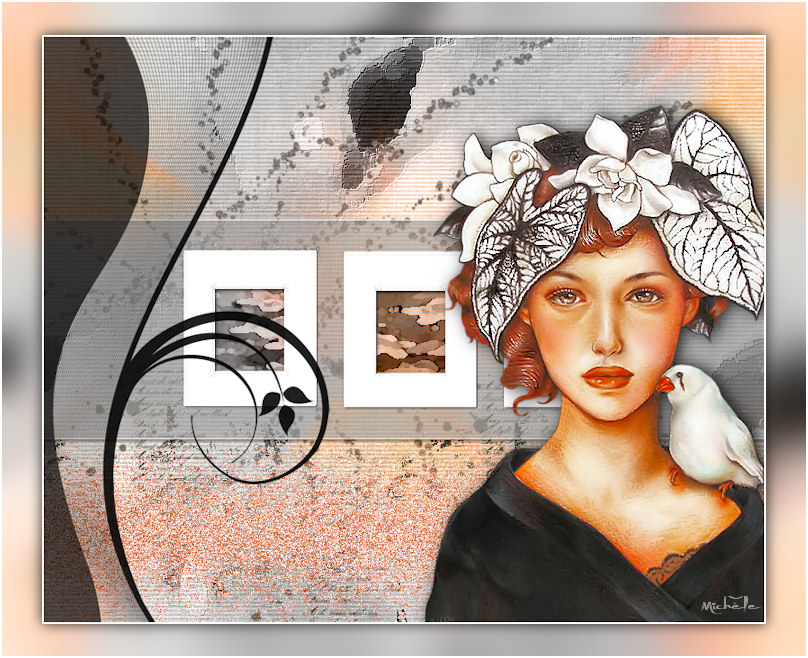
That's it !! You've done it !!
If you 've enjoyed doing my tutorial, it would be nice to write a few words in my guest book ! If you 've had the slightest problem, please, send me a mail so I can see to the problem
Tutorial translated on the 2nd of April 2011
*************
Other versions of that tag