
Thank you for putting a link to this tutorial, whenever you display your realization of that tag on a website, on a group or in a mail !
**************************
You'll find some versions of that tag in my gallery HERE
************************
To realize that tag, you'll need the plugins :
- VM Toolbox
- Murameister
- Mura's seamless
- Alien skin Eye Candy 5 / Impact
- Penta com
and the material zip down below :

**************
*It is forbidden to suppress watermarks on the material provided , to alter, mist or rename the tubes in order to respect the work of the tubers
- The tube of the woman is by Katussia
You can join in her sharing group here
- The tube of the sheep and the star is by Kikirou
You can join in her sharing group here
The other elements have been found on the net
******************
Preparation
- Duplicate your tubes. Close the originals and minimize the copies for now.
- Put the mask in your masks folder.
- Put the file formes Weitere formen.jsl in your preset shapes folder
- Put the selection in your selection folder
- Export the file perle.psp as a picture tube in your psp
*****************
Click here to print the tutorial
*******************
You can use my arrow to follow your work

***************
1- Open a new transparent image of 800 by 650 pixels
2- Set your material palette with two colours out of your main tube
My choice : Foreground : colour f2b9e6 
Background : white (or a very light or luminous colour )
3- Flood fill your transparent layer with your foreground colour
4- Effects / plugins / VM Toolbox / Motion trail wild as below
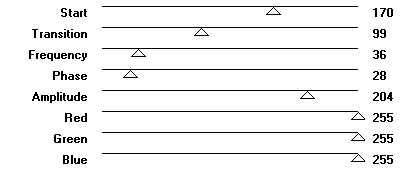
Do that effect twice
5- Add a new raster layer and swap your background and foreground colour ( for me, white will be then in my foreground)
6- Activate the preset shape tool, set as below and choose the shape Nova 4; apply that shape in the middle of your tag starting from the top left hand corner of your tag

Edit / copy and Edit / paste as a new layer ( that will put your shape right in the middle of your tag ). you can now delete the previous layer where your shape isn't quite in the middle !
*** If you prefer , you can use my forme_daydream_fairymist and paste it as a new layer ( you may colorize it or change the mode of the layer )
7- Now, set your foreground in black and your background with a colour of your choice ( I have chosen the colour b90531 
( it's up to you to find the right colours for your stars !)
Now, set your foreground with a linear gradient , angle 45, repeats at 0, Invert NOT checked
8- Activate your symmetric shape tool, set as below and choose the shape star


Draw a little star in the middle of the tag ( similar size to my star )
You may choose to use my star enclosed in the zip if you wish !
9- Layers / convert to raster layer
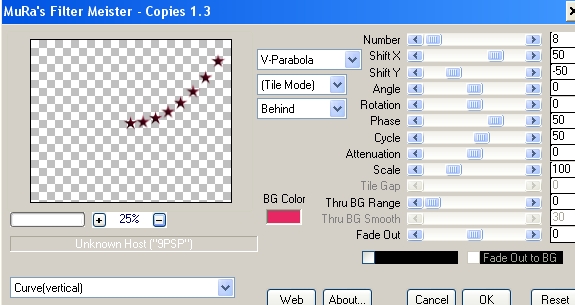
10- Effects / plugins / Murameister / copies as below
11- Add a new raster layer
Set your foreground with a bright colour out of your main tube
(I have chosen that bright pink e92b67  )
)
Flood fill that layer with that colour
12- Layers / load a mask from disk / choose Brujita_ mask_0025 :
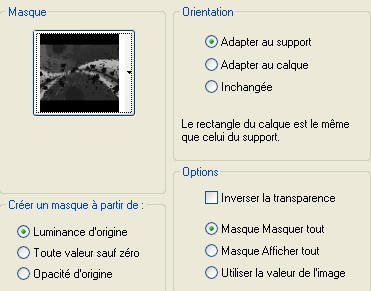
Adjust / sharpness / sharpen more
Layers / merge group
13- Effects / 3d effects / drop shadow / 1, 1, 100, 2, colour f57ea2 for me
14- Effects / plugins / Mura's seamless / Emboss at alpha default
15- Open the tube nuage_daydream , copy it and paste it as a new layer
Place it as on my tag
Set the mode of that layer to Luminance Legacy !
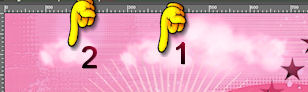
16- Activate your clone brush ( hit letter C to activate it ) and set it as below !


1- Apply your clone brush on the left part of the cloud ( n° 1 below ) and right clic on it
2- Now, stay on the same layer and apply you clone brush a little further on the left ( n° 2 below ) and left click while your pull your brush towards the left ( that will create another cloud as on my picture below !)
17- Open the tube Kikirou 915 good night or a tube of your choice, copy it and paste it as a new layer
( I have only used a part of that tube; activate the layer 3 and with your freehand selection tool, select the sheep with the star; copy it and paste that selection as a new layer
Place the tube at the top of your tag, on the clouds as on my tag
Resize that tube at 75 %
19- With you freehand selection, set as below , select the outside of the yellow star that we are going to colorize
* you may use the Zoom to see the lines better ( Hit the letter Z)

- Selections / modify / expand by 2 pixels
- Adjust / Hue and saturation / colorize / 126, 115 ( I have chosen to colorize in turquoise because I have a little turquoise in my main tube !)
- Select none !
Lower the opacity of that layer to 75
20- Effects /3d effects / 1, 1, 40, 15, noir
21- Open the tube KTs-Maria_Parrish or a tube of your choice, copy it and paste it as a new layer
Place the tube in the bottom left hand corner of your tag
I have resized my tube at 90 %
22- With the clone brush , I have copied the pink flower which is on the bottom left hand corner of my tube and I have cloned it on the bottom right hand corner of that tube
Add a drop shadow of your choice to the whole tube
23- Add a new raster layer
Selections / load selection from disk / choose Selection_daydream_fairymist / check Replace the selection and Source Luminance
Flood fill that selection with a colour of your choice ( the color doesn't matter because it's just going to be a support to draw the corners and that layer will be delete later on !
Select none
24- Add a new raster layer
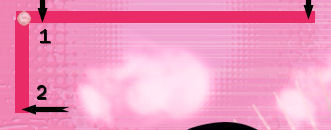
Activate your picture tube tool set as below, choose the picture tube perle

Apply a first pearl in the corner of your painted shaper ( as shown below : n° 1 )
Press the shift key , keep it pressed and apply another pearl as shown on n°2 below
Do that again to cover your horizontal line with pearls
Set the mode of that layer to Luminance legacy and lower the opacity to 75
Add a light drop shadow ( 1, 1, 40, 15, black )
Delete the layer used on step 23
25- Layers / duplicate
Image / mirror
Image / flip
26- Open the tube texte_daydream_fairymist or a text of your choice, copy it and paste it as a new layer
Place the text as on my tag
27- Add a new raster layer and apply your signature
28- Make sure everything is in its place
Image / add some symmetrical borders of 2 pixels, with a bright colour ( ca225c  for me )
29- Image / add some symmetrical borders of 40 pixels with a pale colour ( f6a6d0  for me )
30- With your magic wand, set as below , select that border of 40 pixels width

Effects / plugins / Pentacom / Dot and cross / 72, 10, 2
31- Selections / Invert
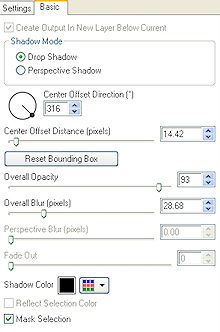
Effects / plugins / Alien skin Eye candy 5 / impact / Perspective shadow / Drop shadow blurry default, as below :
Selections / select none
32- Image / add some symmetrical borders of 2 pixels, with a bright colour ( ca225c for me )
33- Save your work as a jpeg file and resize if necessary
***************
That's it !! You've done it !!
If you 've enjoyed doing my tutorial, it would be nice to write a few words in my guest book ! If you 've had the slightest problem, please, send me a mail so I can see to the problem !
Tutorial translated on the 4th of september 2009
*************