
Thank you for putting a link to this tutorial, whenever you display your realization of that tag on a website, on a group or in a mail !
-----------------------
You'll find some versions of that tag in my gallery here
************************
To realize that tag, you'll need the material zip down below :

**************
Preparation
Duplicate your tubes and images. Close the originals and minimize the copies for now.
- Place the brushes in the brush folder of your Psp files
*****************
Click here to print the tutorial
*******************
You can use my arrow to follow your work

***************
1- Open a transparent image of 800 by 650 pixels
2- Set your colour palette with two colours matching your images
My choice : Foreground : colour 90432e
Background : colour e6c1a6
Set your foreground with a linear gradient as below :


3- Activate the image "père noël" or an image of your choice, copy it and paste it into the selection
Selections / Select none
4- Adjust / softness / soft focus / settings : 100 everywhere
5- Image / add some symmetrical borders of 15 pixels with a colour different from the ones you have in your tag ( I have chosen white )
6- With your magic wand, set as below, select this border

7- With your flood fill tool , set as below, flood fill the selection with the gradient you have in your foreground

8- Selections / Float
9- Effects / 3d effects / Cut out / 0, 0, 100, 20, colour 90432e
10- Effects / 3d effects / inner bevel as below :

11- Seélections / Promote selection to layer
Selections / Select none
12- Layers / duplicate
13- Effects / reflection effects / feed back as below :

14- Selections / Select all
Selections / Modify / contract by 17 pixels
Selections / Invert
Hit the delete key of your keyboard
Selections / Select none
15- Layers / duplicate
Image / mirror
Image / flip
16- In your layer palette, activate the layer " Copie de sélection transformée" as shown below

17- Image / resize at 87% ( Don't check Resize all the layers !)
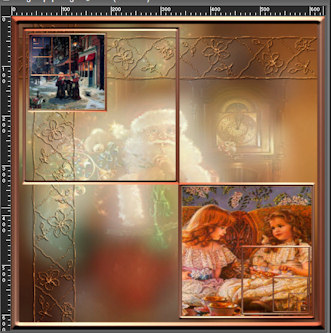
18- With your move tool ,pull that frame down to the bottom right hand corner of your tag as shown below :

19- With your magic wand, set as previously and while keeping the shift key pressed, select the inside of the frame as shown below :

20- Add a new raster layer
Activate the image "fillette.jpg"or an image of your choice, copy it and paste it into the selection
Selections / Select none
21- Layers / Arrange / Move down
22- In your layer palette , activate the layer " Copie (2) de sélection transformée"
With your magic wand, set as previously and while keeping the shift key pressed , select the inside of the frame as shown below :

23- Repeat steps 20 and 21 for your second image ( "Chanteurs" for me )
24- In your palette layer , activate your bottom layer ( Background with the image of père Noël)
Add a new raster layer
Put the colour 6f2e21 in the foreground of your material palette
Activate the brush tool , choose the brush Nonny bordure 05 and apply it on the top of your tag, as on my tag with your foreground colour

I have set the mode of that layer to Hard light, it is up to you to see which mode you prefer!
25- Layers / Duplicate
26- Image / Free rotation as below :

Place the lace, on the left hand side as shown below :
27- Activate the decorative tubes " deco1", "deco2", "deco3" or tubes or your choice, copy them one by one and paste them as new layers onto your tag
Place the tubes to your liking
With your Eraser tool, size 10, rub off the part of the chains that you don't need.
28- Effects / effects 3d / drop shadow of your choice / 1, 1, 100, 1, black for me :
That must be done on all the decorative tubes
29- In your layer palette, activate your top layer
Activate the tube "titre" or a text tube of your choice, copy it and paste it as a new layer
You may colorize that tube ( Règlages / Teinte et saturation / Coloriser ) or write a text of your own
Place to your liking
30- Add a new raster layer and apply your signature
31- Layers / Merge all
32- Save your work as a jpeg file
***************
That's it !! You've done it !!
If you 've enjoyed doing my tutorial, it would be nice to write a few words in my guest book ! If you 've had the slightest problem, please, send me a mail so I can see to the problem !
Tutorial realized on the 13th of december 2007 , reviewed and translated on the 22nd of December 2010
*************
Other versions of that tag
