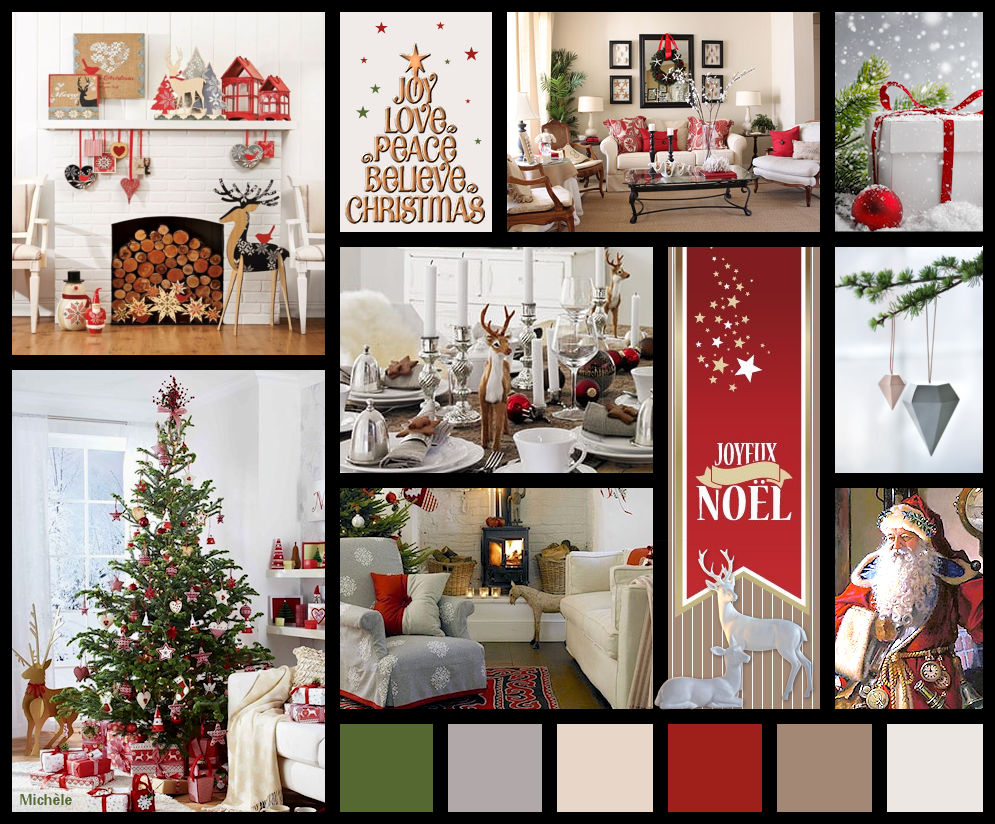

Thank you for putting a link to this tutorial, whenever you display your version of that tag on a website, on a group or in a mail !
**************************
You'll find some versions of that tag in my gallery Here
***********************
To make that tag, you'll need
10 pictures that go well together and
the material zip down below :

******************
Click here to print the tutorial
**********************
You can use my arrow to follow your work
Click on it and drag it all along the tutorial !

***************
Tutorial made with PSP X8
..................................
1- Open the image "Fairymist_Christmas_mood_board_2017" in your PSP.
- The colour of that background may be changed later on.
2 - ADD A NEW RASTER LAYER.
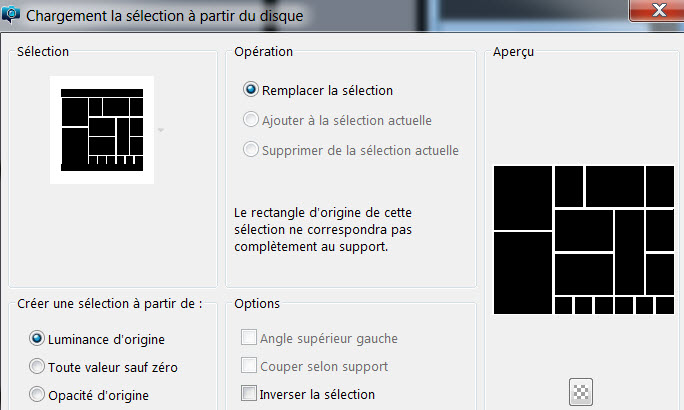
3- Selections / Load a selection / Load the selection from Disk / Choose "Fairymist_Christmas_mood_board_2017"
and set as below :

4- Flood fill the selection with a colour of your choice (black for me).
5- Activate your magic tool and select the inside of the first compartment that you wish to fill in with a picture.
6- Selections / Modify / Expand by 1 pixel.
7- Open your first image in your PSP and copy it.
8- Activate the layer at the bottom of the pile and paste your image AS A NEW LAYER.
9- With your Move tool, place the part of the image as you wish.
- If necessary, resize it so that it fits better.
10- When you are satisfied by your result :
- Selections / Invert.
- Hit the delete key of your keyboard.
- The parts of the image that come out of your compartment will then be deleted..
11- In you layers palette, activate the top layer (your grid).
- Select another compartment and repeat steps 6, 7, 8, 9 and 10.
11- Keep on working that way until your 10 comparments are filled.
- All your images are now under the grid (not in it !).
12- The little squares, at the bottom of your grid are there so you can display the colours you have used for this board.
- Add a new layer so you can flood fill the squares on it.
13- You can then merge all the images like me :

14- Apply your signature.
15- Layers / Merge all.
16 - Save your work as a jpeg file.
***************
That's it, you have done it !
If you have the slightest problem, don't hesitate to get in touch with me !
Tuto translated on the 15th of december 2017.
*******************
You'll find some versions of that tag in my gallery Here
