
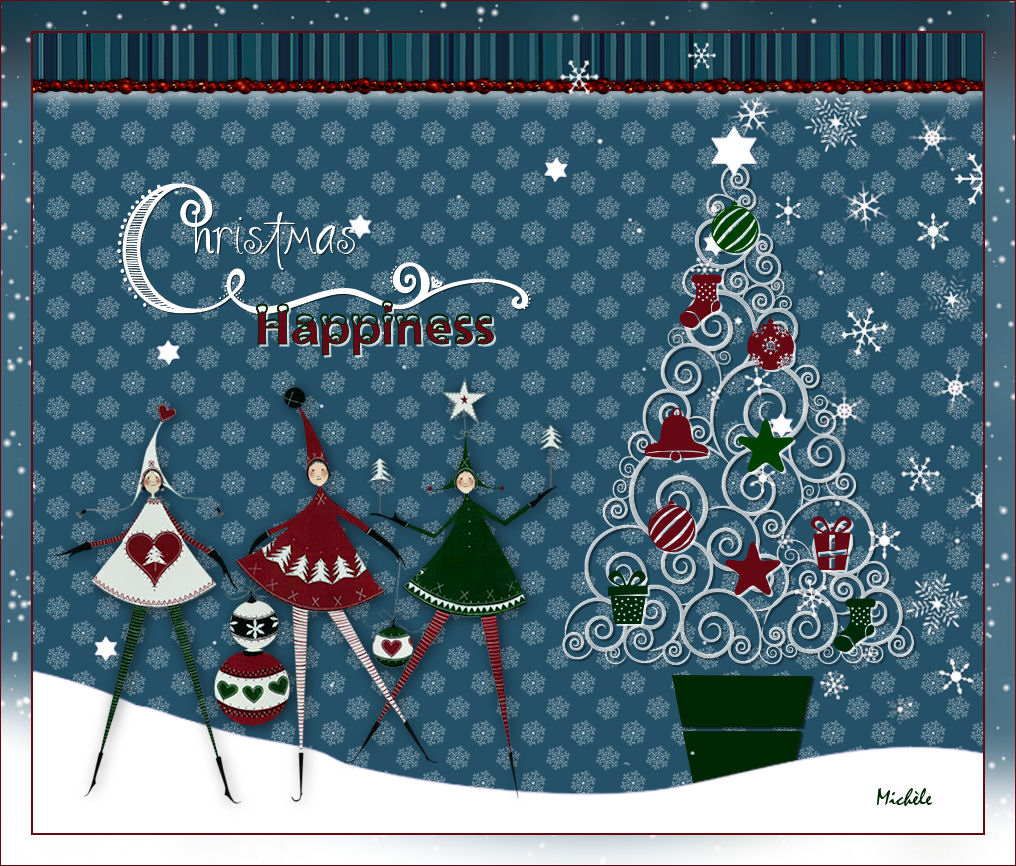
Thank you for putting a link to this tutorial, whenever you display your realization of that tag on a website, on a group or in a mail !
**************************
You'll find some versions of that tag in my gallery HERE
***********************
To make that tag, you'll need the filter :
- VDL Adrenaline / Snowflakes
and the material zip down below :

**************
*It is forbidden to suppress watermarks on the material provided , to alter, mist or rename the tubes in order to respect the work of the tubers
- The tube of the children is by Jhanna
You can join her sharing group here
- The brush "snowtime" is by Crazy alice.
- The other elements that I haven't created, have been found on the net.
******************
Preparation
To be on the safe side, duplicate your tubes and image in your Psp :
-
Window / Duplicate
- Close the originals and work with the copies !
- Place all the brushes in the brush folder of your Psp files.
- Open the fonts outside your Psp if you have Windows Xp or place them in the Font folder of Windows or TFT if you have Win7 or Win8.
*****************
Click here to print the tutorial
**********************
You can use my arrow to follow your work
Click on it and drag it all along the tutorial !

***************
Tutorial made with PSP XIII
*****************
1 - To start, we're going to make a pattern for the background
- Open a new transparent image of 100 by 100 pixels (or other size, see below).
- You may use a transparent image of 300 by 300 pixels (or any other size) if you wish to have more spaced pattern !
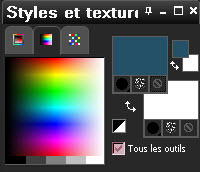
2- Set your material palette as below :
- Set your foreground with a colour of your choice and your background with white or other colour of your choice.
- I have chosen this blue 245168 for my foreground.
3- Flood fill your small transparent image with your foreground colour.
4- ADD A NEW RASTER LAYER.
5- Activate your brush tool and choose the brush "snowtime2" like me or any other snow flake brush of your choice :
- I have resized my brush at 50 :

6- Apply your brush in the center of your image with your background colour (right click).
7- Edit / Cut.
- Edit / Paste as a new layer (Your snowflake is now precisly in the center of your image.
- You can now delete layer two and remain on layer 3 on top of the pile !
8- Effects / Image effects / Seamless tiling default.
9- In my layers palette, I have lowered the opacity of my snowflakes layer at 70.
10- Adjust / Sharpness / Sharpen.
11- Layers / Merge all.
- You pattern is now ready to be used !
12- We're going to display it in the Material palette / tab Patterns.
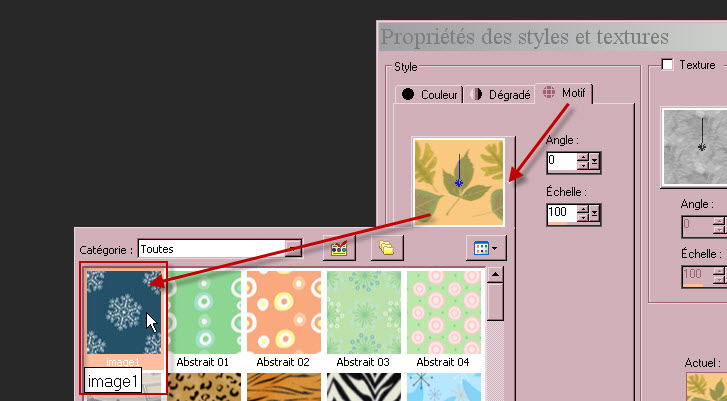
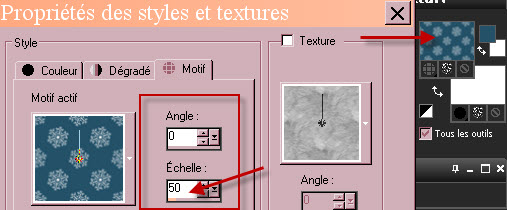
- I have chosen the scale 50 for this pattern. See which scale you prefer.
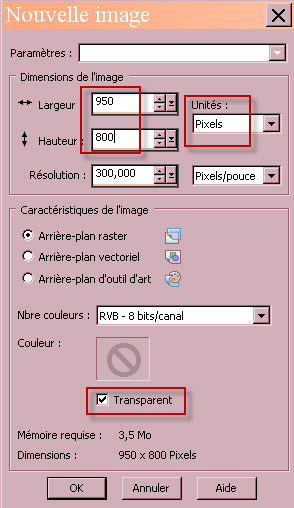
13- Open a new transparent image of 950 by 800 pixels.
- Flood fill your new transparent image with your foreground pattern (left click).
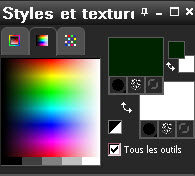
14- Set your material palette as below :
- I have set my foreground with a dark green 002402 and kept the white for the background.
- It is up to you to see which colours match your main tube better !
15- ADD A NEW RASTER LAYER.
16- Activate your brush tool and choose the brush "Fairymist_ChristmasHappiness_vase" :

- Apply the brush on your new layer with your foreground colour.
- Place as on my tag or to your liking.
- You may use another brush or a tube of your choice instead of my pot.
17- ADD A NEW RASTER LAYER.
18- Activate your brush tool and choose the brush "Christmas tree vector" or a brush of your choice:

19- - Apply the brush on your new layer with your background colour (right click).
- Place as on my tag or to your liking.
- You may use another christmas tree tube of your choice instead of my tree.
20- I have applied a drop shadow on both pot and tree as follows : 2, 2, 60, 2, black.
21- ADD A NEW RASTER LAYER.
- Flood fill that layer in white.
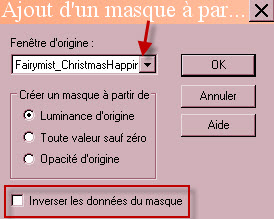
22- Open the mask "Fairymist_ChristmasHappiness_mask_snow" in your Psp and minimize it.
23- Layers / new mask layer / from image :
- Layers / Merge group.
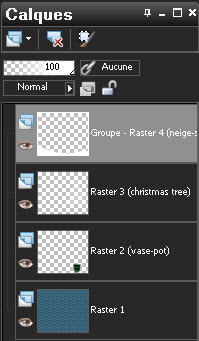
- Here is what I get on my layers palette, at this stage :
24 - Open the image "Fairymist_ChristmasHappiness_stripes" in your Psp and copy it.
25- Paste it as a new layer on to your tag.
26- I have place that decorative band as below :
- Effects / Image effects / Offset :
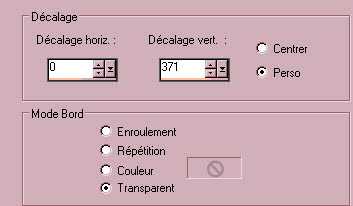
- You may choose another element of decoration or colorize the stripes !
27- Effects / 3d effects / drop shadow as follows : - 6, 0, 80, 20, white.
28- Open the tube "guirlande" or a tube of your choice, in your Psp and copy it.
29 - Paste it as a new layer on to your tag.
30- I have place that decorative band as below :
- Effects / Image effects / Offset :
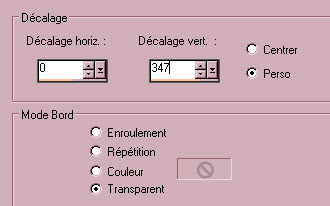
- Colorise this tube if necessary.
31- Open the tube "stars"or a tube of your choice, in your Psp and copy it.
32 - Paste it as a new layer on to your tag.
- It is at the right place.
33- Open the tube "JHanna_724-a"or a tube of your choice, in your Psp and copy it.
34 - Paste it as a new layer on to your tag.
- I have resized that tube at 75% (Resize all the layers NOT checked).
- Place as on my tag.
35- Effects / 3d effects / drop shadow of your choice / 2, 2, 40, 10, black for me.
36- Open the tube "Tree star"or a tube of your choice, in your Psp and copy it.
37 - Paste it as a new layer on to your tag.
- Place it at the top of the tree.
38- Set your Material palette with two colours matching your main tube.
- My choice: - Foreground : I have kept the same green : 002402
- Background : red e 680719
- I have closed my foreground !
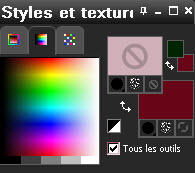
39- Activate your text tool and choose a font that has christmas decorations like mine.
- I have chosen the font "Christmas shapes" and set the size at 64 pixels :

40- Write down the letter of your choice that will correspond to a decoration of your choice and apply your choice.
- I have chosen, one by one, the letters (small letters) : q, f, g, h, w.
41- I have applied a drop shadow on each element of decoration as below :
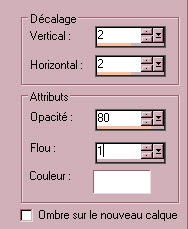
- Then, you can swap colours and write down a few items with your other colour
- I you wish you may use tubes instead of the "dingbats" !
42 - Place all the decorations on your Christmas tree.
- When you are satisfied with all these decorations :
- Layers / Merge down as many times as necessary to get all the decorations on the same layer.
43- Set your Material palette like me :

44- Activate your text tool to write down your text
- I have written the word "Happiness" with the font Snowdrift, size 50.

45- I have put the same drop shadow on that word as on point 41.
46- To write down the second word "Christmas", I have used the font TK Doodle.
- In my Material palette, I have set my background in white and closed my foreground.

47- Effects / 3d effects / drop shadow : 1, 1, 60, 1, black.
- Place your text to your liking.
48- Apply your signature
- Make sure everything is at the right place.
- Layers / Merge all.
- Copy your tag (Edit / copy).
49 - Image / add some symmetrical borders of 2 pixels with a colour of your choice:
680719 for me.
50- Layers / Promote background layer.
51- Image / Canvas size :
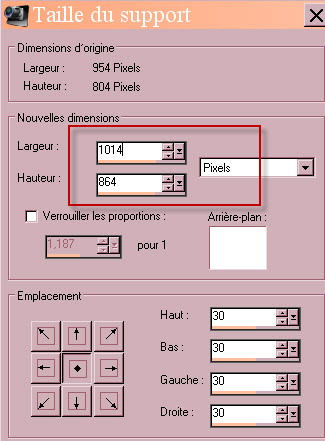
52- ADD A NEW RASTER LAYER.
- Selections / select all.
53- Paste into the selection, the copy that you have just made.
- Selections / select none.
54- Layers / arrange / Move down.
55- Adjust / Blur / Gaussian blur at 30.
56- Apply an effect of your choice on your background. Here is my choice:
- Effects / plugins / VDL Adrenaline / Snowflakes as below :
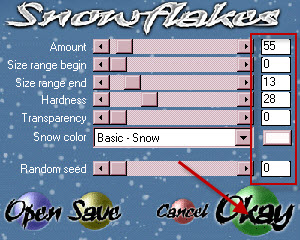
57- Activate the layer on top of the pile:
- Effects / 3d effects / drop shadow of your choice / - 2, - 2, 60, 2, white then 2, 2, 60, 2, white, for me.
58 - Image / add some symmetrical borders of 1 pixel with a colour of your choice:
680719 for me.
59 - Save your work as a jpeg file.
***************
That's it !! You've done it !!
If you 've enjoyed doing my tutorial, it would be nice to write a few words in my guest book !
If you 've had the slightest problem, please, send me a mail so I can see to the problem
Tutorial translated on the 12th of december 2014
*************
You'll find some versions of that tag in my gallery HERE
