Thank you for putting a link to this tutorial, whenever you display your realization of that tag on a website, on a group or in a mail !
**************************
You'll find some versions of that tag in my gallery Here
***********************
To make that tag, you'll need the filter :
- Alien Skin Eye Candy 5 / Impact.
and the material zip down below :

**************
"It is forbidden to suppress watermarks on the material provided, to alter, mist or rename the tubes, in order to respect the work of the tubers.
- The tube of the portrait is by Yoka.
- You can join her sharing group here.
- The tube of the girl is by Katussia.
- The other elements that I haven't created have been found on the net.
******************
Preparation
To be on the safe side, duplicate your tubes and image in your Psp :
-
Window / Duplicate
- Close the originals and work with the copies !
- Place the texture "Corel_15_032.bmp" into the texture file of your Psp files
- Double click on the Alien skin preset, it will automaticaly instal itself.
*****************
Click here to print the tutorial
**********************
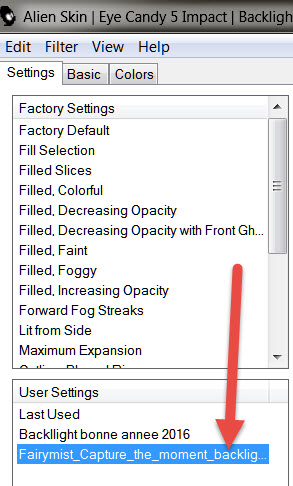
You can use my arrow to follow your work
Click on it and drag it all along the tutorial !

***************
Tutorial made with PSP XIII
********************
1 - Open a new transparent image of 850 by 700 pixels.
2 - Selections / select all.
3- Open the background "Texture 1" or a background of your choice, in your PSP and copy it.
4- Paste it into the selection. Select none.
5- In order to match the colours of my main tube (the portrait), I did this :
- Adjust / Hue and saturation / Hue map as below :
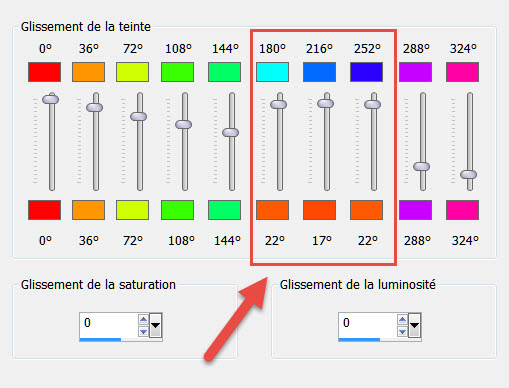
- Those settings above will be different if you have other colors !
6- Effects / Edge effects / Enhance.
7- ADD A NEW RASTER LAYER.
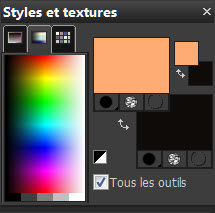
8- Flood fill that layer with a light colour out of your main tube (ffab72 for me).
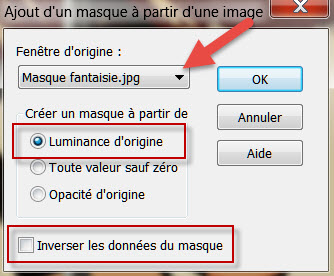
9- Open the provided mask "Masque fantaisie", in your PSP and minimize it.
10- Layers / new mask layer / from image as below :
- Layers / Merge group.
11- Image / Flip.
12- Image / Resize at 120% (Resize all the layers NOT checked).
13- I have placed my mask that way :
- Effects / Image effects / Offset as below :
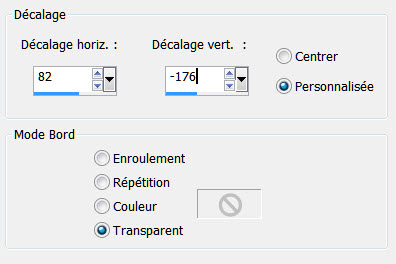
- I have set the mode of that layer on to Dodge.
14 - Open the tube "Yoka-FaCES-II-10-01-10.pspimage" or another vector portrait tube of your choice, in your PSP and copy it
15- Paste it as a new layer on to your tag.
16- I have resized that tube at 102% (Resize all the layers NOT checked).
(I wanted the tube to touch the top boders of my tag).
17- Place that tube agains the left hand side border of your tag. Make sure it touches the top borders of the tag too.
18- Image / Add some symmetrical borders of 2 pixels with the colour of your choic (black for me).
19- Image / Image / Add some symmetrical borders of 50 pixels with a colour contrasting with the previous one.
20- With your magic wand, set as below, click inside that 50 pixels width border:

21 - We're now going to flood fill that border with a pattern of your choice.
- I have chosen the flowered pattern of the little girl's umbrella.
- Here is what I did :
- Activate your rectangle selection tool, set as below and choose the "square" selection :

22- Open the tube "kTs_©AnneCresci_4.pspimage' or your own tube, in your PSP.
23- With your sqare selection tool, select a small square on the umbrella or part of your own tube.
- Edit / copy.
- Edit / Paste as a new image.
24- Click on the pattern tab of your Material palette and look for that new pattern of yours :
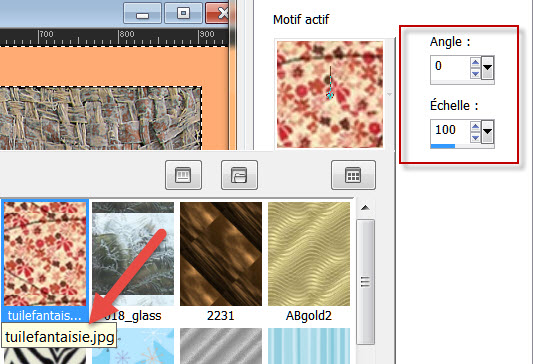
25- Flood fill your selected border with that pattern.
- Keep selection.
- Adjust / Blur / Gaussian blur / 8.
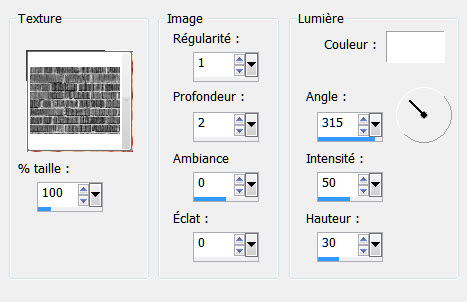
26- Effects / Texture effects / as below or with a texture of your choice :
27- Selection / Invert.
- Effects / 3d effects / drop shadow / 0, 0, 100, 40, black / apply that effect twicel.
- Select none.
28- Go back to your small tube (The little girl for me). If you square selection is still there, select none.
- Copy your tube and paste it as a new layer on to your tag.
- Place the tube at the right place,like me, or to your liking.
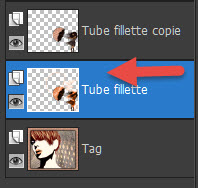
29- Duplicate that tube.
30- Activate the layer just underneath like shown below :
- I have applied a sort of cloudy effect on that tube as explained below :
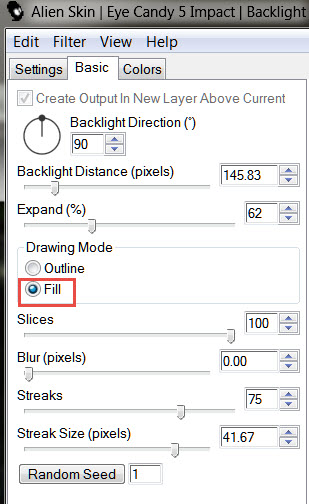
- Effects / Plugins / Alien skin eye candy 5 / Impact / Backlight / apply my preset :
31- I have colorized the layer as below :
- Adjust / Hue and saturation / Colorize / Hue 16 / Saturation 20.
- I could have changed the colour in the colors tab of the previous plugin !
- If the obtained result doesn't satisfy you (It depends so much on the chosen tube!),
you may apply brushes as on my second version of that tag or any other decorative element of your choice.
32- Activate the layer on top of the pile.
- Effects / 3d effects / drop shadow / - 4, 4, 42, 12, black.
33- Open the texte with a white background " Capture_the_moment_tekst.jpg", in your PSP and copy it.
34- Paste it as a new layer on to your tag.
- Set the mode of that layer on to MULTIPLY ! The white background has disappeared !!!
- Place like me or to your liking.
35 - Apply your signature
36 - Image / add some symmetrical borders of 1 or 2 pixels with a colour of your choice (black for mei.)
36 - Save your work as a jpg file.
***************
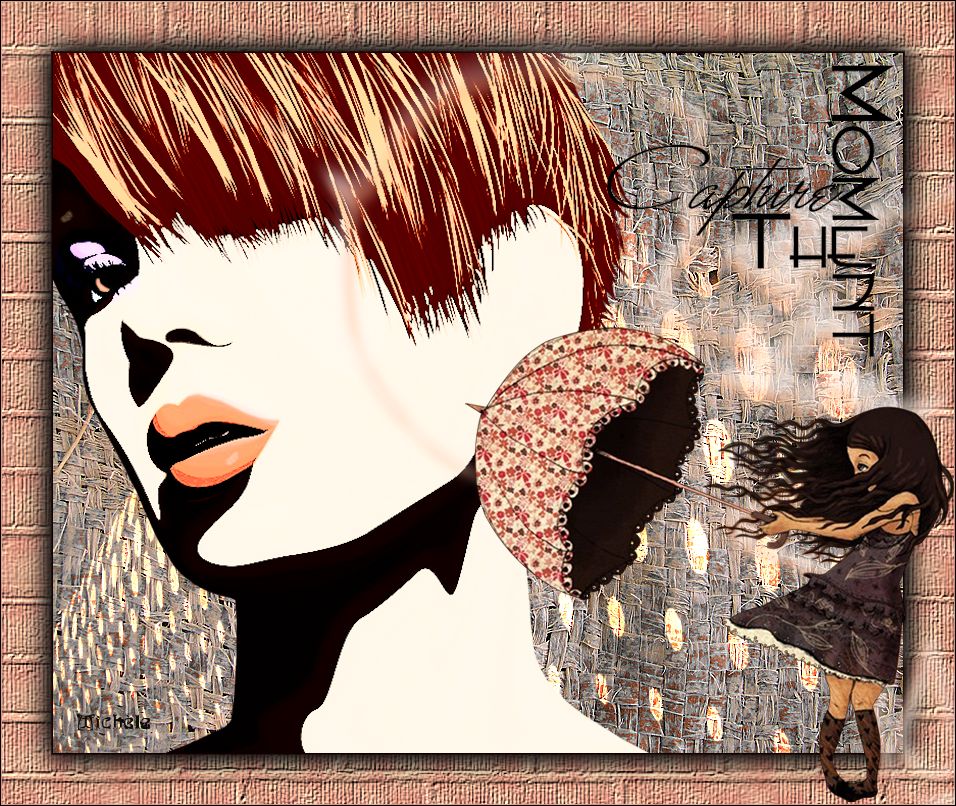
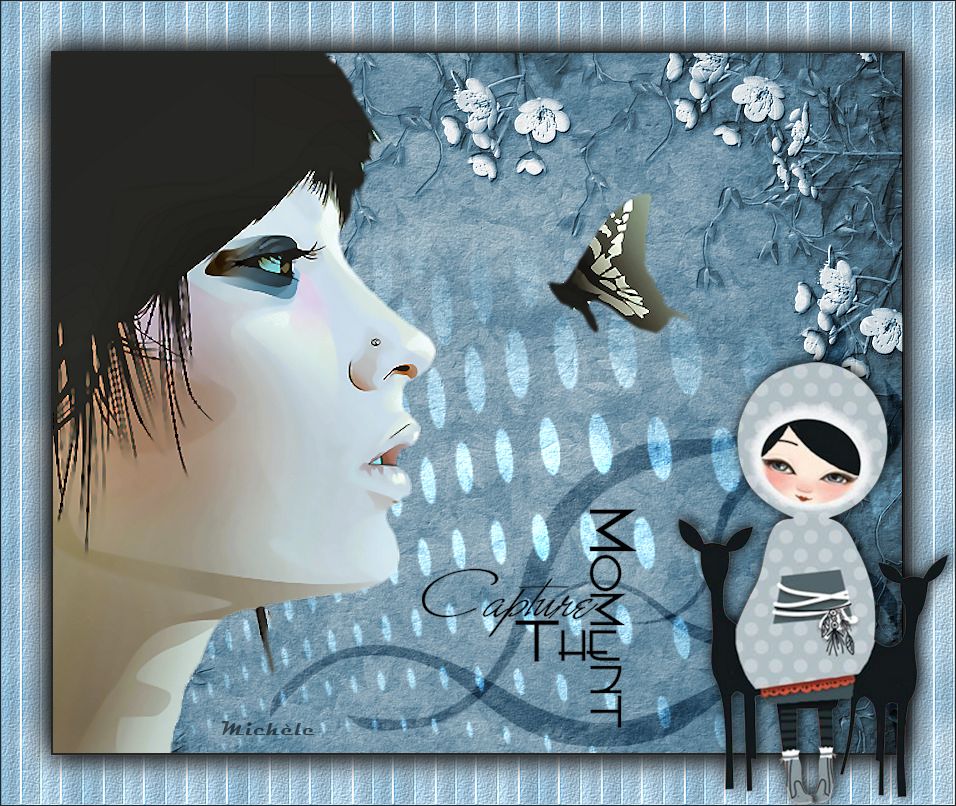
That's it, you have done it !
If you have the slightest problem, don't hesitate to get in touch with me !
Tuto translated on the th of february 2016
*******************
You will find other versions of my tag, in the gallery here