
Thank you for putting a link to this tutorial, whenever you display your realization of that tag on a website, on a group or in a mail !
**************************
You'll find some versions of that tag in my gallery Here
***********************
To make that tag, you'll need the filter :
- Mura's Meister / Clouds.
***********************
- This time, my tubes aren't attached to the tutorial.
- The tubes of the birds are by Mou and André.
- The elements of scrap I have used are by HorsePlaypasturedesigns
(Kit : SandyToesSaltyKisses)
You may download the kit by clicking on the box downbelow :

******************
Click here to print the tutorial
**********************
You can use my arrow to follow your work
Click on it and drag it all along the tutorial !

***************
Tutorial made with PSP XIII
**************
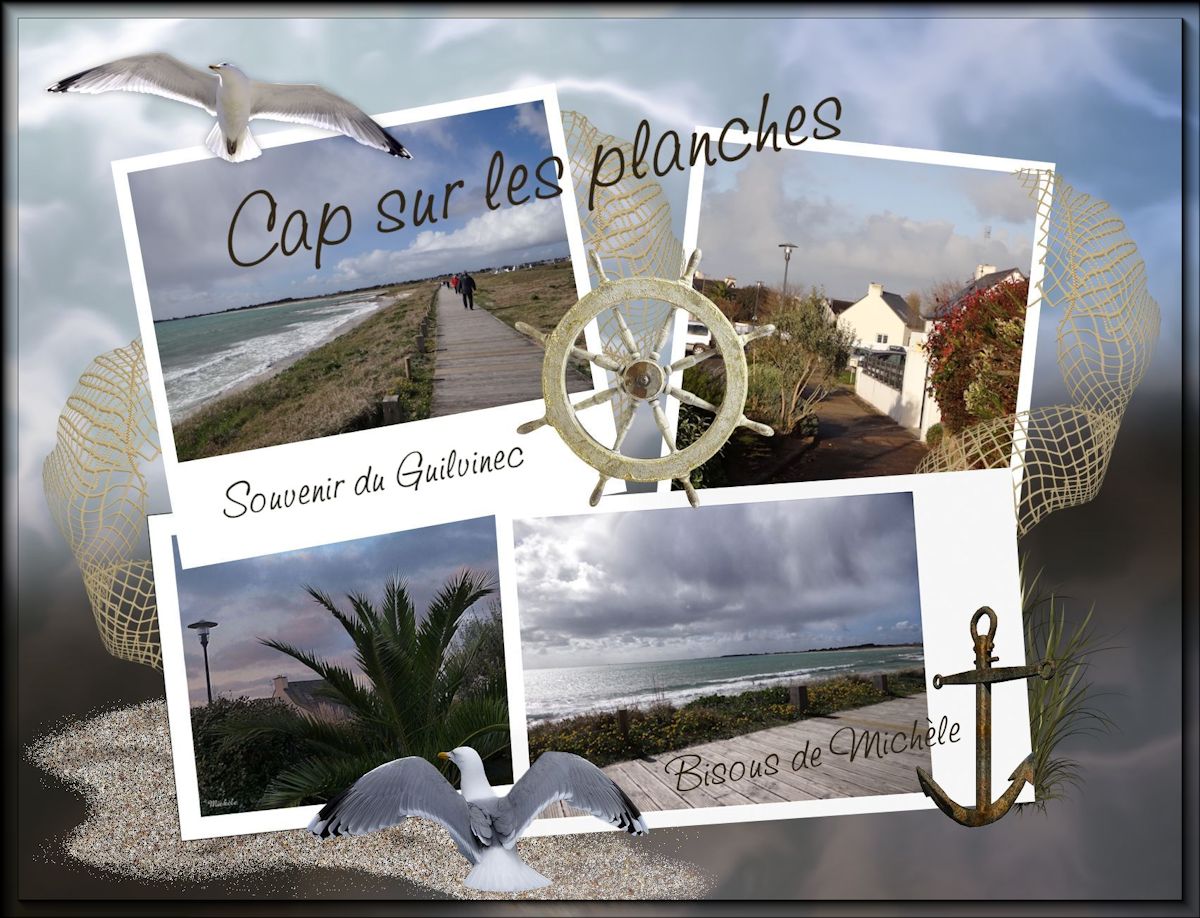
This size of this tag is the one I use when I want to have my tag printed as a postcard.
You may resize that tag in the end if you want to send it on a group.
******************
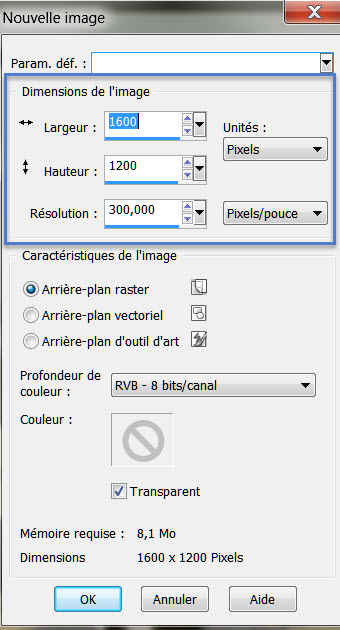
1 - Open a new transparent image of 1600 by 1200 pixels
2 - Selection / select all.
3 - Open one of the pictures you want to use on that collage, in your Psp and copy it.
4- Paste it INTO THE SELECTION. Deselect all.
5- Adjust / Blur / Gaussian blur of your choice (50 for me).
6- ADD A NEW RASTER LAYER.
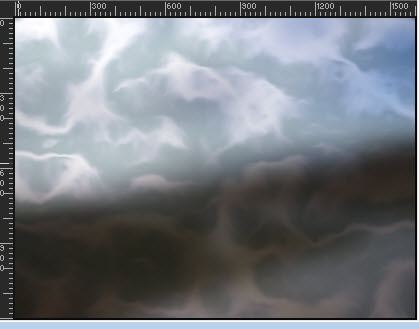
7- Effects / Plugins / Mura's Meister / Cloud as below :
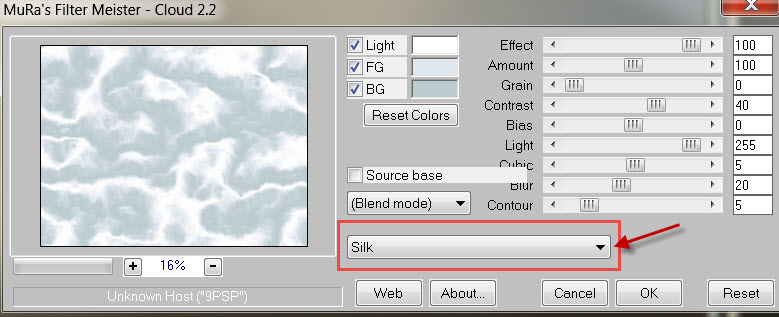
- I have set the mode of that layer on to Multiply. See which mode gives you the best result !
- Here is mine :
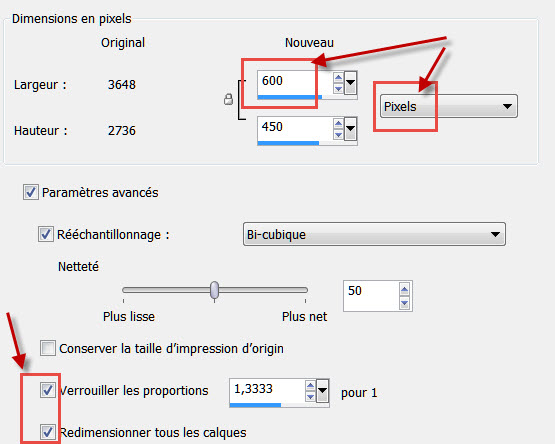
8- Go back to your first picture (the one you have previously blurred) and resize it as below :
- If necessary : Adjust / Sharpness / sharpen.
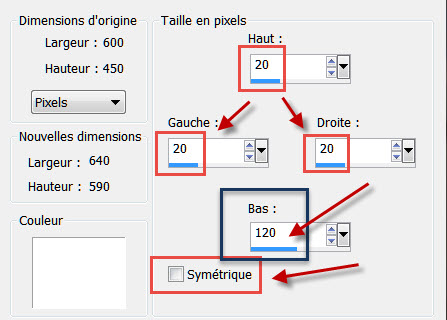
9- We are now going to add some NON symmetrical borders on that picture :
- Image / add some borders (in white for me) as below :
10- Activate your text tool to write something of your choice on the bottom border of that picture (Souvenir du Guilvinec for me) :
- Set your background with the colour you want to use to write your text (2a2721 for me) and close your foreground.
- Write down your text with a font of your choice if you don't have the font I have used (saginaw) and choose the size that suits you.
- Apply.
-
Move your text to the right place.
- Convert your vectorial layer on to a raster one.

- Layers / Merge visible.
11- Copy that merged image and paste it as a new layer on to your 1600 by 1200 pixels width tag.
- Place your image as you wish.
12- Optionnal : Free rotation of your image as below :

- Choose the sort of rotation you want to apply on your picture :Left / Right / 10°, 20° etc.
13- Repeat all these steps with your other pictures.
- For one of them, I have added a border of 150 pixel on the right hand side of the picture and 20 pixels on the other sides .
14- My other pictures have symmetrical borders of 20 pixels.
- It is up to you to choose what borders you want to add to your pictures !
15- It is time to add decoration items on your tag.
- Copy them and paste them one by one on your tag
.
16- Don't forget to drag your layers up or down according to where you want these to be !.
17- I have added some more writing on my tag and applied a free rotation on them too..
18- All you have to do now is apply your signature and add a border to merge all your layers.
- You can choose to add a fancy border if you wish !
19- Save your work as a jpeg file and resize it if necessary
***************
That's it, you have done it !
If you have the slightest problem, don't hesitate to get in touch with me !
Tuto translated on the th of april 2016
*******************
You will find other versions of my tag, in the gallery here
