

Click here to see other versions of that tag
***************
To realize that tag, you'll need the plugin AP 01 ( innovations)
and the material zip here
**************
*It is forbidden to suppress watermarks on the material provided , to alter, mist or rename the tubes in order to respect the work of the tubers
- The tubes of the pear and of the crocus are by Guismo
You may find her tubes on Dakara' site here or on her sharing group ici
- The tube of the vases is by Yoka,
You may join in her sharing group here
*****************
Préparation
Duplicate your tubes and images. Close the originals and minimize the copies for now.
Place your selection in your selections folder
*********************
Click here to print the tutorial
*******************
You can use my arrow to follow your work

1- Open a new black image of 800 by 650 pixels
2- Set your foreground with a linear gradient, angle 0, repeat 1, Invert NOT checked with the following colours or other colours of your choice
Foreground : 906500 
Background : ffc801 
3- Add a new raster layer and flood fill it with this gradient
4- Layers / new mask layer / from image / choose mask58 / only check Source Luminance
Adjust / sharpness / sharpen more
Merge group
5- Selections / load a selection from disk / choose selectbonneannee /

6- Hit the delete key . Keep selection !
7 - Add a new raster layer
*****Selections / Modify / select selection borders / check outside , anti-alias / border width at 5
8- Flood fill that selection with your gradient ( the same gradient as on step 2 )
9- With your magic wand set as below, select the inside of the vertical rectangle on the left hand side of the tag and while keeping the shift key pressed  , select the two squares that are on the right hand side of the tag

10- Activate the bottom layer ( the black one )
Effects / plugins /AP 01 ( innovations) / Lines Silverlining as follows :
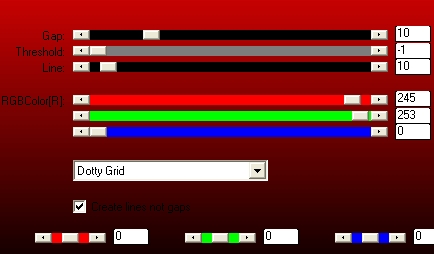
11- Select none
You keep the black layer activated
12- Open the tube Yoka vases misted, copy it and paste it as a new layer
You may resize it if you prefer !
Place that tube in the square that is in the bottom right hand side ; with your move tool, place the best part of that tube in the center of that square
We're now going to suppress the part of the tube which isn't in that square
13- Activate your top layer ( the one with the 3 frames/ cadres )
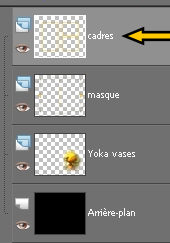
With your magic wand , set as above, select the square on the bottom right hand side
Selections / invert
14- Activate now the layer where you have Yoka vases and hit the delete key
Select none
15- Keep the Yoka vases layer activated !
Open the tube vagues, copy it and paste it as a new layer
It is at the right place !
16- Open the tube Calguispoire20128, copy it and paste it as a new layer
17- Image / resize at 75 %
Adjust / sharpness / sharpen
Place the tube as on my tag
18- Merge all
Open the tube Calguiscrocus 20128, copy it and paste it as a new layer
19- Image / flip
Place the tube as on my tag
20- Open the tube étoiles, copy it and paste it as a new layer
Place as on my tag
21- Open the tubes texte 1, texte 2 et nombres, copy them and paste them as new layers
Place them to your liking
22- If you prefer to write your own text, I have used the font TheNautigalROB, size 72 for the message Bonne année and the font Tempus sans ITC, size 26 for the rest
My background was set with the same gradient as on step 2 and my foreground was shut
23- Add a new raster layer and apply your signature
24- Image / add some symmetrical borders of 3 pixels in a colour of your choice ( yellow for me )
*****************
That's it !! You've done it !!
If you 've enjoyed doing my tutorial, it would be nice to write a few words in my guest book ! If you 've had the slightest problem, please, send me a mail so I can see to the problem !
Tutorial translated on the 19 th of december 2009
**********************
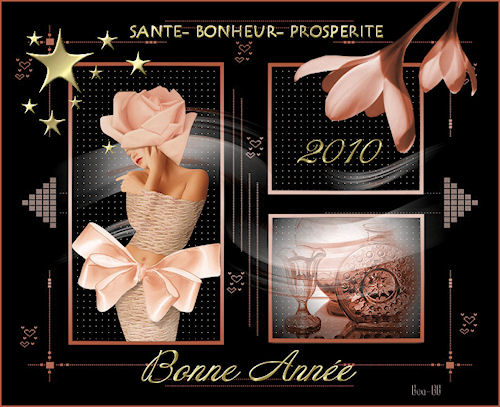
 Thank you Bea BB for your marvellous version
************
 Thank you Ria for your superb brighful version

*************
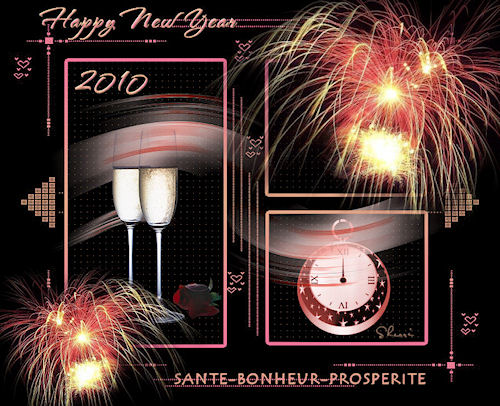
 Thank you Sherri for your gorgeous version
***************
 Thank you Lydy for this cheerful version

***************
 Thank you Ronnee for your lovely version

***************
You can see all the versions that are on the French tutorial page here
*****************
