
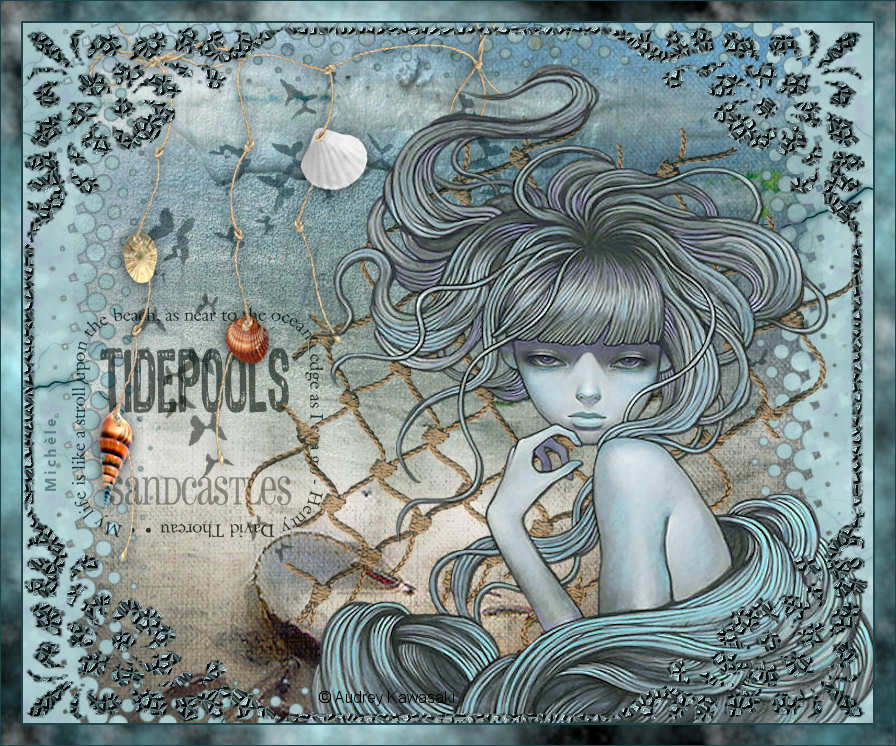
Thank you for putting a link to this tutorial, whenever you display your realization of that tag on a website, on a group or in a mail !
**************************
You'll find some versions of that tag in my gallery HERE
************************
To realize that tag, you'll need the plugins :
- Alien skin eye candy 5 / Textures
- Filters Unlimited 2.0
- Xenofex 1 here
- Graphic plus / cross shadow.
and the material zip down below :

**************
*It is forbidden to suppress watermarks on the material provided , to alter, mist or rename the tubes in order to respect the work of the tubers
- The tube of the lady is by Mtfp.
- The element of decoration butterfly is part of a tube by Kikirou.
- A big thank you to my friends Kikirou and Maria Tereza ( mtfp) who give me permission to use their beautiful tubes.
- The elements of scrap that I have used and resized come from the site Le scrap de Manue (It is now closed)
- The other elements that I haven't created, have been found on the net.
******************
Preparation
To be on the safe side, duplicate your tubes and image in your Psp :
-
Window / Duplicate
- Close the originals and work with the copies !
- Place the two masks in the mask folder of your Psp files.
*****************
Click here to print the tutorial
**********************
You can use my arrow to follow your work
Click on it and drag it all along the tutorial !

***************
Tutorial made with PSP XIII

Step 1 : The background of the tag
1 - Open a new transparent image of 850 by 700 pixels.
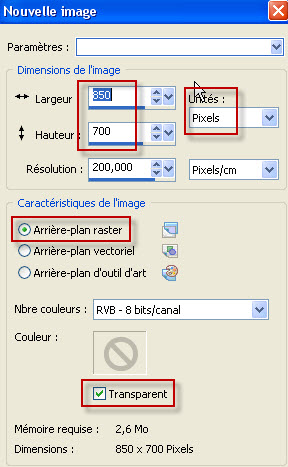
2 - Set your Material palette with two colours of your choice.
- My choice : Foreground : dark colour 1d444a
Background : Light colour 9fbcbe
- Set your foreground with a sunburst gradient as shown below :

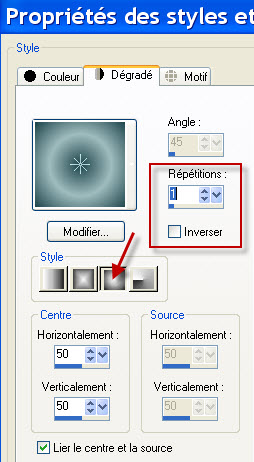
3 - Flood fill your transparent image with your light background colour (Right click).
4- Effects / Plugins / Alien skin eye candy 5 / Textures / Marble as below :
- Use the colours of your Material palette by clicking on the little black arrows as shown below :

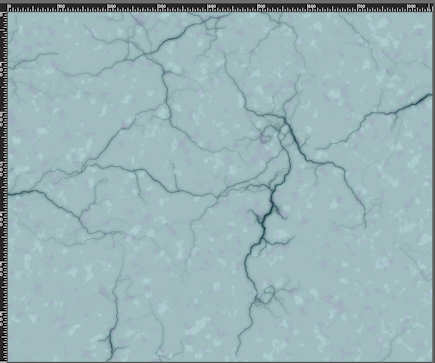
5- Layers / Duplicate.
6- Effects / Alien skin eye candy 5 / Textures / Texture noise as below :

7- I have set the mode of that layer on to Soft light . It is up to you to see which mode suits you best. You may change that mode later on if necessary (but don't merge your layers as suggested below if you want to keep that option !).
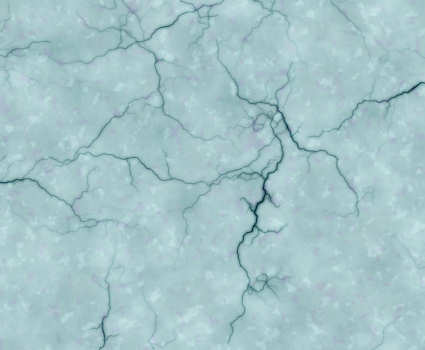
8- Layers / Merge all.
9- Open the background "Manue_collab_papier (7).jpg" or a fancy paper that matches your first layer (That background must be 800 by 800 pixels).
- Promote background layer.
10- Effects / Plugins / Filters Unlimited 2.0 / Edge squares / square edge 16
11- Copy your modified background and paste it as a new layer on to your tag.
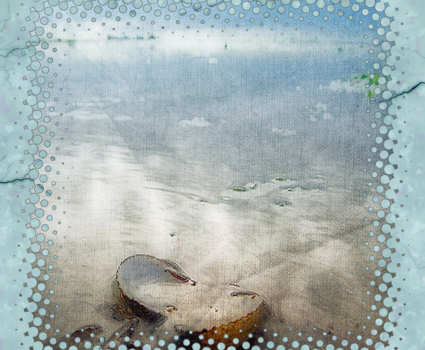
- You may add a slight drop shadow on that layer if you wish. I have left it as it is.
12- Open the image " DSC_11049_resized.jpg" or an image of your choice of the same size as mine (750 by 500 pixels).
13- On that image :
- Layers /Load a mask from disk / Choose the mask 20_20 and set as below :
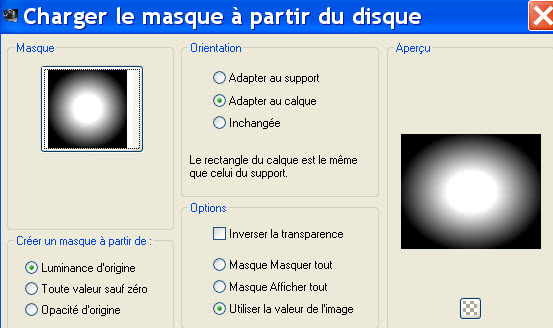
- Merge group.
14- Copy that merged layer and paste it as a new layer on to your tag.
15- Effects / Image effects / Offset as below :
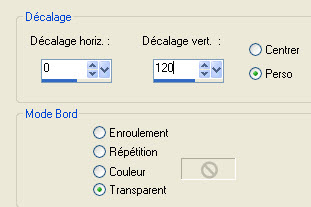
- I have set the mode of that layer on to Multiply. It is up to you to see which mode your prefer.

Step 2 : Elements of decoration
1- Open the tube "papillons.pspimage" or a decorative tube of your choice.
2- Copy that tube and paste it as a new layer on to your tag.
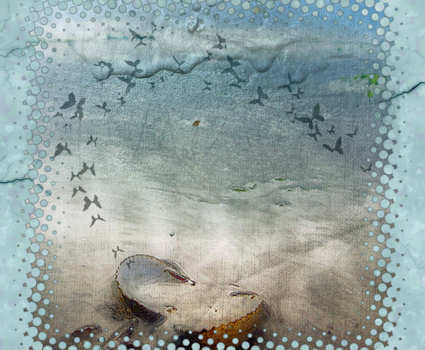
- I have moved my tube, that way :
- Effects / Image effects / Offset as below :
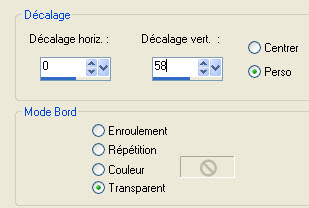
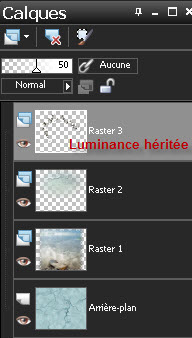
- I have set the mode of that layer on to Luminance legacy and lowered its opacity to 50.
- It is up to you to see which mode and opacity suit you .
3- Open the tube " text_tidepool.pspimage" or a text tube of your choice and copy it.
4- Paste it as a new layer and place it like me or to your liking.
- Effects / Image effects / Offset as below :
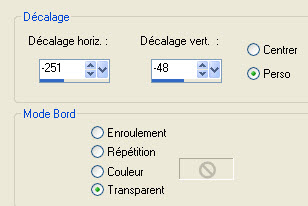
- I have set the mode of that layer on to Luminance legacy and lowered the opacity of that layer on to 75. It is up to you to see what your prefer.
5- Open the tube " Manue_collab_elements (5).pspimage" or a tube of your choice and copy it.
6- Paste it as a new layer on to your tag.
7- I have moved my tube, that way :
- Effects / Image effects / Offset as below :

- I have lowered the opacity of that layer at 70.
8- Ouvrir le tube "Manue_collab_elements (13).pspimage"or a tube of your choice and copy it.
9- Paste it as a new layer on to your tag.
10 - I have moved my tube, that way :
- Effects / Image effects / Offset as below :


Step 3 : The woman
1- Open the tube by Mtfp or a tube of your choice and copy it.
2- Paste it as a new layer on to your tag.
- I have resized the tube by 110 % ( Resize all the layers NOT checked)
- Adjust / Sharpness / Sharpen.
3- Here is what I did to make my tube match my colours :
- Adjust / Hue and saturation / Hue map as below :
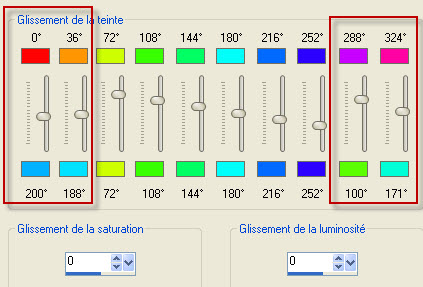
4- Place the tube against the bottom and right hand side of your tag.
5- Effects / 3d effects / Drop shadow of your choice / 1, 1, 70, 1, black for me.

Step 4 : The borders
1- ADD A NEW RASTER LAYER .
2- Flood fill that new layer with your foreground sunburst gradient.
3- Effects / Plugins / Xénofex 1/ Baked earth as below :
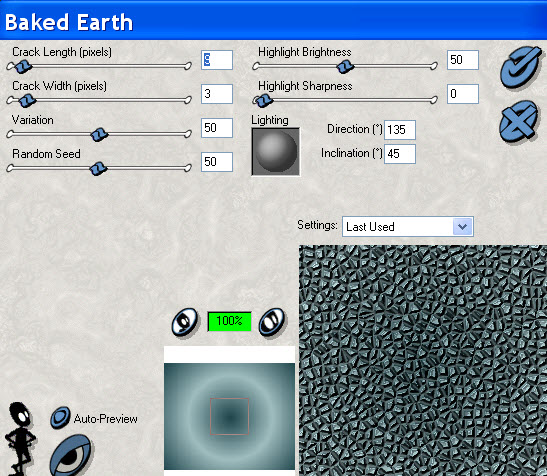
- For those who would have problems with that plugin, I have included the layer on which I have applied that plugin, in the zip. You may have to colorize it.
4- - Layers /Load a mask from disk / Choose the mask KC-02 and set as below :

- Merge group.
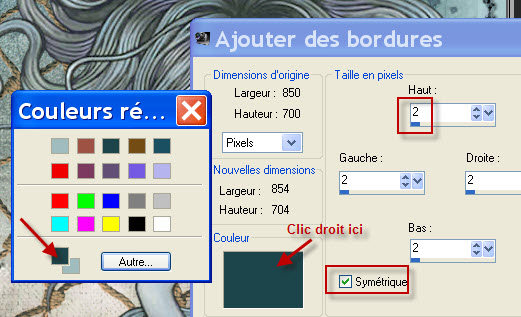
5- Image / add some symmetrical borders of 2 pixels with your dark colour.
6- Layers / Promote background layer (to a raster layer)
7- Image / Canvas size as below :

8 - ADD A NEW RASTER LAYER .
9- Layers / arrange / move down.
10- Flood fill that new layer with your foreground gradient.
11- Effects / Plugins / Graphic plus / cross shadow default.
12- Effects / Alien skin eye candy 5 / Textures / Texture noise as on step 1.
13- Activate your top layer and apply your signature
14 - Image / add some symmetrical borders of 1pixel with your dark colour.
15 - Save your work as a jpeg file.
***************
That's it !! You've done it !!
If you 've enjoyed doing my tutorial, it would be nice to write a few words in my guest book ! If you 've had the slightest problem, please, send me a mail so I can see to the problem
Tutorial translated on the 15th of September 2012
*************
You'll find some versions of that tag in my gallery HERE
