
Thank you for putting a link to this tutorial, whenever you display your realization of that tag on a website, on a group or in a mail !
**************************
You'll find some versions of that tag in my gallery HERE
************************
To realize that tag, you'll need the plugins Extravaganza, Alien skin Eye Candy 5 / Impact, Filters Unlimited 2
and the material zip here
**************
*It is forbidden to suppress watermarks on the material provided , to alter, mist or rename the tubes in order to respect the work of the tubers
- The tube of the automnal scenery is by Guismo
You can find her tubes on Dakara's site here
or you can join in her sharing group here
- The tube of the forest is by DragonBlu,
you can join in her sharing group here
- The tube of the small elf is by Kikirou
you can join in her sharing group here
- One of the brushes is by Obsidian Dawn
The other elements have been found on the net
******************
Preparation
Duplicate your tubes and your mask. Close the originals and minimize the copies for now.
Place your texture in your textures folder
Export your brushes in your psp as custom brushes
*****************
Click here to print the tutorial
*******************
You can use my arrow to follow your work

***************
1- Open a new transparent image of 800 by 650 pixels
2- Set your material palette with two colours out of your main tube
My choice : Foreground : colour d7784a 
Background : dark colour 49293d 
3- Flood fill your transparent layer with your foreground colour
4- Add a new raster layer and flood fill it with your background colour
5- Layers / new mask layer / from image / choose Suzmaskfz0 / check Source Luminance
Adjust / sharpness / sharpen more
Merge group
6- Open the tube Calguismistautumn699 or a tube of an automnal scenery, if your thema is Autumn, copy it and paste it as a new layer
*If your main tube is, like me, somebody in feet, try to find a scenery with a ground or a floor
7- Open the tube Mist Scenery420 or a tube of your choice ( complementary to the previous one ), copy it and paste it as a new layer
Place the two scenery tubes to your liking
I have lowered the opacity of the tube Mist Scenery420 to 80
8- Add a new raster layer
Flood fill that layer with the colour dad0d1 
9- Effects / plugins / Extravaganza / Ray transmission / 58,128,44
Set the mode of that layer to Dodge and lower its opacityto about 33 ( it's up to you to adjust according to the tubes and colours you have chosen )
10- Add a new raster layer
Activate your brush tool, set as below and apply the brush SS-sparklies once or several times with a bright colour of your choice

I have chosen the colour ffff00 
You may change the mode and the opacity of that layer if you wish
11- Open the tube Autumn fairy or a tube of your choice, copy it and paste it as a new layer
Place the tube at the right place
12- Effects / 3d effects / drop shadow / 4, 4, 50, 20, black or a drop shadow of your choice
13- Open the tube Kikirou158_fantasy or a tube of your choice, copy it and paste it as a new layer
Place at the right place
14- Effects / 3d effects / drop shadow / 4, 4, 50, 20, black or a drop shadow of your choicex
15- Layers / duplicate
16- Activate the first layer of the elf (which is underneath the other one )
Effects /distortion effects / wind / right , Intensity : 100
17- I have colorized that layer ( 82, 38 ) but you don't have to do it
18- You may add some other elements of decoration at any time to please yourself
19- Make sure everything is in its place
Image / add some symmetrical borders of 2 pixels with a colour of your choice ( I have chosen orange )
20- Layers / Promote Background layer
21- Image / resize at 90% ( Resize all the layers NOT checked )
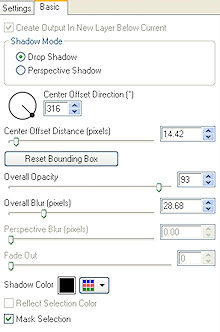
22- Effects / Alien skin Eye candy 5/ Impact / Perspective shadow / drop shadow blurry :
23- Add a new raster layer
Layers / arrange / move down
24- We're now going to use the same colours as on step 2 but invert your foreground with your background
Flood fill your new layer with your background colour ( orange for me )
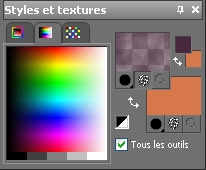
Set your material palette as below
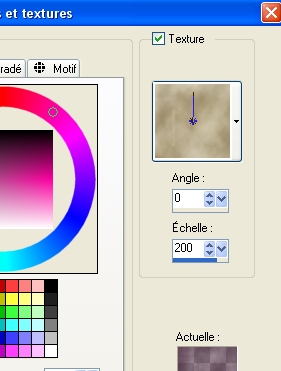
Check Texture, choose texture 42em, Scale 200
25- Flood fill the same layer with your foreground texture
27- Effects / plugins / Filters unlimited 2 / Paper textures / Wallpaper coarse / 128, 99
28- Image / add some symmetrical borders of 2 pixels with a colour of your choice ( I have chosen orange )
29- Add a new raster layer, apply your signature and merge all
30- Save your work as a jpeg file and resize it if necessary
***************
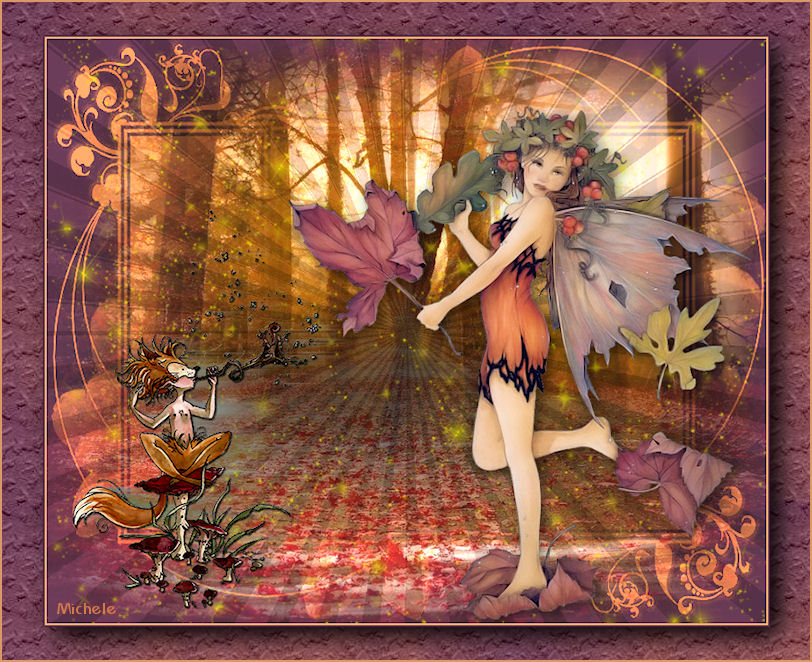
That's it !! You've done it !!
If you 've enjoyed doing my tutorial, it would be nice to write a few words in my guest book ! If you have the slightest problem, please, send me a mail so I can see to the problem !
Tutorial translated on the 26th of september 2009
***************
You'll find some versions of that tag in my gallery HERE