
Thank you for putting a link to this tutorial, whenever you display your realization of that tag on a website, on a group or in a mail !
**************************
You'll find some versions of that tag in my gallery HERE.
*********************
To realize that tag, you'll need the plugins Graphic plus, AP01 ici , Alien skin Eye Candy 5 / Impact, Mura's seamless
and the material zip here
**************
*It is forbidden to suppress watermarks on the material provided , to alter, mist or rename the tubes in order to respect the work of the tubers
- The tube of the bird is an element of scrap by Taggers scraps
- The mask I've used is by HJR
- The background is by Beba Graphicx
- One of the brushes I've used and enclosed in the zip is by Ales1984
The other elements have been found on the net
******************
Preparation
Duplicate your tubes, mask and picture, close the originals and minimize the copies for now. Export your brushes in your psp as custom brushes
*****************
Click here to print the tutorial
*******************
You can use my arrow to follow your work

***************
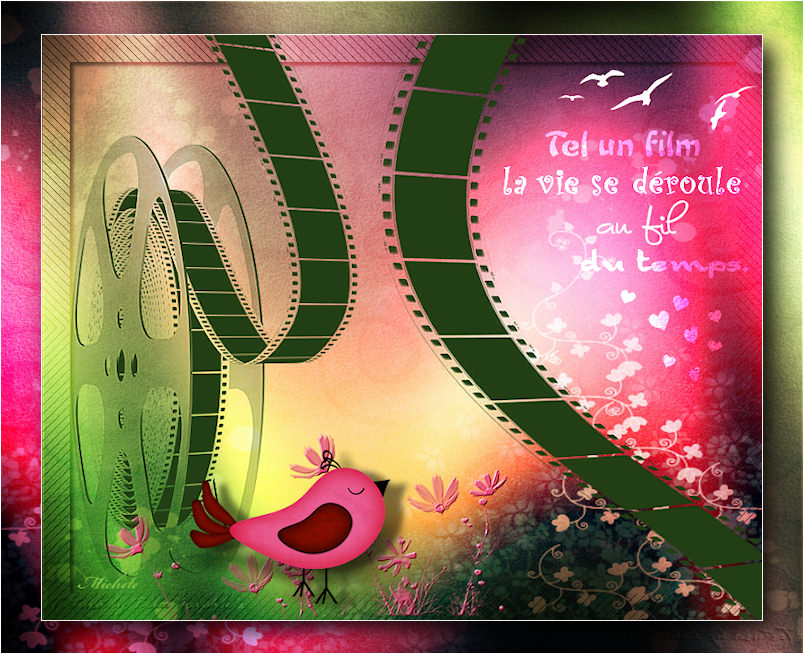
1- Open a transparent image of 800 by 650 pixels
2- Set your palette layers with two colours out of your main tube
My choice : Foreground : colour E34D7B 
Background : colour 63B920 
3- Prepare, in your foreground a linear gradient, angle 225, repeats 0, Invert NOT checked
4- Flood fill your transparent image with that gradient
5- Effects / Plugins / Graphic plus / Cross shadow default
6- Ajouter un nouveau calque et sélectionner tout
7- Open the picture BebaGx_textura04 or a background of your choice, copy it and paste it into the selection
Select none
8- Image / mirror ( this is only for my background!)
Set the mode of that layer to Overlay
9- Add a new raster layer and flood fill it with a contrasting colour which goes with your tag
I have chosen a dark green 213e13 
10- Layers / new mask layer / from an image / choose the mask Hjr-mask_filmreel / check Source luminance
Adjust / sharpen / more sharpen
Merge group
11- Open the tube textefairymist1, copy it and paste it as a new layer
Do the same thing with the three other text layers
Place the four text layers to your liking
You can use the tool Mesh warp to make your text move up and down
* You can write your own text with fancy fonts of your choice and choose the modes of the different layers so that the result suits you *
12- Add a new raster layer and apply some brushes of your choice to decorate your tag; don't forget to add as many layers as the brushes you use
(Enclosed in the zip the flowers brush I've used behind the bird )
13- Open the tube bird Tantrum_JATW_Bird or a tube of your choice, copy it and paste it as a new layer
Resize the tube bird at 70 %
14- Effects /3d effects / drop shadow / 4, 20, 50, 10, black
15- Activate the layer raster 2 ( the one with Beba's background ) and select all
16- Selection / Modify / contract by 30 pixels
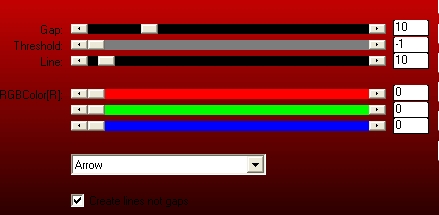
17- Selections / Invert the selection
Effects / plugins / AP01 (Innovations)/ Lines Silverlining as below
18- Effects /3d effects / drop shadow / 4, 4, 50, 5, black
Select none
19- Add a new raster layer and apply your signature
20- Make sure everything is at the right place
Image / add some symmetrical borders of 1 pixel in white
21- Layers / Promote Background layer
Image / resize at 90% ( Resize all the layers NOT checked )
22- Effects / Alien skin Eye candy 5/ Impact / Perspective shadow / drop shadow blurry
23- Add a new raster layer
Layers / arrange / move down
24- Flood fill that new layer with the same gradient as on line 3 but set the angle to 45
25- Effects / plugins / Graphic plus / Cross shadow default
26- Add a new raster layer and select all
27- Open your background image ( BebaGx texture 04 for me ) copy it and paste it into the selection
Select none
Set the mode of that layer to Overlay
28- Image / add some symmetrical borders of 1 pixel in white
29- Save your work as a jpeg file and resize your tag if necessary
***************
That's it !! You've done it !!
If you 've enjoyed doing my tutorial, it would be nice to write a few words in my guest book ! If you 've had the slightest problem, please, send me a mail so I can see to the problem !
Tutorial translated on the 29th of April 2009
*****************
You'll find some versions of that tag in my gallery HERE.