
Thank you for putting a link to this tutorial, whenever you display your realization of that tag on a website, on a group or in a mail !
**************************
You'll find some versions of that tag in my gallery HERE
************************

To realize that tag, you'll need the plugins :
- Mura's seamless / Emboss at alpha
- Mura' s meister / Copies
and the material zip down below :

**************
*It is forbidden to suppress watermarks on the material provided , to alter, mist or rename the tubes in order to respect the work of the tubers
- The tube of the veiled woman is by Guismo
You'll be able to find her tubes on Dakara' s site here
and you can join in her sharing group here
- The tube of the oriental flask is by Yoka
You can get Yoka's tubes by joining in her sharing group here
The other elements that I haven't created, have been found on the net
******************
Preparation
- To be on the safe side, duplicate your tubes, mask and image in your Psp :
-
Window / Duplicate
- Close the originals and work with the copies !
- Place the mask "2020.msk" in the mask folder of your Psp files.
- Place the 6 brush files in the brush folder of your Psp files.
- Place the selection file "fairymist_annie-claude_1.PspSelection" in the selection folder of your Psp files.
- Double click on the Dingbat -font "Arabsq.ttf"( outside your Psp !) and minimize it.
*****************
Click here to print the tutorial
**********************
You can use my arrow to follow your work
Click on it and drag it all along the tutorial !

***************
Tutorial realized with PSP XIII
Step 1 : The background of the tag
- Open a new transparent raster layer of 800 by 650 pixels

- Selections / Select all
- Open the image "2.jpeg" in your Psp and copy it.
- Paste into the selection of your tag.
- Selections / Select none
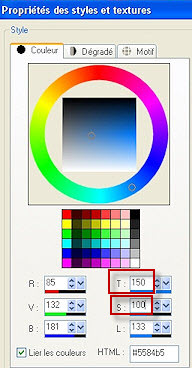
- Adjust / Hue and saturation / Colorize / 150, 100 for me
PIck a colour out of one of your tubes with your dropper tool and note the figures that you have ( Hue and Saturation ) as shown below ; these figures will be used for your colorizing effect
- Effects / Edge effects / Enhance
Step 2 : The tube of the face
- Open the tube "calguismistwom2419.pspimage" or a tube of your choice, in your Psp and copy it
- Paste that tube as a new layer on to your tag
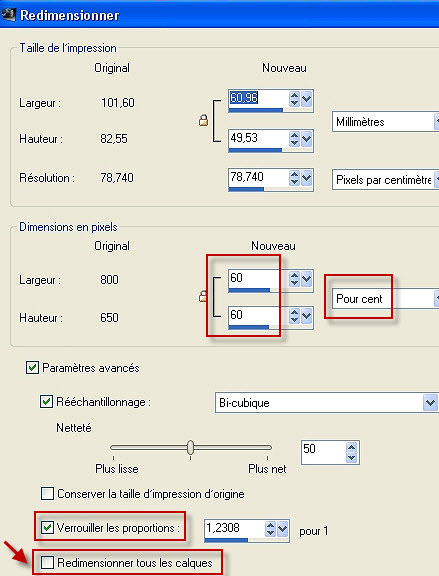
- Resize that tube to your liking / 60% for me / set as below
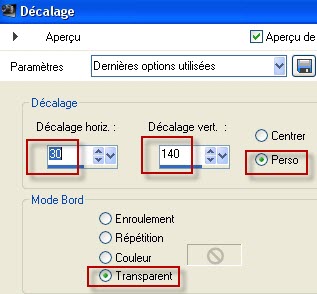
- On MY tube : Effects / image effects / Offset as below :
If you use your own tube, you will have to place it as shown on my tag with your move tool !
- Selections / load a selection / from disk / choose "fairymist_annie-claude_1.PspSelection" / set as below :
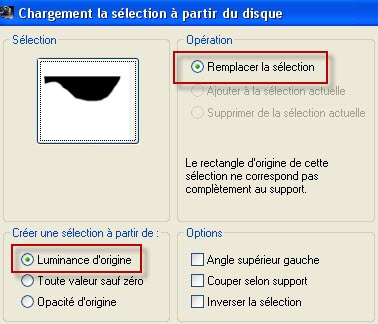
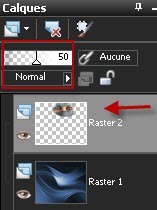
- HIt the delete key of your keyboard and select none
- Adjust / Sharpness / Sharpen
- In your layer palette, lower the opacity of that layer to your liking / 50 for me
Step 3 : The scenery
- Open the scenery image "Paysage.jpg" or an image of your choice , in your Psp
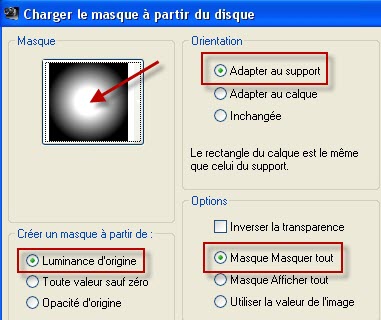
- On your image : Layers / Load a mask / from image / Choose the 2020 mask / set as below :
- Layers / Merge group
- Copy that merged layer
- Paste it as a new layer on to your tag
- I have resized that layer at 50% ( same resizing settings as on step 2)
You'll have to find the right resizing percentage if your image is smaller or bigger than mine
- In your layer palette, lower the opacity of that layer to your liking / 60 for me
Step 4 : The flask
- Open the tube " Yoka-Misc-Vases2-25-06-10.pspimage" or a fancy tube of your choice, in your Psp
- Copy that tube and paste it as a new layer on to your tag
- Resize your tube if necessary. I have resized mine at 65%
- Place that tube at the right place and don't move it any more !
- I have chosen to colorize my tube as on step 2 :
Adjust / Hue and saturation / Colorize / 150, 100
- Layers / Duplicate twice
You now have 3 layers with that vase
- On the first layer of the vase ( the one which is underneath ):
Effects / distortion effects / Wind as below :

Repeat the wind effect but From left this time
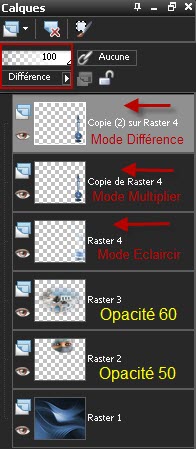
In your layer palette , set the mode of that layer to Dodge
- Activate now the layer which is on top of the previous one and set the mode of it to Multiply
- Activate now the layer which is on top of the previous one and set the mode of it to Difference
If you are using a tube different from mine , it will be up to you to find out which modes and opacities will suit you better!!
Step 5 : The brush Flowers
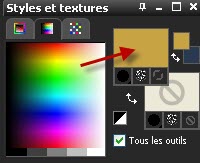
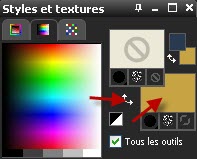
- In your material palette, set your foreground with the colour you want to apply your brush with
My choice : Yellow c9a245
- In your layer palette, make sure your top layer is activated !
- Add a new raster layer
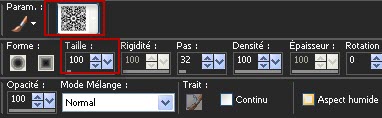
- Activate your brush tool and set as below
Apply the brush "fleurs-volutes.PspBrush", in the bottom, right hand side corner of your tag with your foreground colour ( left click )

You may apply a brush of your choice if you prefer !
Step 6: The arabic sign
- Add a new raster layer if necessary ( no need to if you are in a vectorial mode )
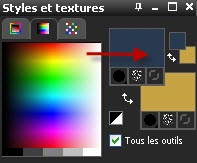
- Set your material palette as below ( use the little curved arrow to do it )
Activate your text tool, set as below and type a letter from your keyboard
I have chosen the letter z

- Place the letter at the right place
- I have chosen to lower the opacity of that layer to 65 ( In my layer palette !)
- Optionnal : Effects / Plugins / Mura's seamless / Emboss at alpha / Default

Step 7 : End of your tag
- Add a new raster layer and apply your signature
- Make sure everything is in the right place !
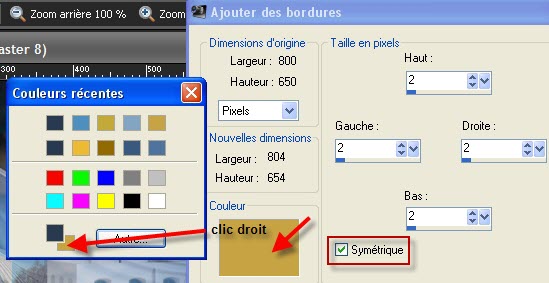
- Image / add some symmetrical borders of 2 pixels with your background colour
If you do a right click on the colour square , you will get the colours you are using
- Layers / Promote Background layer
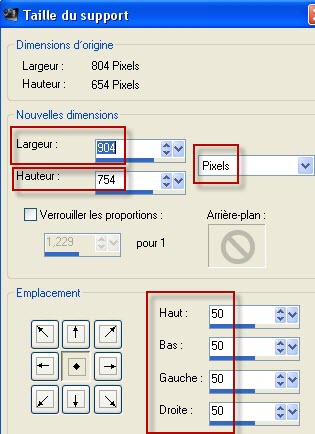
- Image / Canvas size / set as below :
- Effects / 3d effects / drop shadow / 0, 0, 80, 20, black
Step 8 : The final frame
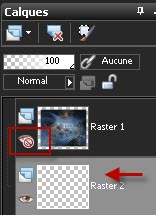
- Add a new raster layer
- Layers / Arrange / Move down
- In your layer palette , close the eye of the layer on which your tag is ( so you can see what you are doing ! )
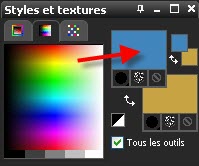
- Set your material palette as below, with another colour out of your tubes, in your foreground / My choice : dark blue : 283a50
- Flood fill your transparent layer with this foreground colour
- Set now your material palette with a third colour out of your tubes in your foreground
My choice : 3e87bc
- Add a new raster layer
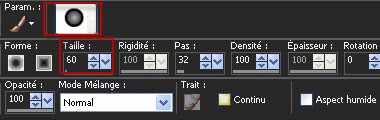
- Activate your brush tool, set as below and apply the brush "arabesque1.PspBrush" with your foreground colour, in the center of your tag
- As this brush needs to be exactly in the center of the tag, the best way to do it is this :
Copy that layer you have just painted and paste it as a new layer
Delete the previous layer where your brush isn't quite in the center !
- Make sure you are on this new layer where your brush is well centered
- Add a new raster layer
- With your brush tool, set as below, apply the brush "bulle_fairymist.PspBrush" with your background colour, in the center of your tag ( Right click )
- Copy that layer and paste it as a new layer
- Delete the layer where your brush isn't well placed
- Make sure you are on the layer where your brush is well placed
- Layers / Merge down
Both brushes ( arabesque and bulle ) are on the same layer now
- Edit / cut !
- Selections / select all
- Edit / Paste into the selection ( I know, the result is horrible !!!)
Selections / Select none
- Image / Resize at 8% ( Resize all the layers NOT checked ) !! We now have a rectangle in the same proportions as your tag instead of a square !
- Effects / Mura's meister / Copies as below :
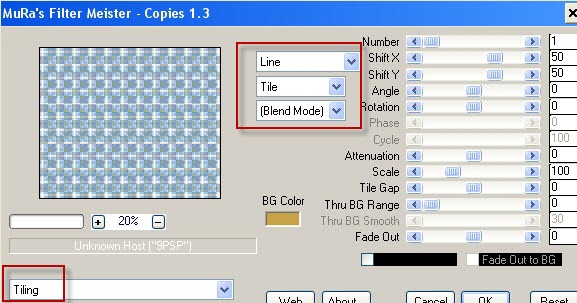
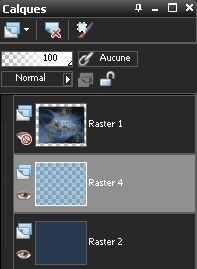
If your choice of colours doesn't turn out to give a nice final result, you may try to find a different colour for your background ( raster 2 ) !
- Effects / Plugins / Mura's seamless / Emboss at alpha / Default
- Activate your top layer and open the eye so you can see your tag !
- Image / add some symmetrical borders of 2 pixels with your background colour ( Yellow for me )
- Save your work as a jpeg file and resize it if necessary
***************
That's it !! You've done it !!
If you 've enjoyed doing my tutorial, it would be nice to write a few words in my guest book ! If you 've had the slightest problem, please, send me a mail so I can see to the problem
Tutorial translated on the 9th of April 2011
*************
Other versions of that tag