

Thank you for putting a link to this tutorial, whenever you display your realization of that tag on a website, on a group or in a mail !
**************************
You'll find some versions of that tag in my gallery HERE
***********************
To realize that tag, you'll need the plugin :
- Flaming pear / Flood
and the material zip down below :

**************
*It is forbidden to suppress watermarks on the material provided , to alter, mist or rename the tubes in order to respect the work of the tubers
- The tube of the angel is by Bibiche.
- The tube of the woman is by Denise Worisch
- The tube of the butterfly is by Marzeny
- The brushes " SS_glowing_circles_10.PspBrush" and "SS-light-beams-5.PspBrush" are by Obsidian
- The brush "starbrush_byMim4y_3.PspBrush is by Mim4Y
- The other elements that I haven't created, have been found on the net.
******************
Preparation
- To be on the safe side, duplicate your tube and image in your Psp :
-
Window / Duplicate
- Close the originals and work with the copies !
- Place the 6 brush files in the brush folder of your Psp files.
- Place the gradient "arc en ciel" in the gradient folder of your Psp files.
*****************
Click here to print the tutorial
**********************
You can use my arrow to follow your work
Click on it and drag it all along the tutorial !

***************
Tutorial realized with PSP XIII

Step 1 : The background of the tag
1 - Open a new transparent image of 850 by 700 pixels.

2 - Set your Material palette with two colours out of your main tube (the angel, for me)
- My choice : Foreground : Dark colour 005d65
- Background : Light colour a7edf0
- Set your foreground with a sunburst gradient as below :


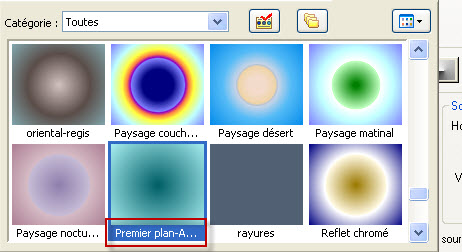
3 - Flood fill your transparent image with that Foreground-Background gradient.

Step 2 : The sky
1- ADD A NEW RASTER LAYER
- Selections / Select all.
2- Open the image "Ciel_sky" or another well contrasted picture of clouds and copy it.
3- Paste it INTO THE SELECTION and deselect all ( Ctrl + D). Your picture has now the right size.
4- Copy that new resized picture and paste it AS A NEW IMAGE. We're going to modify it.
5- On that new image :
- Image / Greyscale.
- Adjust /Brightness and Contrast as below (for my image) :

- It is up to you to see which settings give a nice contrasted look to your clouds.
Then, I did : Effects / edge effects / Enhance.
6- Copy that modified image.
7- Paste it as a new layer on to your tag
8- Delete the previous layer where your coloured clouds are ( In your layers palette, all you have to do is click on the red cross ).

9- Activate your top layer (raster 3 with your grey clouds)
- Activate your rectangle selection, set as below :

- Click on Custom Selection (you can find it where my red square is , just above)

10- Selections / Modify / Inside _outside Feather as below :

11- Selections / Invert
- HIt the delete key of your keyboard. Deselect all (Ctrl + D).
12- Set the mode of that layer on to Overlay or any other mode that suits you better.

Step 3 : The sea
1- Open the image "mer.jpg" or a similar image with the same size as mine and copy it.
2- Paste it as a new layer on to your tag.
3- I have moved my picture of the sea as below :
- Effects / image effects / offset as below :
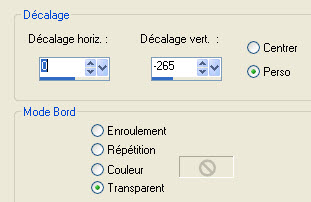
4- I have set the mode of that layer on to Multiply. See which mode you prefer !

Step 4 : The scenery
1- Open the tube "arbre_tree.pspimage" or a tube of your choice and copy it.
2- Paste it as a new layer on to your tag.
3- I have placed my tube that way :
- Effects / Image effects / Offset as below :


Step 5 : The rainbow
1- Open the tube "arc-en-ciel.pspimage" and copy it.
2- Paste it as a new layer on to your tag.
3- Adjust / Blur / gaussian blur / 10.
4- I have placed my tube that way :
- Effects / Image effects / Offset as below :

5- I have set the mode of that layer on to Hard light and lowered the opacity at 55. It is up to you to see which mode and opacity suit you better.

Step 6 : The rings of light on the sea
1- Activate your ellipse selection tool and set it as below :

2- In your layers palette, activate the layer of the sea .
- Draw a first ellipse with your ellipse selection tool.
3- Selections / Promote selection to layer. Deselect all.
- I have set the mode of that layer on to Dodge. (You may lower the opacity of that layer if you wish)
4- Go back to the layer where your sea is !
- Draw a second ellipse with a different size, on another place on the sea.
5- Selections / Promote selection to layer. Deselect all.
- I have set the mode of that layer on to Dodge.
6- Go back to the layer where your sea is !
- Draw a third ellipse with a different size, on another place on the sea.
7- Selections / Promote selection to layer. Deselect all.
- I have set the mode of that layer on to Dodge.
8- Repeat steps 4, 5, 6 and 7 to add a fourth ellipse, if you wish too.
- Here is what I get in my layers palette and on my tag :
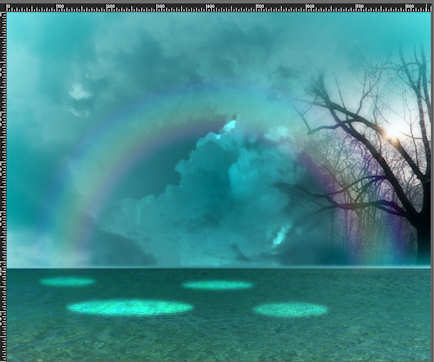


Step 7 : The angel
- ACTIVATE NOW THE LAYER ON TOP OF YOUR PILE OF LAYERS.
1- Open the tube "aaabibicheblackdream003.pspimage"or a tube of your choice and copy it.
2- Paste it as a new layer on to your tag.
3- I have resized my tube at 75% (Resize all the layers NOT checked)
4- I did : Image / Mirror.
5- Place that tube as on my tag.

Step 8 : The magic bubbles
1- Set your Material palette as below with white or a light colour in your foreground :
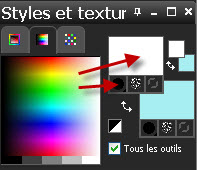
2-ADD A NEW RASTER LAYER
- Activate your brush tool, set as below and apply the brush " SS_glowing_circles_10.PspBrush" on that layer with your foreground colour.

- Place the bubble as on my tag or to your liking.
- I have set the mode of that layer on to Dodge and lowered the opacity at 55. See what you like best !
3- Layers / Duplicate
4- Image / Resize at 75% (Resize all the layers NOT checked)
- Place the bubble as on my tag or to your liking.
5- Layers / Duplicate
6- Image / Resize at 75% (Resize all the layers NOT checked)
- Place the bubble as on my tag or to your liking.

Step 9 : The magic butterflies
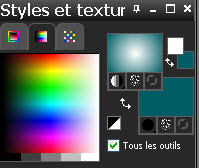
1- Set your Material palette as below :
(Set your background with your previous dark colour (005d65).
2- Open the tube " papillon.pspimage"or a small tube of your choice and copy it.
3-ADD A NEW RASTER LAYER !!!!
- Paste your tube, on your tag, as A NEW SELECTION !!!!!!!!!
- Do a left click on your tag to drop your sellection.
4- Activate your flood fill tool and flood fill the selection with your foreground gradient.
- DESELECT ALL.
5- i have set the mode of that layer on to Screen and lowered the opacity at 90. See what suits you best!
6- Layers / Duplicate
7- Image / Resize at 75% (Resize all the layers NOT checked)
- Place as on my tag or to your liking.
8- Layers / Duplicate
9- Image / Resize at 75% (Resize all the layers NOT checked)
- Place as on my tag or to your liking.
10- I have, then, applied different rotations on my three butterflies :
( 20° left , 20° right and 60° right, for me ....Just please yourself !)


Step 10 : The woman and the rocks
1- Open the tube "8048dwtubes.pspimage"or a tube of your choice and copy it.
2- Paste it as a new layer on to your tag.
- Place it in the bottom left hand side as on my tag.
- I have reduced the opacity of that layer at 75 to give my tube a little transparency.
3- Open the tube " Andre_rochers_1"or a tube of your choice and copy it.
4- Paste it as a new layer on to your tag.
- Place it in the bottom right hand side as on my tag.
- I have set the mode of that layer on to Soft light and lowered the opacity at 75.

Step 11 : The magic rays
1- Set your Material palette as below :

2-ADD A NEW RASTER LAYER
- Activate your brush tool, set as below and apply the brush "SS-light-beams-5.PspBrush" on that layer with your foreground colour.
- Place the tip of your brush as shown below :
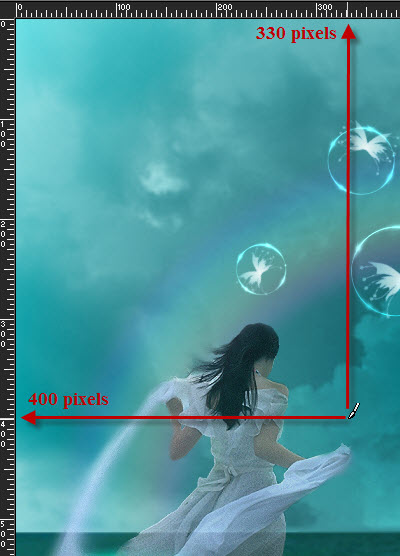
3- I have set the mode of that layer on to Dodge and lowered the opactiy at 45.
** If your Psp doesn't accept large brushes, you will find my layer with these rays in my zip. (All you will have to do is copy and paste that layer on to your tag as a new layer ).

Step 12 : The stars
1-ADD A NEW RASTER LAYER
- Activate your brush tool, set as below and choose the brush "starbrush_byMim4y_3.PspBrush".

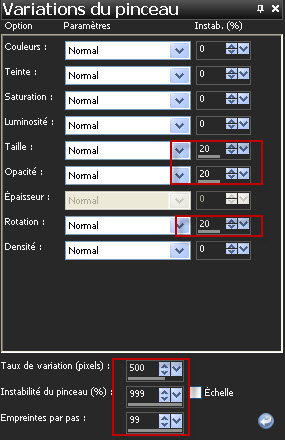
2- We're now going to play with the brush variance !
- View / Palettes / Brush Variance or press F11 on your keyboard.
3- Set as below :
4- Apply the brush with your foreground colour (white) in the upper left hand side of your tag.
5-ADD A NEW RASTER LAYER
- Apply again the brush in the upper right hand side of your tag.
- You may change the size of your brush or play with the cursors to get a different result !

Step 13 : The borders
1- Apply your signature
- Make sure everything is at the right place .
1- Image / add some symmetrical borders of 1 pixel with a colour of your choice :
102d2f for me.
3- Layers / Duplicate
4- Image / resize at 90% (Resize all the layers NOT checked)
5- Effects / 3d effects / drop shadow / 0, 0, 80, 20 , black.
6- On the layer which is underneath :
- Adjust / Blur / Gaussian blur / 10.
7- Effects / Plugins / Flaming pear / flood as below :

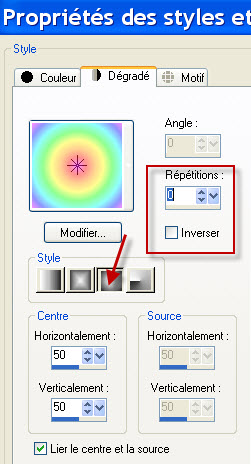
8-Set your Material palette as below :
- Set your foreground with the Rainbow gradient , as shown below :
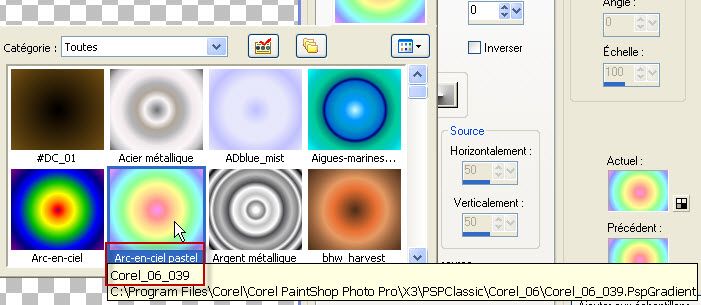
9-ADD A NEW RASTER LAYER
- Flood fill your new layer with this gradient.
I have lowered the opacity at 35.
10- Image / add some symmetrical borders of 1 pixel with a colour of your choice :
102d2f for me.
11 - Save your work as a jpeg file.
***************
That's it !! You've done it !!
If you 've enjoyed doing my tutorial, it would be nice to write a few words in my guest book ! If you 've had the slightest problem, please, send me a mail so I can see to the problem
Tutorial translated on the 26th of may 2012
*************
You'll find some versions of that tag in my gallery HERE
