Thank you for putting a link to this tutorial, whenever you display your realization of that tag on a website, on a group or in a mail !
**************************
You'll find some versions of that tag in my gallery HERE
***********************
To make that tag, you'll need the filters :
- Mock / Windo.
- Toadies / What are you.
- AAA frames / Fotoframe
- Alien skin Eye candy 5 / Nature / Snowdrift
- Mura's Meister / Copies.
- Mura's seamless / Emboss at alpha.
and the material zip down below :

**************
*It is forbidden to suppress watermarks on the material provided , to alter, mist or rename the tubes in order to respect the work of the tubers
- The tubes of the child and of the scenery are by Guismo.
You may join her sharing group here.
- The other elements that I haven't created, have been found on the net.
******************
Preparation
To be on the safe side, duplicate your tubes and image in your Psp :
-
Window / Duplicate
- Close the originals and work with the copies !
- Place the sélections in the selection folder of your Psp files.
- Double click on the Alien skin preset, it will install itself in the right folder.
- Open the font outside your Psp if you have Windows Xp or place it in the Font folder of Windows if you have Win7.
*****************
Click here to print the tutorial
**********************
You can use my arrow to follow your work
Click on it and drag it all along the tutorial !

***************
Tutorial made with PSP XIII
***********************
1 - Open a new transparent image of 850 by 700 pixels.
2 - Set your Material palette with two colours out of one of your main tubes (the scenery for me)
My choice : Foreground : Light colour e5b96a
Background : dark colour 524e65
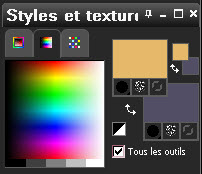
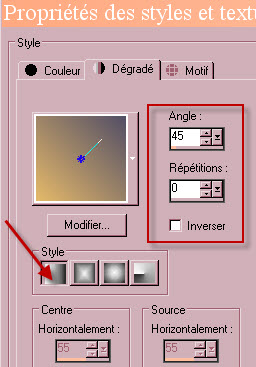
- Set your foreground with a linear gradient as below :
3 - Flood fill your transparent image with your foreground gradient.
4- Open the tube "calguismistedAfrican06082012" or a large tube of a scenery of your choice,in your Psp and copy it.
5- Paste it as a new layer on to your tag.
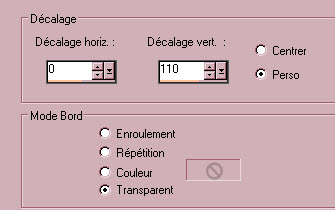
6- I have moved my tube that way :
- Effects / Image effects / offset as below :
 .
.
7- Layers / Merge all (Flatten !).
8- Adjust / Blur / Gaussian blur at 20.
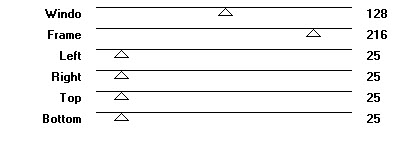
9- Effects / Plugins / Mock / Windo default :
10- Paste the tube of the scenery that is still in memory, as a new layer on to your tag.
11- I have moved my tube that way ::
- Effects / Image effects / Offset as on point 6.
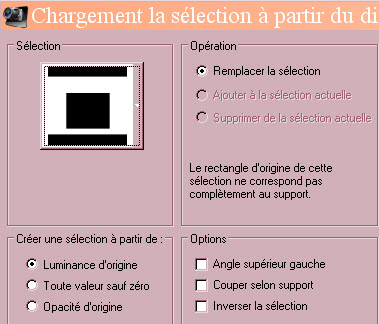
12- Selections / Load a selection / from disk / choose "Fairymist_Amadou_1"/ set as below :
- Hit the delete key of your keyboard.
- Selections / Deselect all.
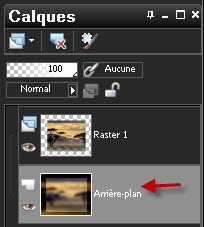
13- In your layers palette, activate the layer at the bottom of the pile :
14- Selections / Load a selection / from disk / choose "Fairymist_Amadou_2"/ set as previously.
15- Selections / Modify / Select selection borders and set as below :
16- Selections / Promote selection to layer. Deselect all.
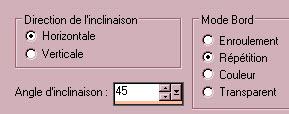
17- Effects / Geometric effects / Skew as below :
18- Layers / Duplicate.
19- Image / Mirror.
20- Layers / Merge down.
21- Effects / Plugins / Toadies / What are you / 20, 20.
22- Image / Resize at 105% (Resize all the layers NOT checked).
23- Effects / Edge effects / Enhance.
- You may duplicate that layer if you wish to emphasize the effect or you may change mode on that layer
- I have chosen to duplicate that layer and merge down.
24- Selections / Load a seection / from disk / choose "Fairymist_Amadou_2"/ set as previously.
- Hit the delete key of your keyboard.
- Selections / Deselect all.
25- Layers / Merge all.
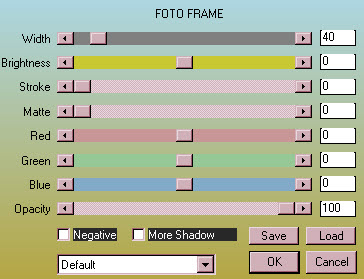
26- Effects / Plugins / AAA frames / Fotoframe, default as below :
27- Image / Add some symmetrical borders of 2 pixels with a colour of your choice (black for me).
28- Image / Add some symmetrical borders of 48 pixels with your foreground light colour.
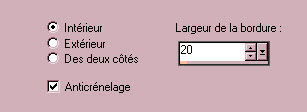
29- With your magic wand, set as below, click on the border of 48 pixels.

30- Open the image "Fairymist_Amadou_motif" and copy it.
31- ADD A NEW RASTER LAYER.
32- Paste that "motif" into the selection, on to your new layer. Deselect all.
- You may change the mode of that layer on to Luminance Legacy or any other mode of your choice, so that the border matches your colours.
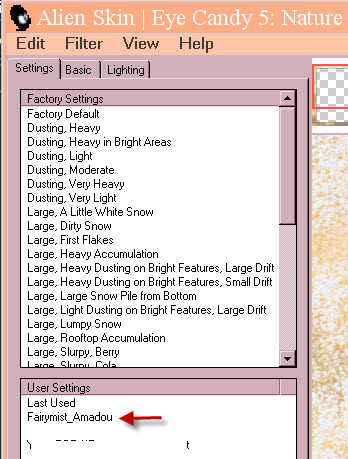
33- Effects / Plugins / Alien skin Eye candy 5 / Nature / Snowdrift / Choose my preset
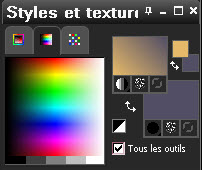
34- In your Material palette, keep your dark colour in background and shut your foreground.
35- Activate your text tool, choose the font Freetiles and set as below :

- Write down on your tag the letter n, in small letters, size 60,
(You may choose another letter!).
- Apply your choice and promote your vectorial layer into a raster one.
- I have set the mode of that layer on to Multipliy.
36- With your move tool, place your fancy letter, in the top left hand side part of your tag, as shown below !
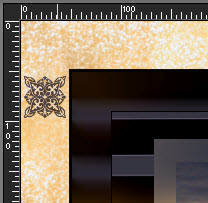
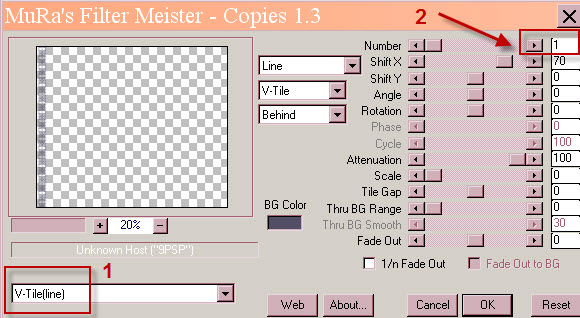
37- Effects / Plugins / Mura's Meister / Copies as below :
38- Layers / Duplicate.
- Image / Mirror.
39- Activate your text tool, once more.
- Write down the letter y, in small letters, size 60, on your tag (You may choose another letter!).
- Apply your choice and promote your vectorial layer into a raster one.
- I have set the mode of that layer on to Multipliy.
40- With your move tool, place your fancy letter, in the top left hand side part of your tag, as shown below !
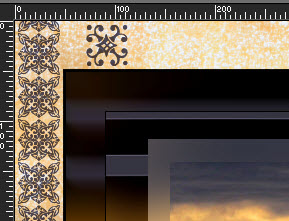
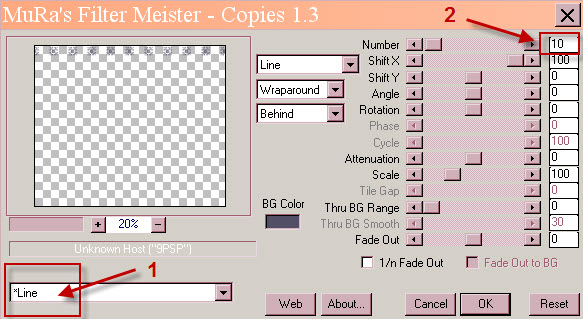
41- Effects / Plugins / Mura's Meister / Copies as below :
42- With your eraser tool, set as below, erase the parts that are shown down below.


43- Layers / Duplicate.
- Image / Flip.
44- Layers / Merge all.
45- Open the tube "calguisEnfantAfri24042014" or a tube of your choice, in your Psp and copy it.
46- Paste that tube as a new layer on to your tag.
47- I have resized that tube at 90%, twice (!) (Resize all the layers NOT checked).
48- Place the tube like me or to your liking.
49- Effects / 3d effects / drop shadow of your choice / 1, 20, 60, 10 for me.
50- Open the tube "deco_giraffe"or a tube of your choice, in your Psp and copy it.
51- Paste that tube as a new layer on to your tag.
Place the tube like me or to your liking.
- My tube has already got the same shadow as the child's .
52- Layers / Duplicate.
- Image / Mirror.
53- Activate, once more, your text tool and choose the font LoisAnn, size 70 (or another font of your choice).
- Write down Amadou, on your tag with your background dark colour (foreground closed).
- Apply your choice and promote your vectorial layer into a raster one.
54- Effects / Plugins / Mura' s seamless / Emboss at alpha.
55- I have added a little butterfly tube above the name.
56- Apply your signature
- Make sure everything is at the right place
57- Image / add some symmetrical borders of 1 or 2 pixels with a colour of your choice:
Black for me.i
- Enregistrer votre travail en jpeg.
***************
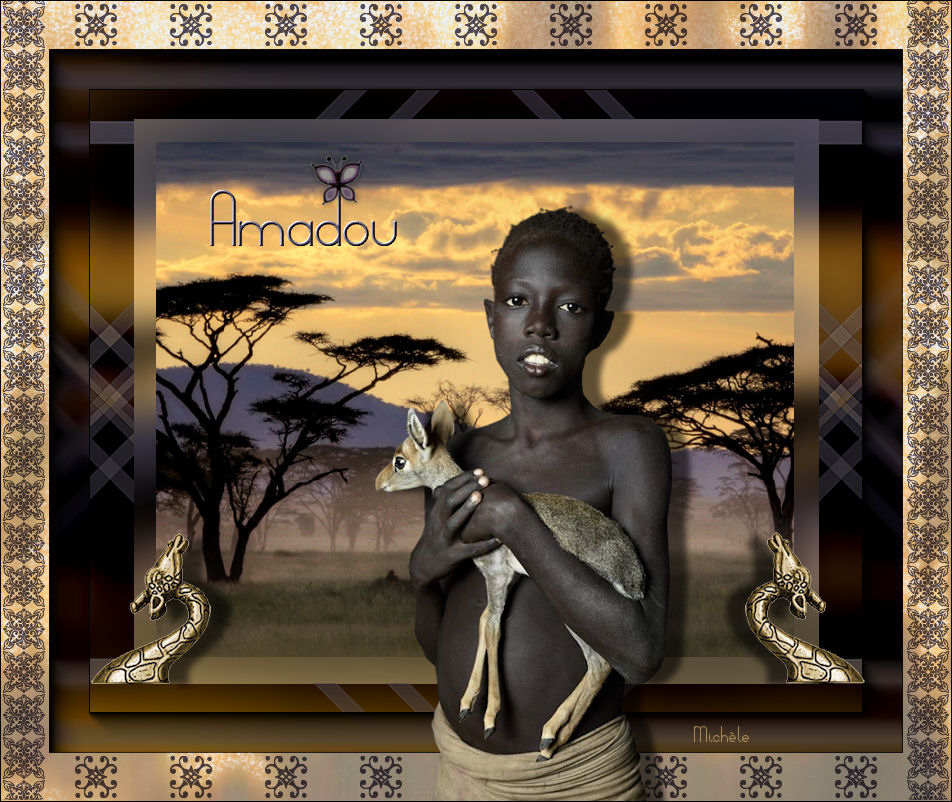
That's it !! You've done it !!
If you've enjoyed doing my tutorial, it would be nice to write a few words in my guest book !
If you've had the slightest problem, please, send me a mail so I can see to the problem
Tutorial translated on the 9th of July 2014
*************
You'll find some versions of that tag in my gallery HERE