
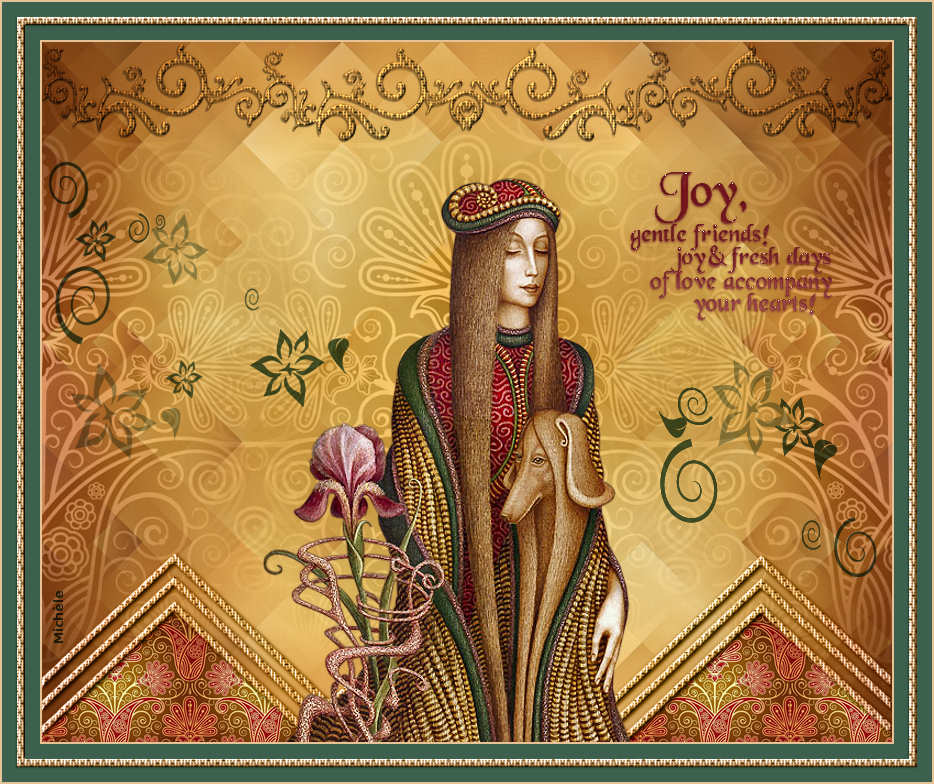
Thank you for putting a link to this tutorial, whenever you display your realization of that tag on a website, on a group or in a mail !
**************************
You'll find some versions of that tag in my gallery HERE
************************
To realize that tag, you'll need the plugins :
- Medhi / Weaver & Sorting tiles here
- Alien skin eye candy 5 / Textures
and the material zip down below :

**************
*It is forbidden to suppress watermarks on the material provided , to alter, mist or rename the tubes in order to respect the work of the tubers
- The tube of the woman is by Jhanna
- You can join her sharing group here
- The brushes are by Coby17
- The other elements that I haven't created, have been found on the net.
******************
Preparation
- To be on the safe side, duplicate your tube and image in your Psp :
-
Window / Duplicate
- Close the originals and work with the copies !
- Place the brush files in the brush folder of your Psp files.
- Place the selections in the selection folder of your Psp files.
- Double click on the preset Alien skin eye candy 5 / texture / weave named "Fairymist_aisha" so that it goes in the right place.
*****************
Click here to print the tutorial
**********************
You can use my arrow to follow your work
Click on it and drag it all along the tutorial !

***************
Tutorial realized with PSP XIII

Step 1 : The background of the tag
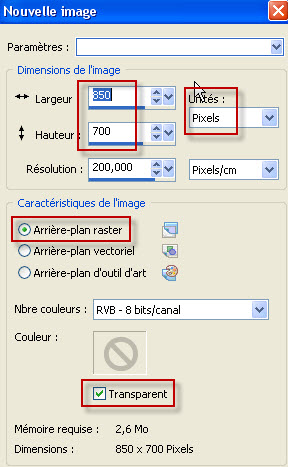
1 - Open a new transparent image of 850 by 700 pixels.
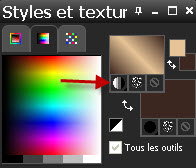
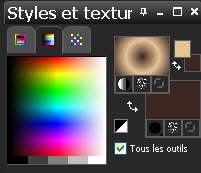
2 - Set your Material palette with two colours out of your main tube.
- My choice : Foreground : Light colour e6c396
- Background : dark colour 3d2821
- Set your foreground with a linear gradient as below :
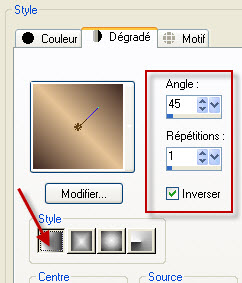
3 - Flood fill your transparent image with your foreground gradient.
4- ADD A NEW RASTER LAYER
- Set your foreground with a sunburst gradient as below :
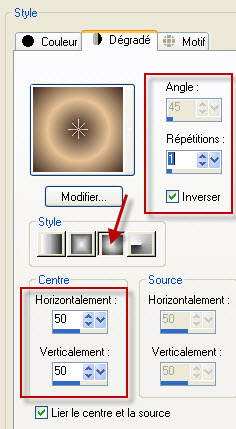
5- Flood fill your transparent image with that new foreground gradient.
6- Set the mode of that layer on to Overlay.
- Layers / Merge all.
7- Effects / Plugins / Medhi / Weaver as below :

8- Effects / Plugins / Medhi / Sorting tiles as below :
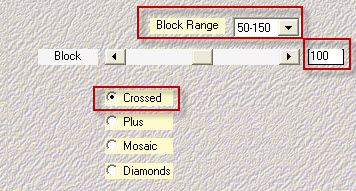
9- Effects / Plugins / Medhi / Seamless Border 1.1 as below :
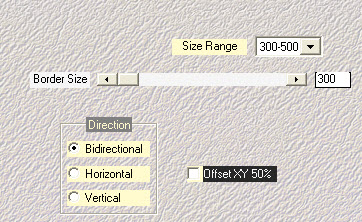
10- Adjust / Sharpness / High-pass sharpen as below :
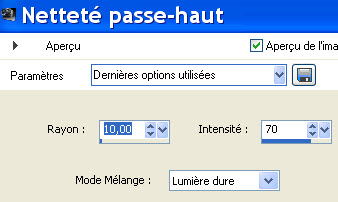
- If your Psp hasn't got that effect , just do : Adjust / Sharpness / Sharpen.
11- Layers / Duplicate.
- Set the mode of that layer on to Soft light or any other mode that suits you better.
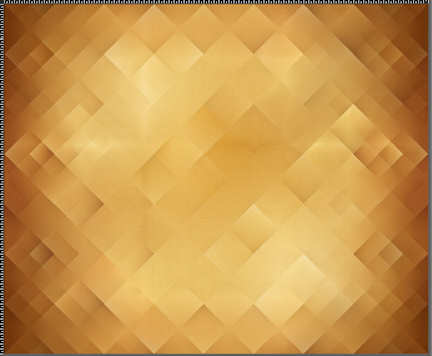
- Here is my result : my background is now brightful.

12- Open the tube "fairymist_aisha_deco.pspimage" and copy it.
13- Paste it as a new layer on to your tag.
- Set the mode of that layer on to Luminance legacy and lower its opacity ( 45 for me )
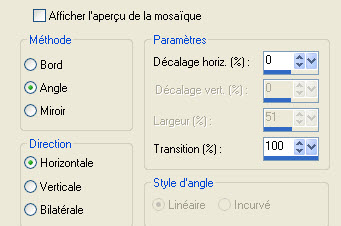
14- Effects / image effects / Seamless tiling as below :

Step 2- Decorations
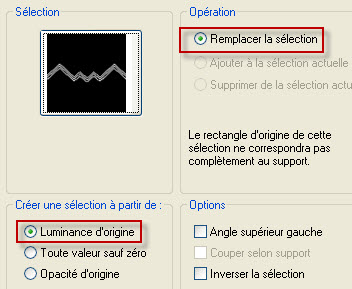
1- Seélections / Load a selection / from Disk / choose " Fairymist_aisha.PspSelection" and set it as below :
2 - ADD A NEW RASTER LAYER
- Set your Material palette as below (No more gradient in your foreground).
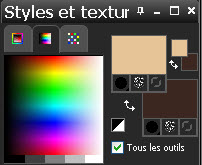
- Flood fill your selection, on that new layer, with your foreground colour (Set your flood fill tool as below).

3- Deselect all (Ctrl + D).
4- Activate your magic wand, set as below and select, the bottom part of the zig zag decoration, as shown below (Keep the shift key pressed).


4- Selections / Modify / Expand by 2 pixels.
5- Open the 'image "Background.jpg" or an image with a pattern matching your tube. You may minimize that image, we're going to use that pattern to flood fill your selection.
- Set your material palette as below :
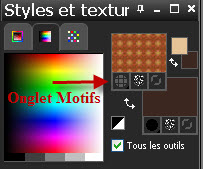
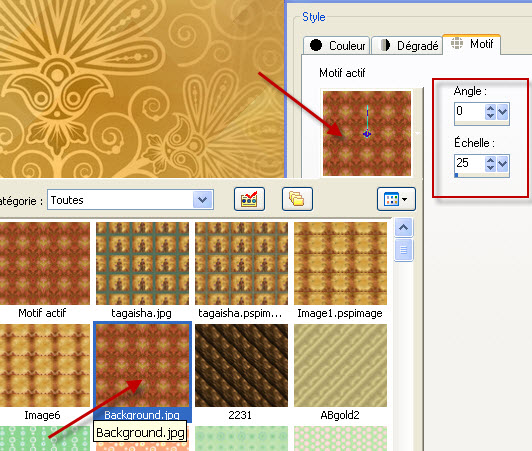
6- Go back to your tag.
- ADD A NEW RASTER LAYER
- Flood fill the selection, on that new layer, with your foreground pattern (scale 25 !)
- Deselect all (Ctrl + D).
7- Layers / Arrange / Move down.
- You may change the mode or the opacity of that layer to your liking. (I have left mine as it is)
8- In your layers palette, activate your top layer.
- I have set the mode of that layer on to luminance legacy . It is up to you to see if that mode suits you.
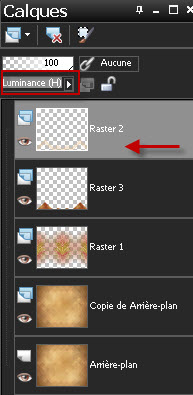
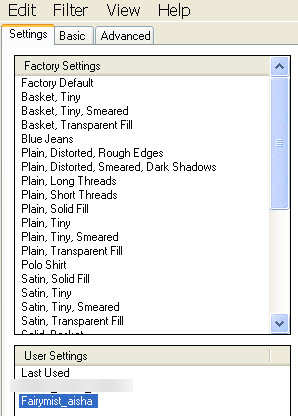
9- Effects / Alien skin eye candy 5 / textures / weave / click on the preset "Fairymist-aisha" as shown below :
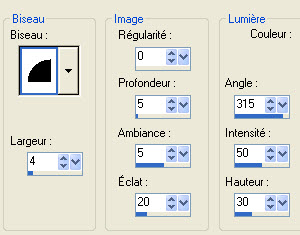
10- Effects / 3d effects / Inner bevel as below :
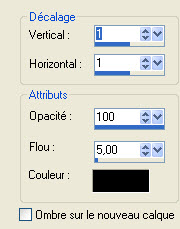
11- Effects / 3d effects / drop shadow as below :
12- Selections / Load a selection / from disk / choose " Fairymist_aisha_2.PspSelection" (same settings as previously)
13-ADD A NEW RASTER LAYER
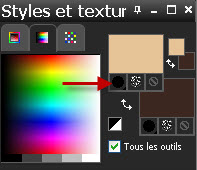
- Flood fill the selection, on that new layer, with your foreground colour (No pattern in your foreground)
- Deselect all (Ctrl + D).
14- Effects / Alien skin eye candy 5 / textures / weave / click on the preset "Fairymist-aisha" as previously.
15- Effects / 3d effects / Inner bevel as previously.
16- Effects / 3d effects / drop shadow / 1, - 1, 40, 1, black.
- I have set the mode of that layer on to Multiply.
- I have duplicated that layer.
- I have set the mode of that new layer on to Dodge and lowered its opacity at 25.
- It is up to you to play with the modes of those two layers to get a result you like.

Step 3 : The main tube ( the woman)
1- Open JHanna's tube or a tube of your choice and copy it.
2 - Paste it as a new layer on to your tag
3- I have placed the tube that way :
- Effects / Image effects / Offset as below :
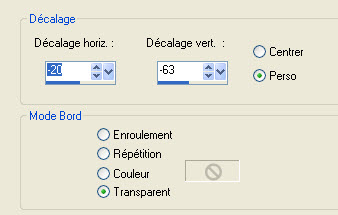
4- Layers / Duplicate.
5- Activate the layer which is underneath (the original tube of the woman, not its copy)
- Adjust / Blur / Gaussian blur / 15.
- I have set the mode of that layer on to Dodge and lowered its opacity to 85. It is up to you to see which mode and opacity give the better effects with your colours. I chose to use a brightful drop shadow rather than a dark one!

Step 4 : Final decorations
1- Set the foreground of your Material palette with a colour matching your tube as we'll apply the brushes on your background with that colour.
- I have chosen to use a green (3c5e4d) out of my main tube.
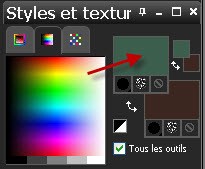
2- Activate your top layer.
- ADD A NEW RASTER LAYER
- Activate your brush tool, set as below and apply the brush "Popurry_Flowers.PspBrush" with your foreground colour against the left hand side of your tag.

- I have set the mode of that layer on to Multiply. It is up to you to see which mode suits you.
3-ADD A NEW RASTER LAYER
- Activate your brush tool, set as below and apply the brush "Popurry_Flowers2.PspBrush"with your foreground colour against the right hand side of your tag.

- I have set the mode of that layer on to Multiply. It is up to you to see which mode suits you.
4- Open the tube "texte.pspimage"or a text tube or brush of your choice and copy it..
5- Paste it as a new layer on to your tag
- Place as on my tag or to your liking.
- You may colorize that tube.

Step 5 : The borders
1- Apply your signature
- Assurez vous que tout est bien en place
2- Image / add some symmetrical borders of 2 pixels with the light colour you chose on step 1 / point 2 (e6c396).
3- Image / add some symmetrical borders of 15 pixels with the colour you chose for your brushes "Poppury" (3d5f4d).
4- Image / add some symmetrical borders of 8 pixels with the light colour you chose on step 1 / point 2 (e6c396)..
5- Image / add some symmetrical borders of 15 pixels with the colour you chose for your brushes "Poppury" (3d5f4d).
6- Image / add some symmetrical borders of 2 pixels with the light colour you chose on step 1 / point 2 (e6c396).
7- With you magic wand, set as below, select the middle light border (8 pixels width).

8- Selections / Promote selection to layer.
9- Effects / Alien skin eye candy 5 / textures / weave / click on the preset "Fairymist-aisha" as previously.
10- Effects / 3d effects / Inner bevel as previously.
11- Effects / 3d effects / drop shadow / 1, - 1, 40, 1, black.
- I have set the mode of that layer on to Luminance legacy .
- Deselect all (Ctrl+D).
12 - Save your work as a jpeg file.
***************
That's it !! You've done it !!
If you 've enjoyed doing my tutorial, it would be nice to write a few words in my guest book ! If you 've had the slightest problem, please, send me a mail so I can see to the problem
Tutorial translated on the 2nd of July 2012
*************************
You'll find some versions of that tag in my gallery HERE
