
Thank you for putting a link to this tutorial, whenever you display your realization of that tag on a website, on a group or in a mail !
**********************
You'll find some versions of that tag in my gallery HERE
************************
To realize that tag, you'll need the plugins VM Natural, Graphic plus, Alien skin Eye Candy 5 / Impact, VM distortion
and the material zip HERE
**************
*It is forbidden to suppress watermarks on the material provided , to alter, mist or rename the tubes in order to respect the work of the tubers
- The tube of the fairy is by Hanni
You can join in her sharing group by clicking here
-The tube of the flowers is by Guismo
You'll be able to find her tubes on Dakara' s site here
and you can join in her sharing group here
-The mask I have used is by HJR
- The tube fleurs _coeurs has been made from one of Ales's brushes Ales1984
The other elements have been found on the net
******************
Preparation
Duplicate your tubes, the picture and the mask by Hjr. Close the originals and minimize the copies for now. Export the brushes in your psp as customs brushes. Place your gold texture in your texture file
*****************
Click here to print the tutorial
*******************
You can use my arrow to follow your work

***************
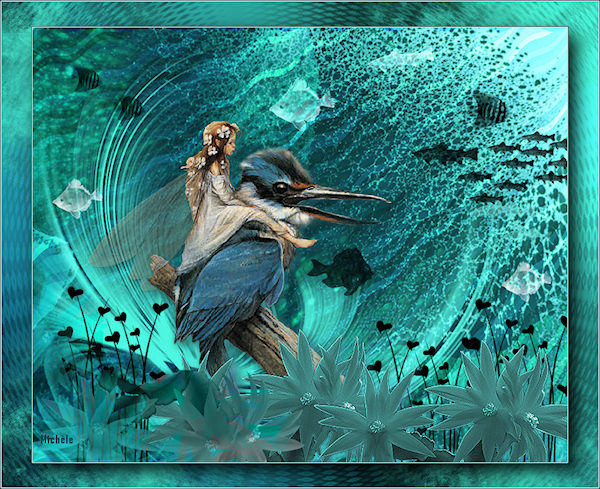
1- Open a transparent image of 800 by 650 pixels
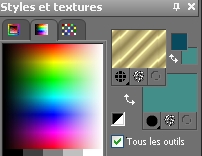
2- Prepare your material palette with two colours out of your main tube
My choice: foreground : color 0c4a5e 
Background : color 448e89 
Nothing stops you from creating a pink sea; just let your imagination guide you !!
3-Set your foreground with a linear gradient, angle 45, repeats 0, Invert NOT checked
Flood fill your transparent image with that gradient
4- Add a new raster layer and select all
5- Open the picture Water&oil BS07145, copy it and paste it as a new layer
Select none
Set the mode of that layer to Overlay
6- Add a new raster layer
Set your foreground with your gold texture / angle 0, size 100
Flood fill your layer with that gold texture
7- Effects / plugins / VM natural / Splash set as below :

8- Effects / distortion effects / wave as below :
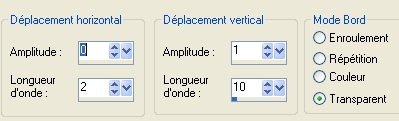
Image / mirror
Set the mode of that layer to Overlay
9- Add a new raster layer and flood fill it with a color brighter than your light color
I have chosen the color 49f4d5 
Layers / new mask layer / from image / choose Hjr-mask-texture37 / only check Source Luminance
Merge group
Set the mode of that layer to Screen or to another mode of your choice !
10- Open your tube AH _Fairy_0801_08 or a tube of your choice, copy it and paste it as a new layer
Place the tube as shown on my tag
11- Effects / 3d effets /drop shadow of your choice ( for me : 4, 4, 50, 20, black )
12- Open the tube fleurs_coeurs or a tube of your choice, copy it and paste it as a new layer ( if you prefer, you may use brushes of your choice instead of a tube)
Place le tube at the bottom of your layer
13- Duplicate that layer two or three times and place all your flowers at the bottom of your tag; don't make them look too symmetrical !
You may have to move them again later on !
14- Open the tube Calguisredflower1339, or a tube of your choice, copy it and paste it as a new layer
15- Image / resize at 40% for the tube redflower by Guismo
16- Adjust / Hue and saturation / colorize / 125, 90 on my tube !
Place that tube at the bottom of the tag
17- Duplicate that layer several times (you can apply the effect mirror so they don't look too symmetrical) and play around with the different modes in order to get different effects ( dark, transparent, bright etc ...) I have used the modes Normal, Screen, Overlay and Luminance.
18- Add a new raster layer
Set your material palette with the black and white colours ( or any other colours you want to use to draw your fish !)
Activate the brush tool, set as below with a fish of your choice at a size which suits you; draw the fish

Place that fish at the right place
19- Add as many layers as you want to draw fishes!
Play around with the modes of the layers and draw with either a light or dark colour
20- You may add a text on a new layer if you feel like it !
21- When you've finished adding decoration, make sure everything is at the right place !
Image / add some symmetrical borders of 1 pixel with your bright color (point 9)
Image / add some symmetrical borders of 1 pixel with your dark color
22- Layers / Promote background
23- Image / resize at 90 °% ( Resize all the layers NOT checked )
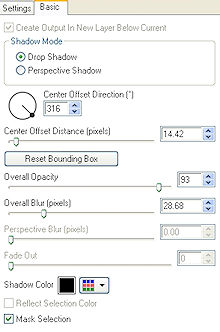
24- Effects / plugins / Alien skin Eye candy 5 / impact / Perspective shadow / Drop shadow blurry defaut, as follows :
25- Add a new raster layer and flood fill it with the same gradient as on point 2 but with your bright color in the background
Layers / arrange / move down
26- Effects / plugins / Graphic plus / cross shadow default
27- Effects / plugins / VM distortion / Radial pox / default : 175, 99, 109, 39
28- Add a new raster layer
Activate your brush tool, set as below, choose GrungeBrush 007 and apply it with your bright color three or four times on your tag

You may change the mode of the layer if you wish
29- Layers / Merge all
30- Add a new raster layer and apply your signature
31-Image / add some symmetrical borders of 1 pixel with your bright color (point 9)
Image / add some symmetrical borders of 1 pixel with your dark color
32- Save your work as a jpeg file; resize your tag if necessary
********************
That's it !! You've done it !!
If you 've enjoyed doing my tutorial, it would be nice to write a few words in my guest book ! If you 've had the slightest problem, please, send me a mail so I can see to the problem !
Tutorial translated on the 24th of May 2009
*************
You'll find some versions of that tag in my gallery HERE